For Posterity

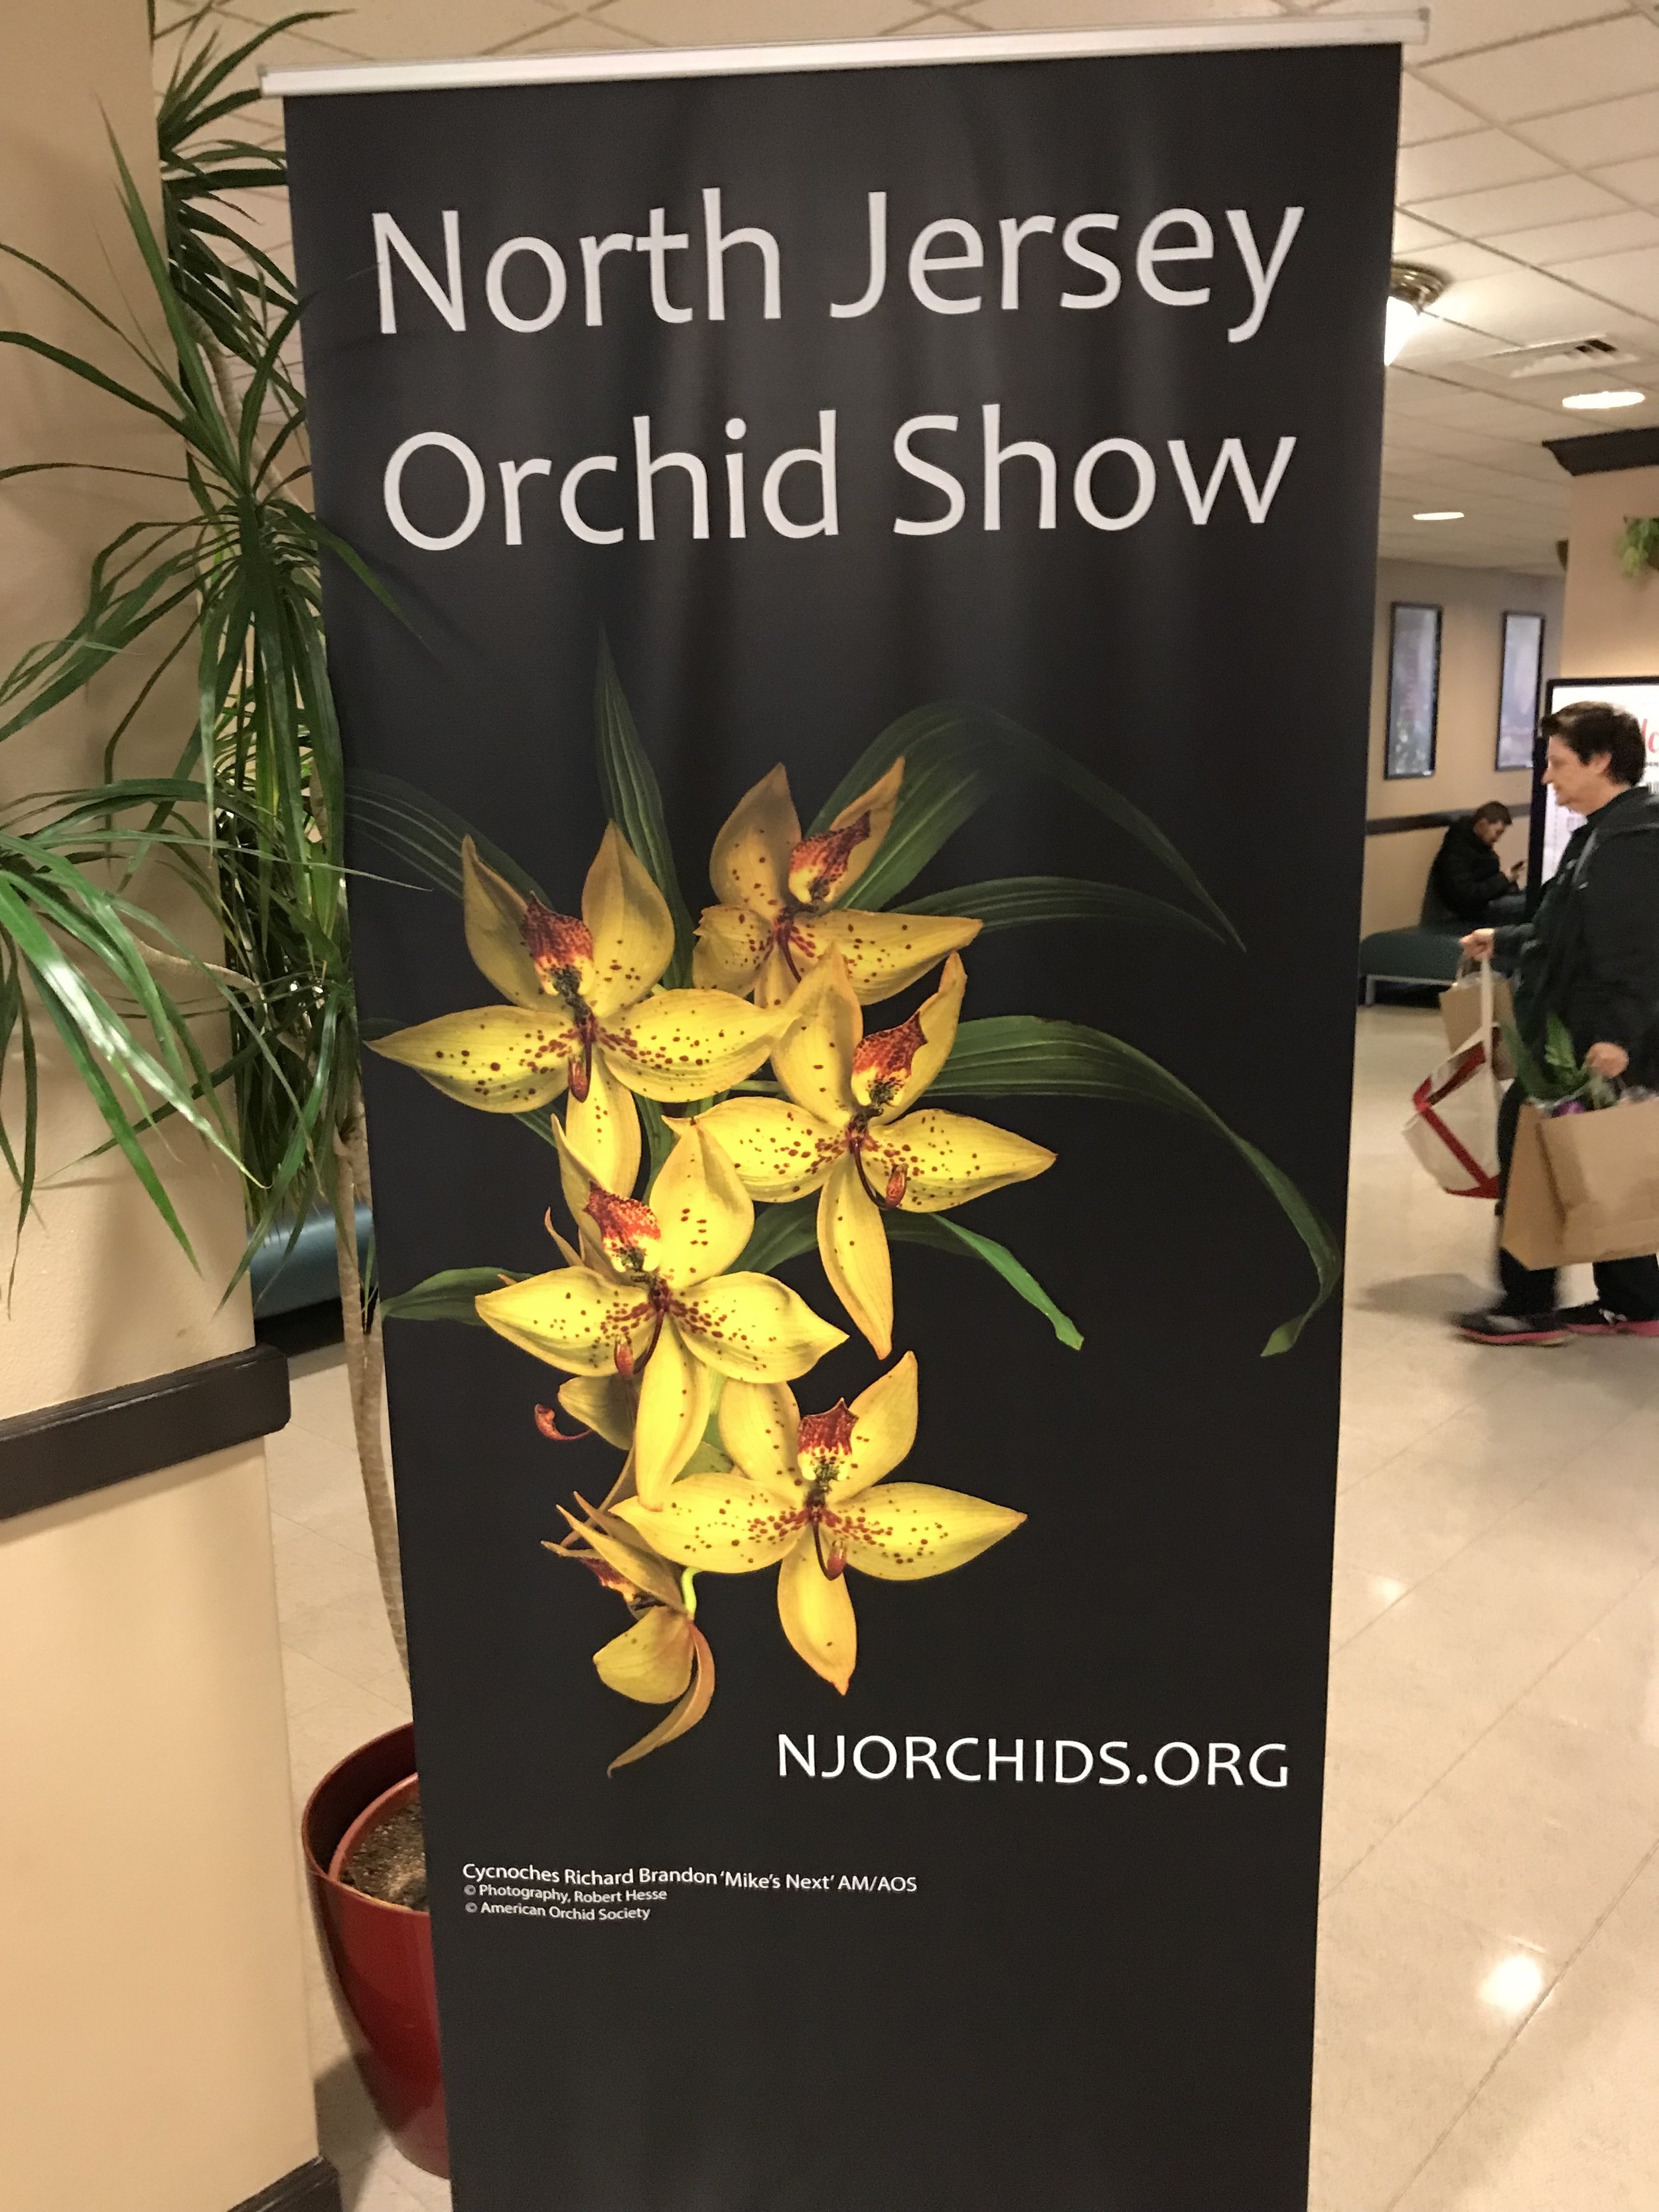
We have been growing orchids for many years. There is a certain excitement, thrill even, when a new plant blooms. For the uninitiated, it is worth pointing out that orchids do not grow quickly, they take years to reach blooming size and we like to buy our plants young since we primarily grow new hybrids. So, hypothetically, imagine buying some baby plants and then you nurture them along for many years, growing them, loving them, potting them up keeping any eye on the temperature through the winter, watching out for pests and then some day, voila, a bloom. A first bloom mind you, many orchids don't come into their own until they have bloomed a few times (read a few more years). Anyways, you get it, orchid blooms = excitement. Well that's the standard, but now imagine when a particularly nice bloom opens up... woohoo, bells whistles etc... We recently had a plant like that, a Dendrobium cross from the venerable Sunset Valley Orchids, Fred Clarke, the proprietor has a magic touch with the little genetic letter game of craps that we growers rely on. Anyways, we digress, so we had this great plant the was on its third blooming and figured, it was worth the 5 hours of driving to show it off at the North Jersey Orchid Show. So, some more background. Orchid names/hybrids are a serious business, the Royal Horticultural Society (RHS) has been keeping track since the 1800's, every cross, every award. In the U.S. we have the American Orchid Society (AOS) which performs the same service/oversight in conjunction with the RHS. If a hybridizer makes a cross then it has to be registered with the AOS/RHS in order to have a name and not be noted as the parent x parent. Often times crosses go unnamed until they have been awarded and shown to be worthy of being recorded for the ages. Now that name is called the grex name (all the thousands of plants with the same parents). The grex name is only part of the story though, because many orchids produce near on 1 million seeds per capsule with near on 1 million variations on how those babies are going to look. With all those variations, if one plant is special it deserves to be recognized, so with orchids each plant or "clone" is viewed individually and once awarded has the right to carry its own name and the initials of the award it won....in perpetuity. So without further ado we present:

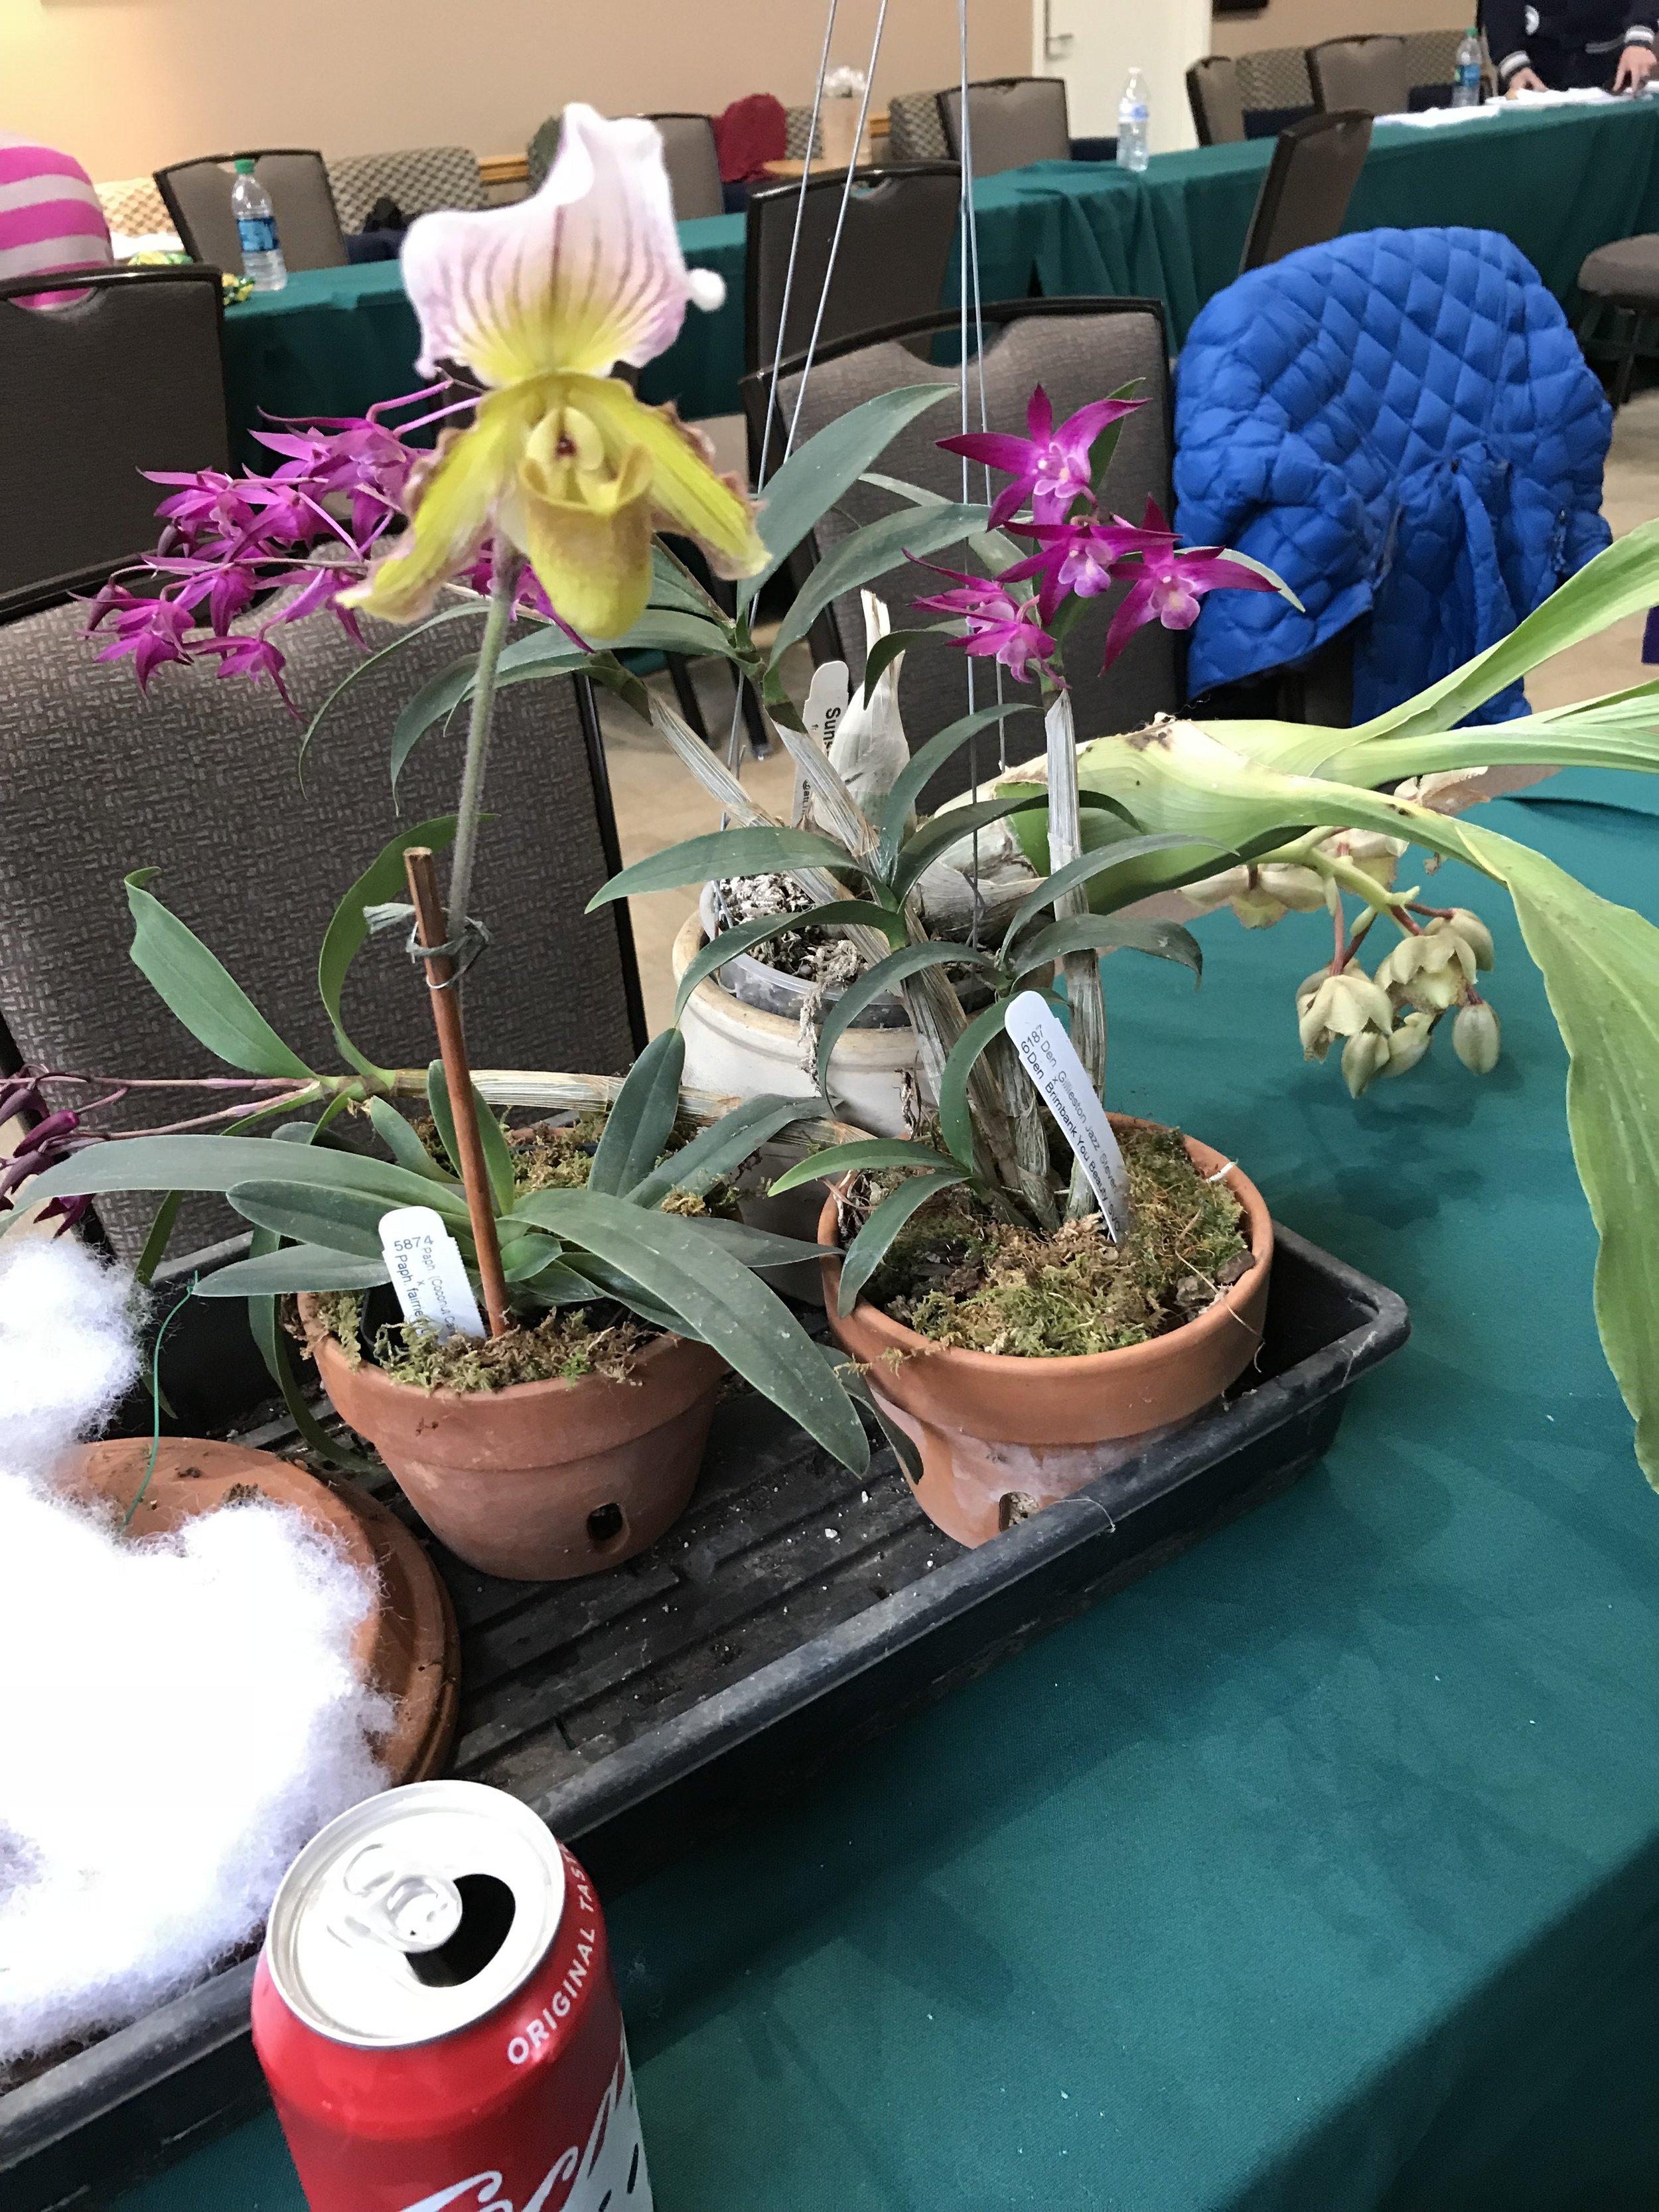
Dendrobium Graham Spearman 'Ermela Kaferi' HCC/AOS  

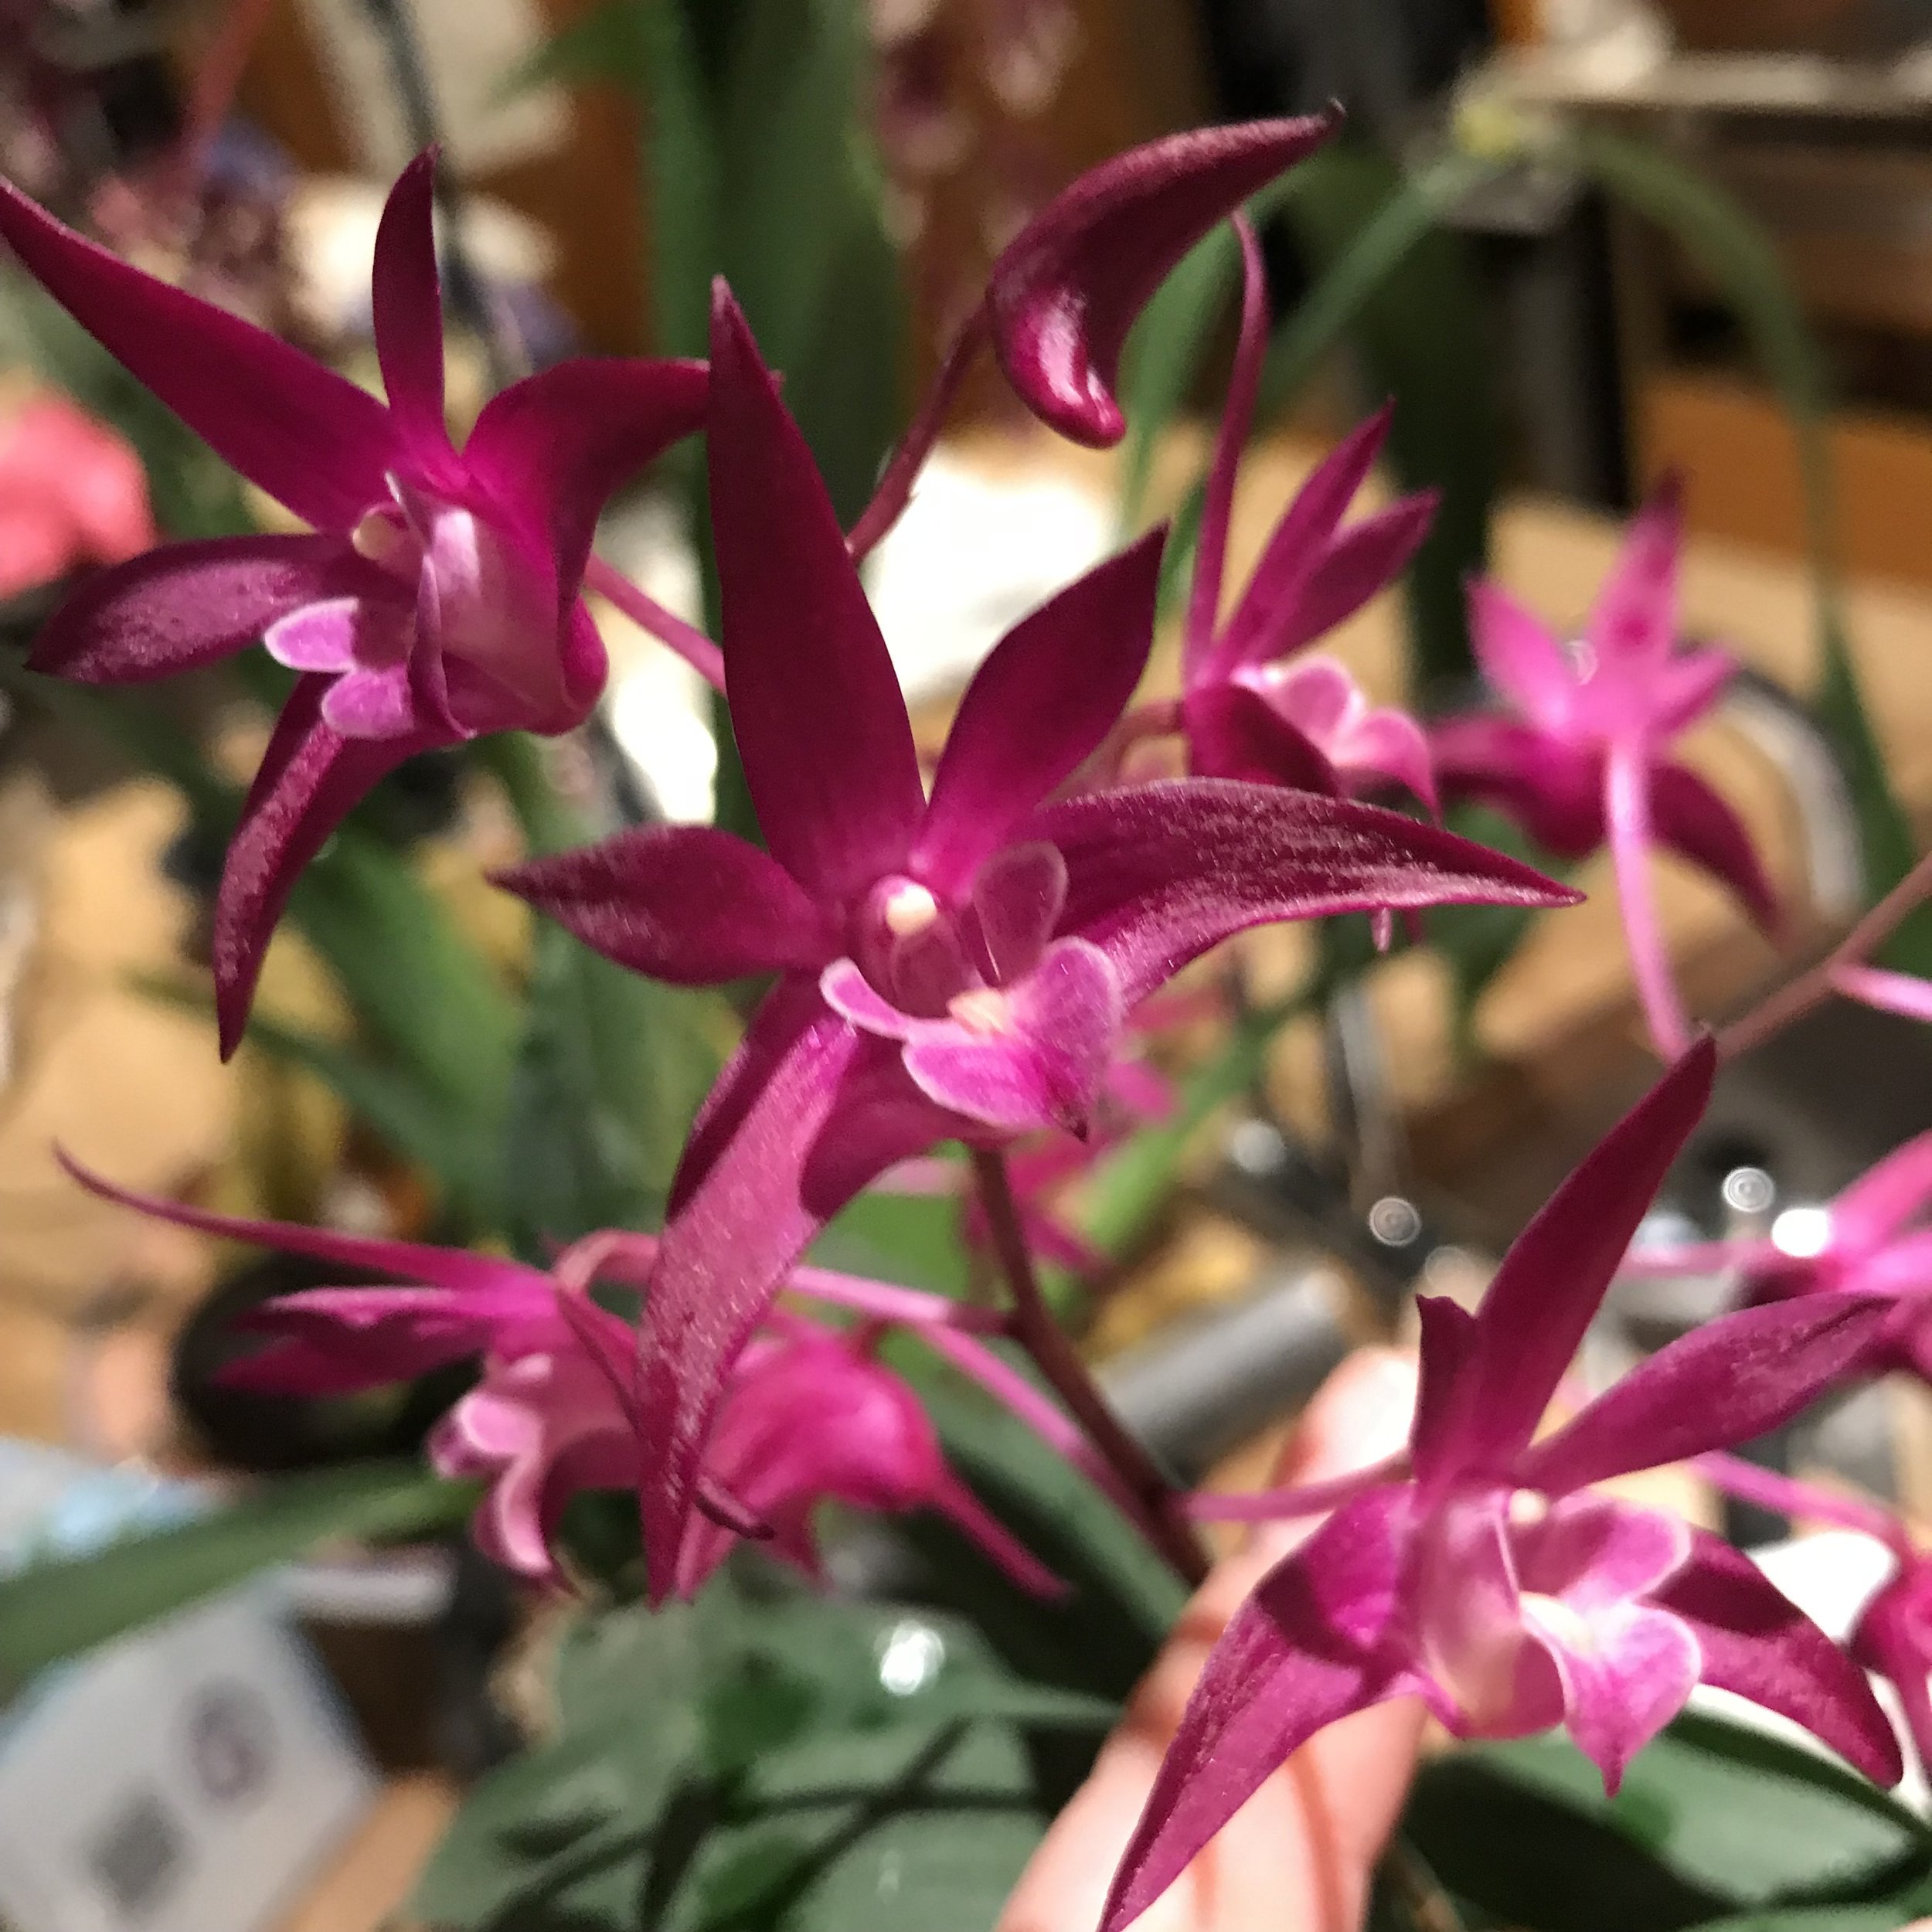
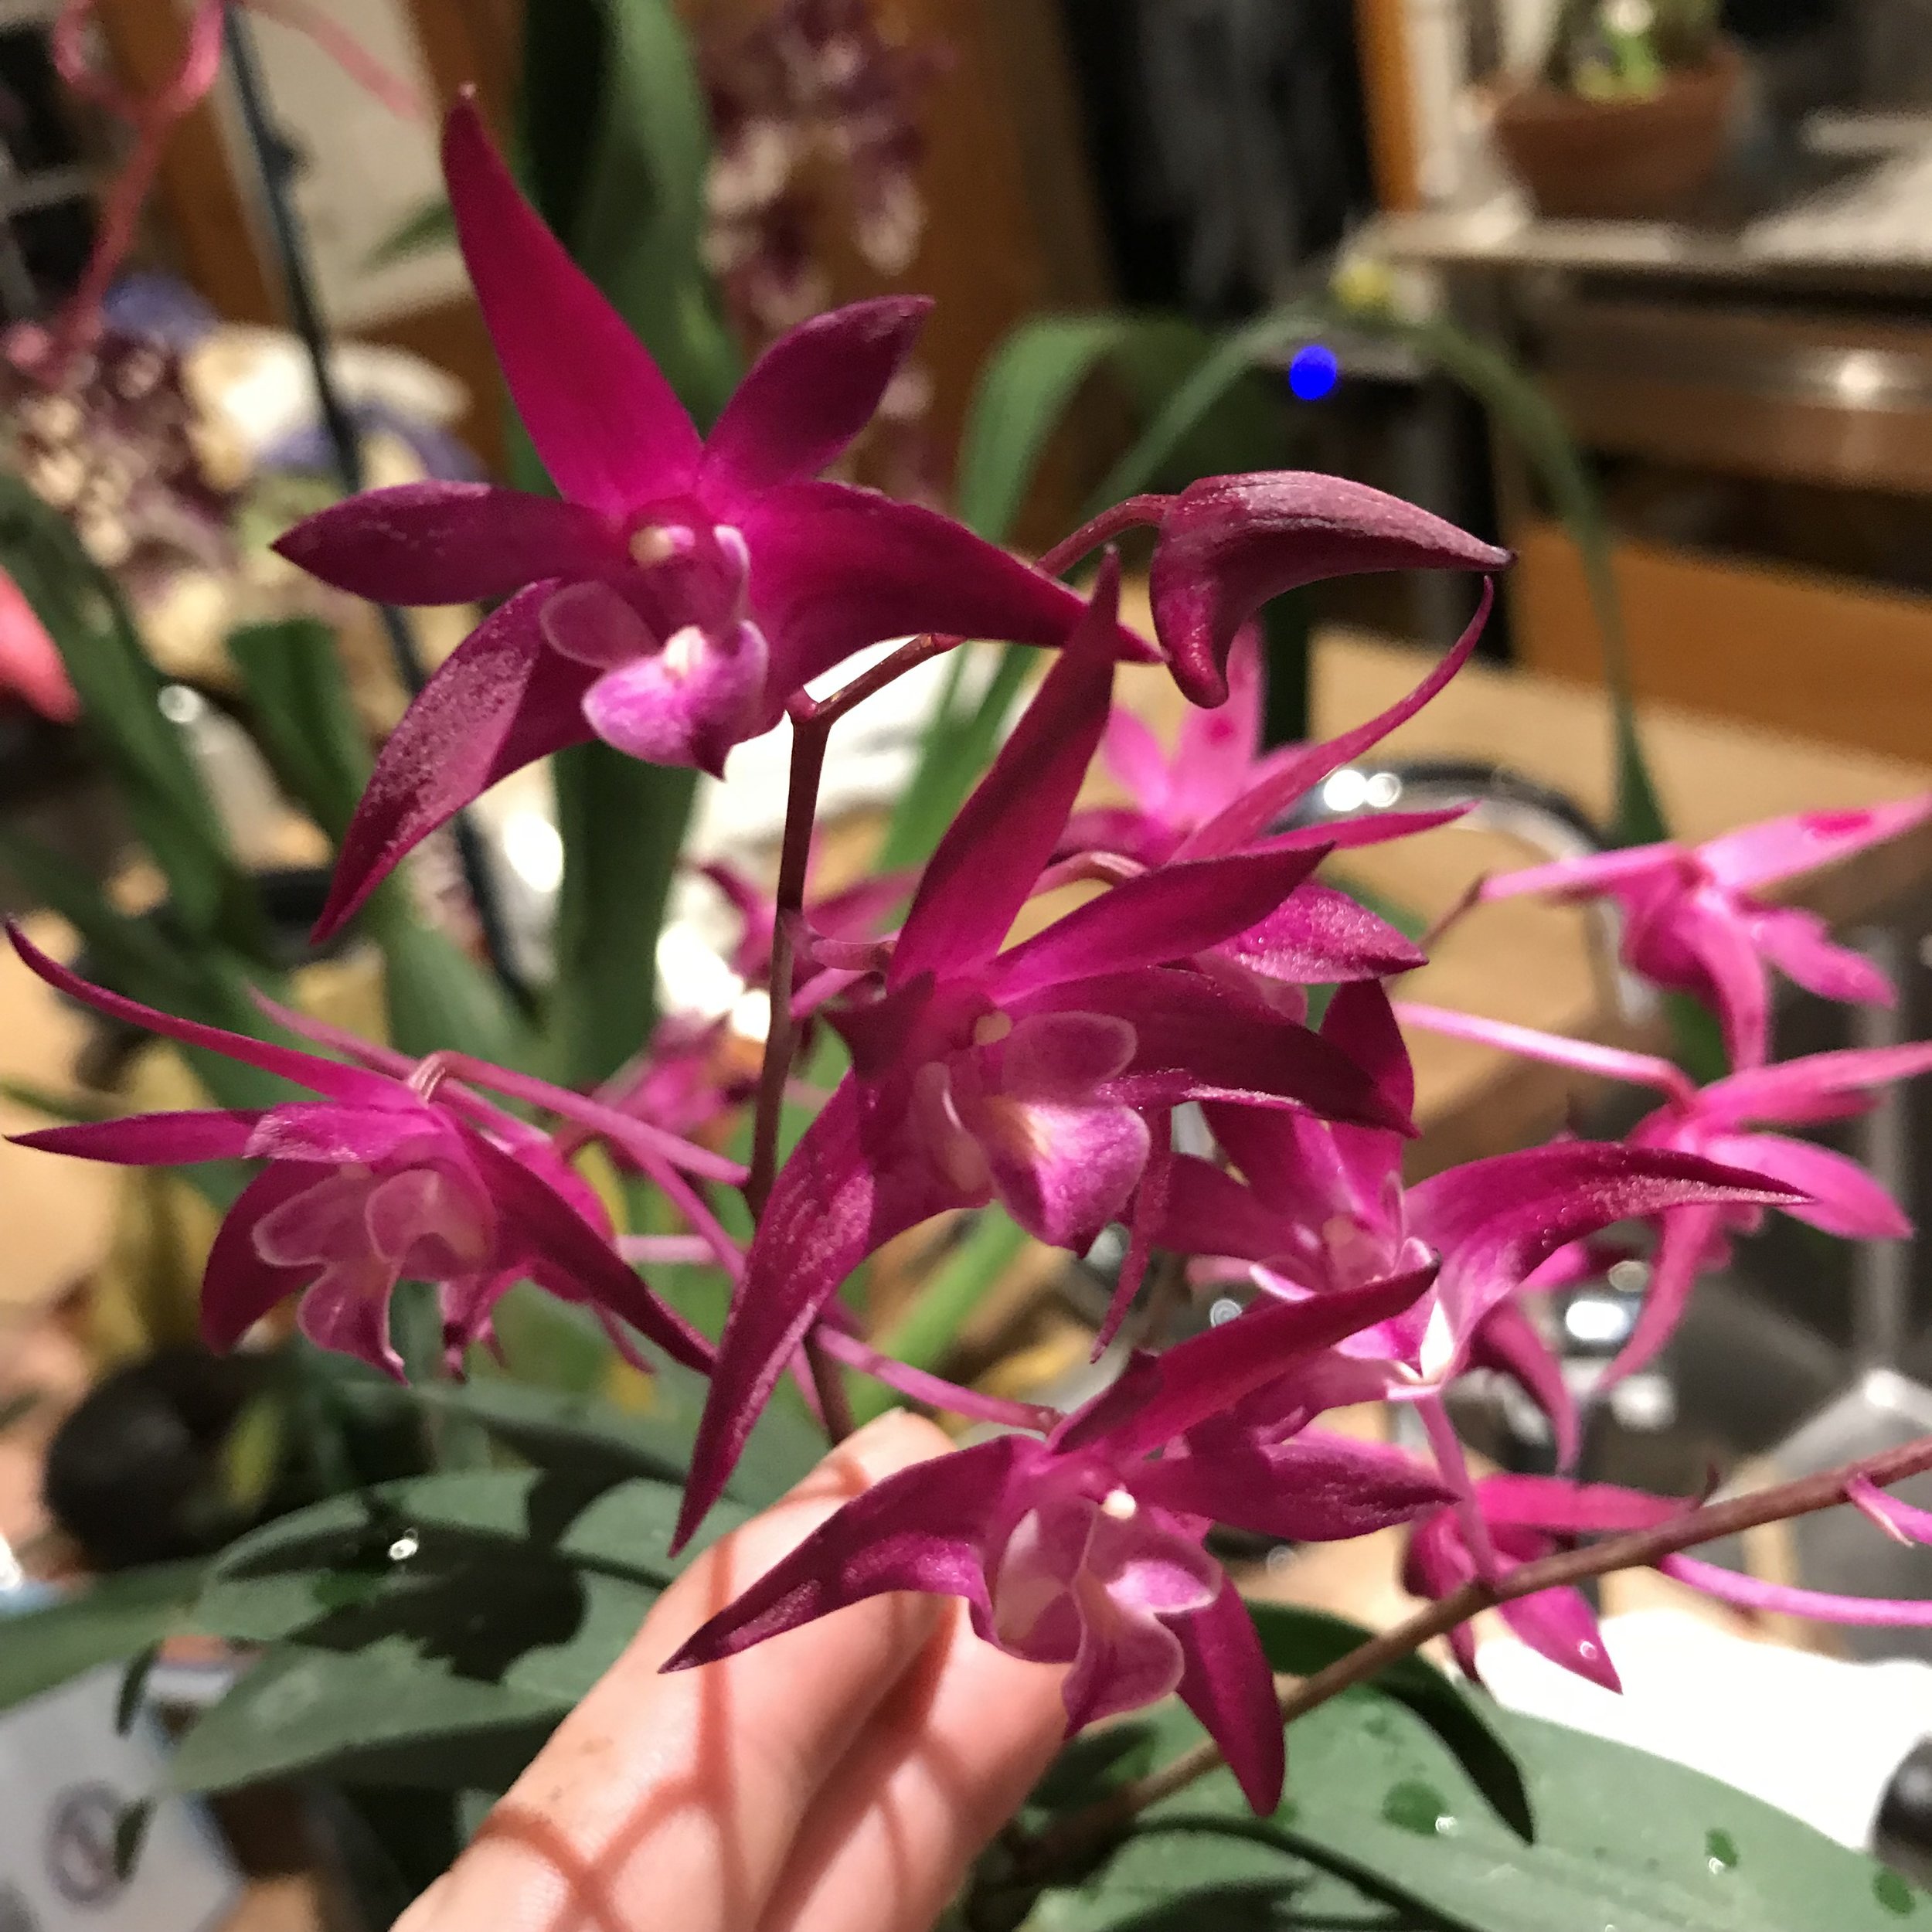
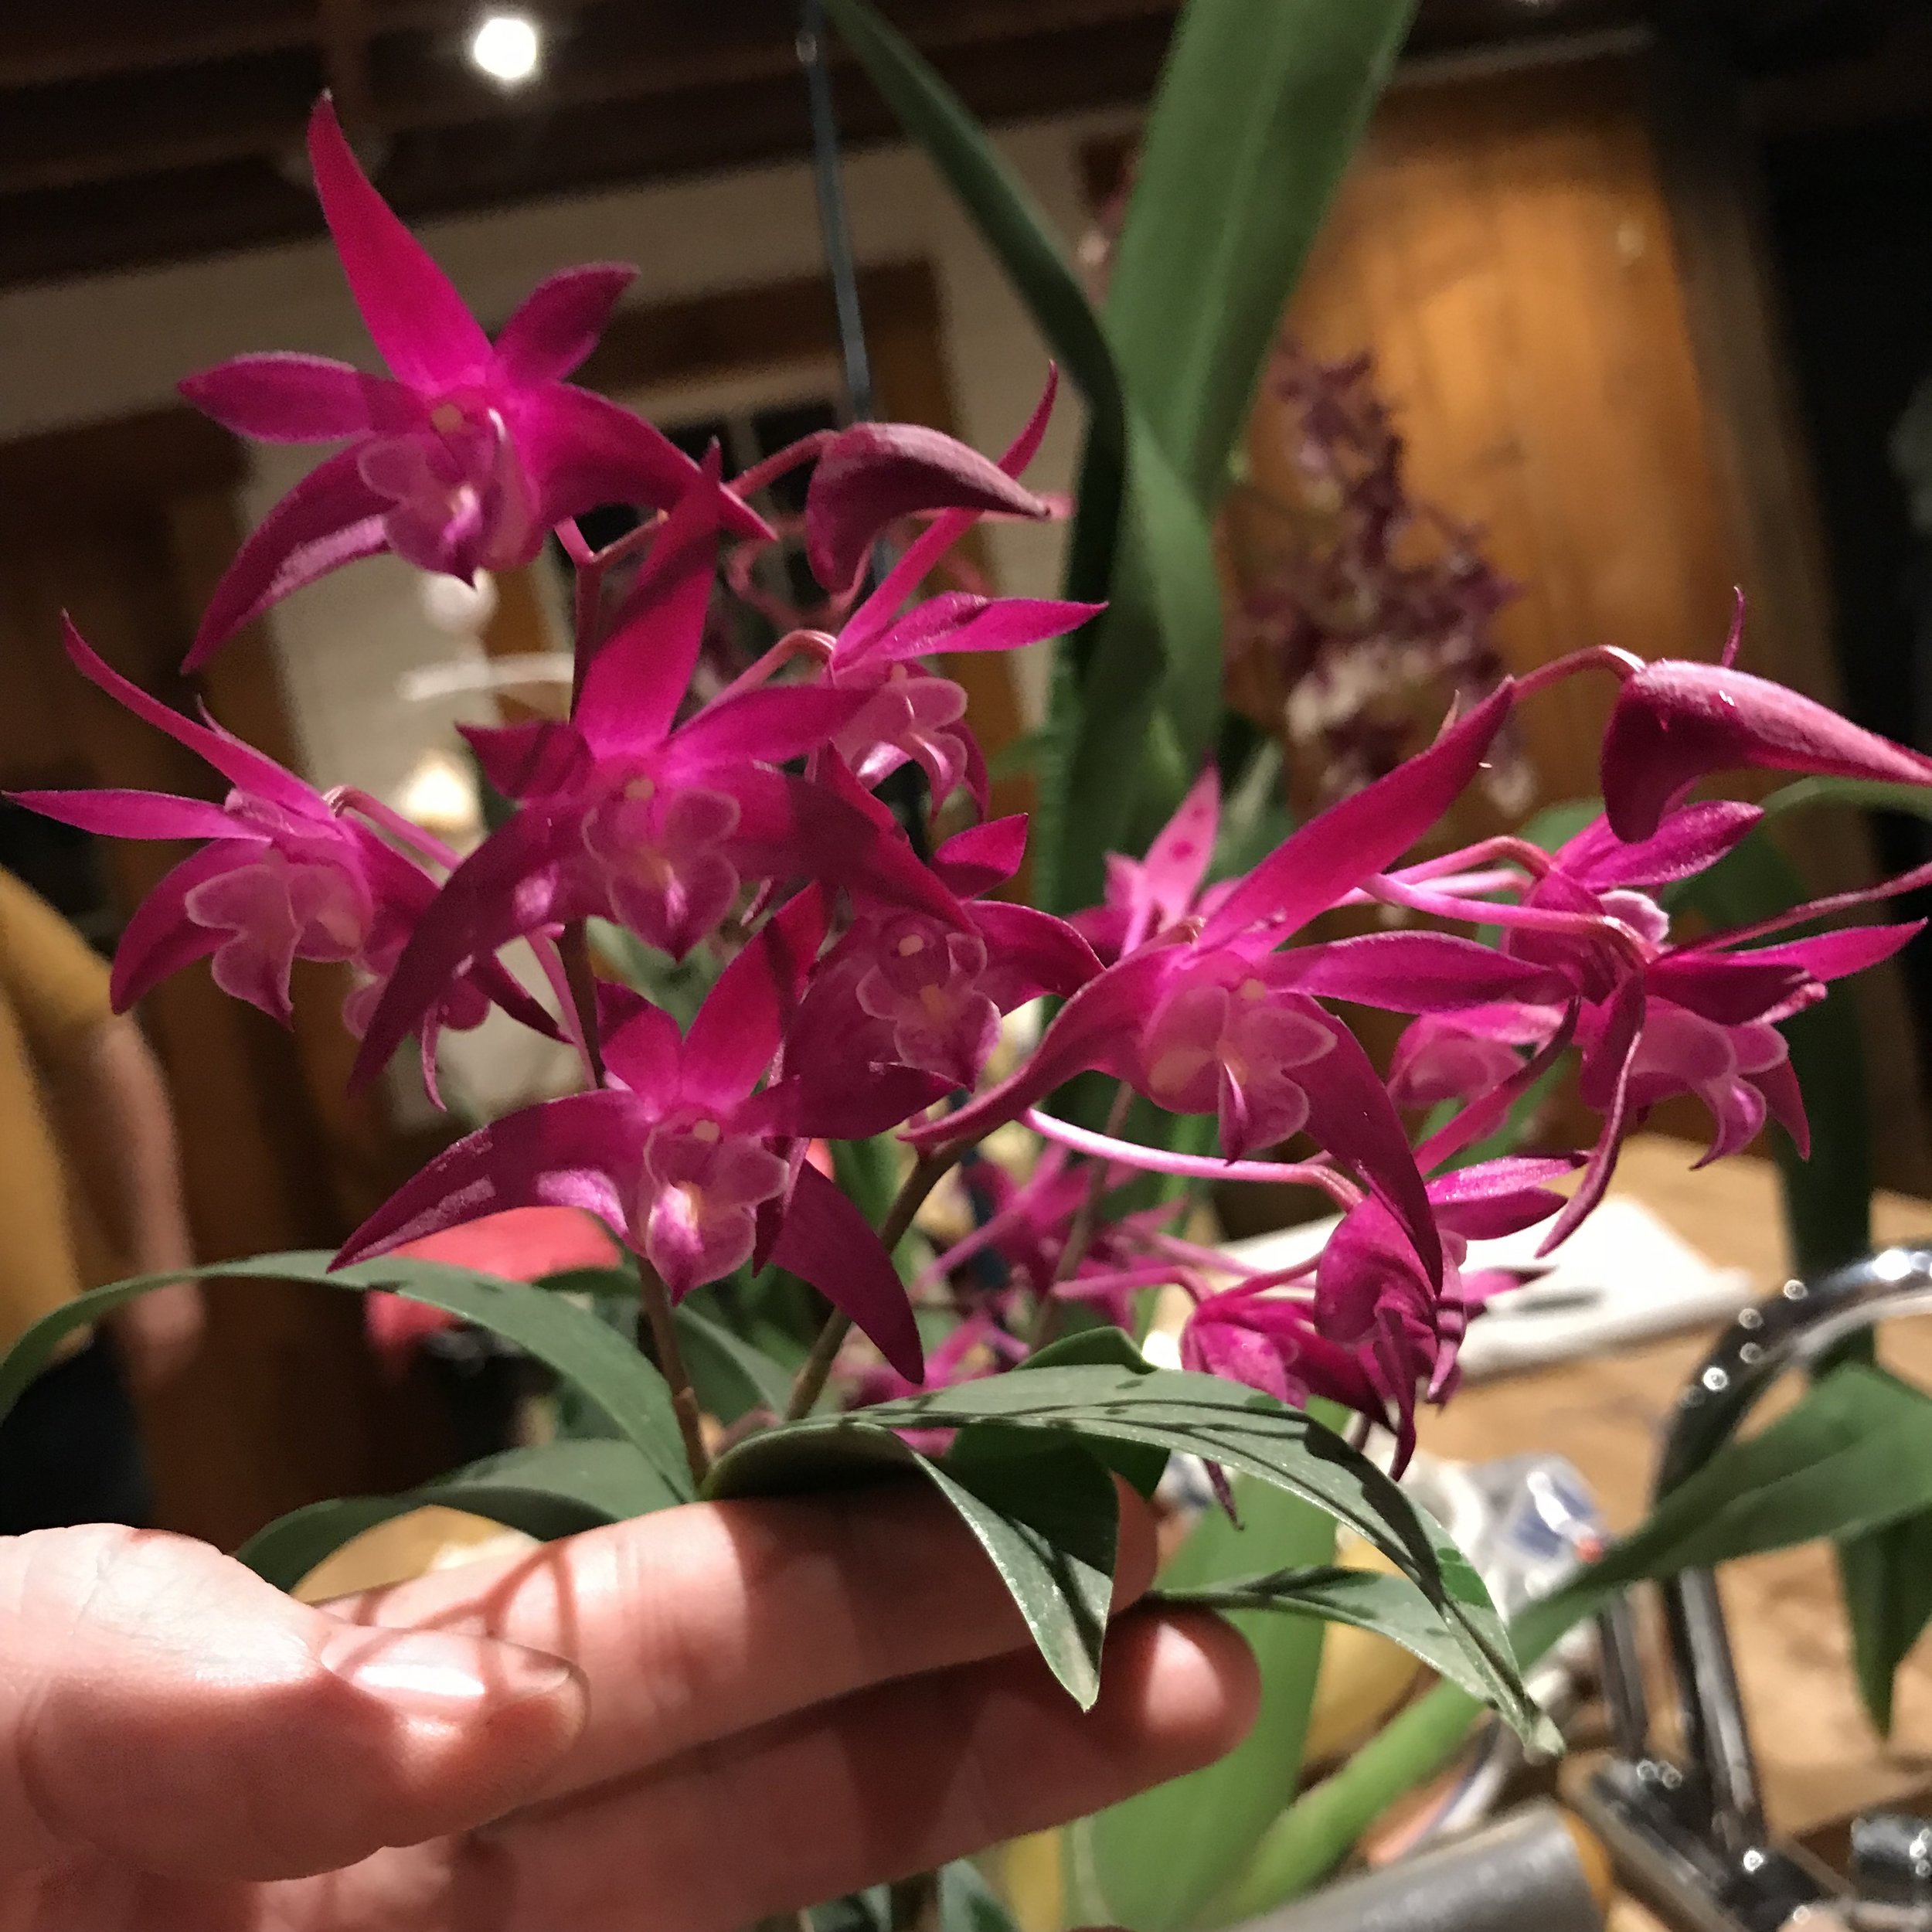
The parents of this beauty are Dendrobium Gilleiston Jazz x Brimbank You Beauty - the first plant carried the pod and the second provided the pollen. 

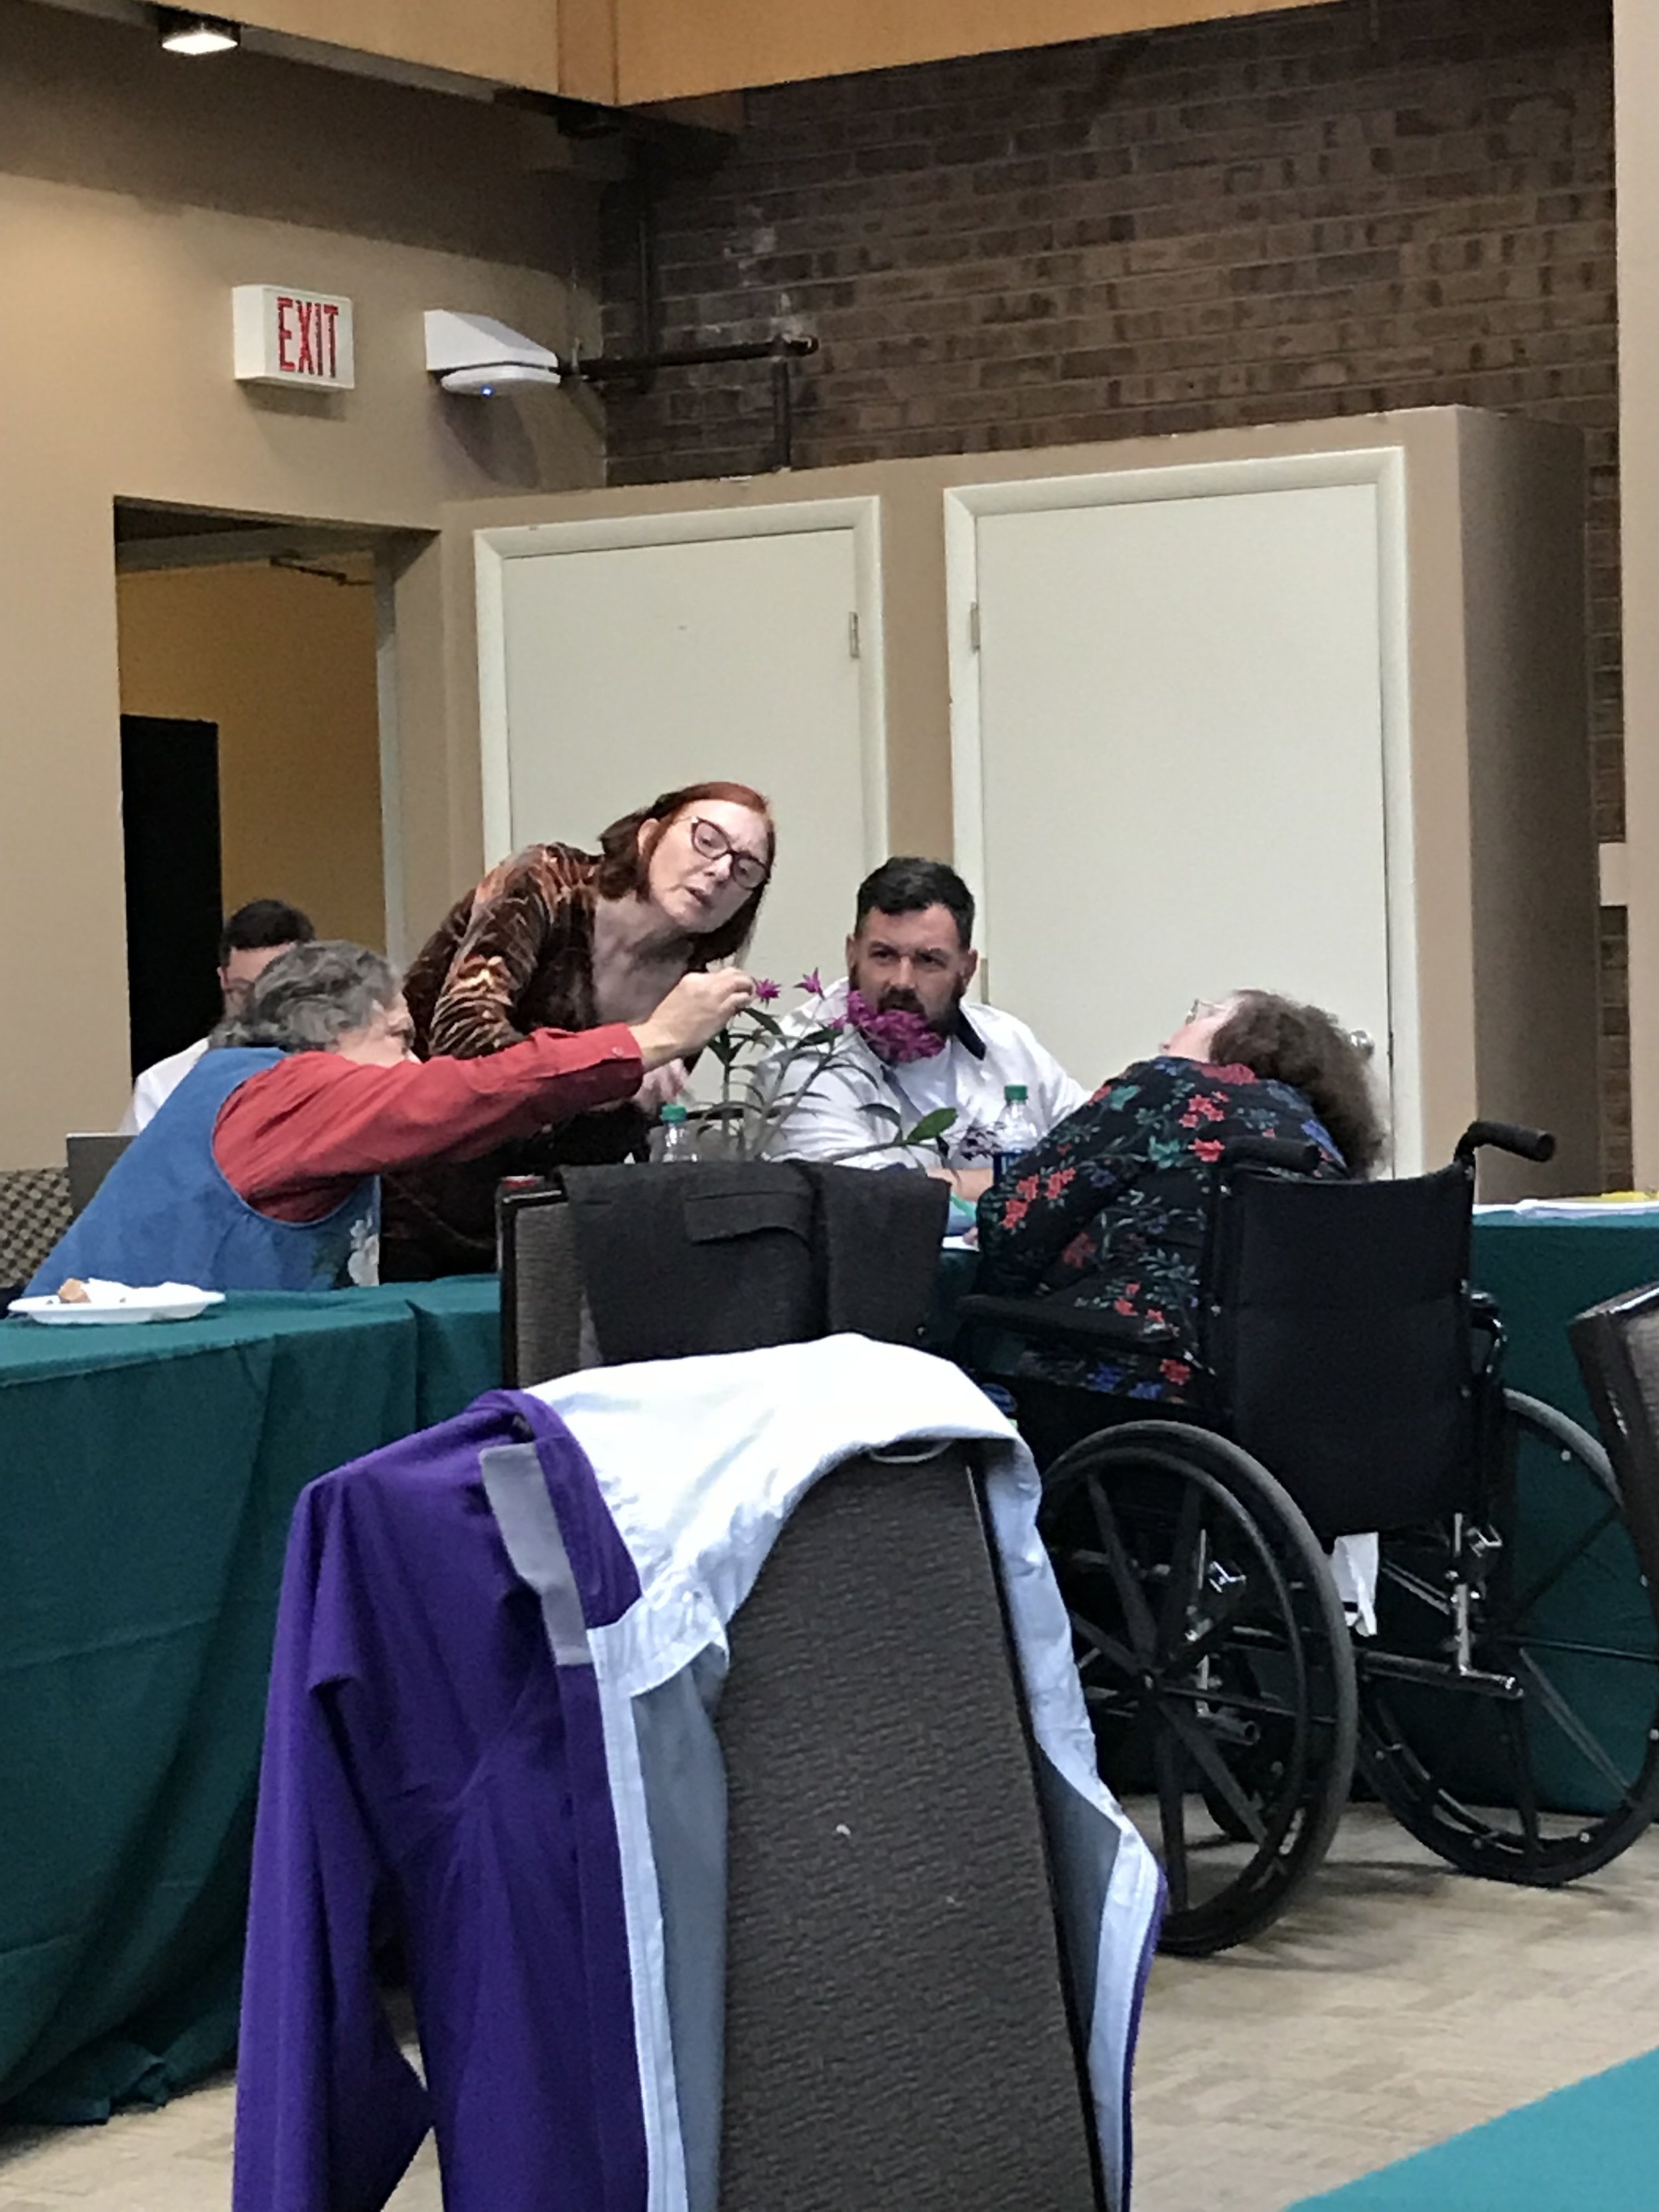
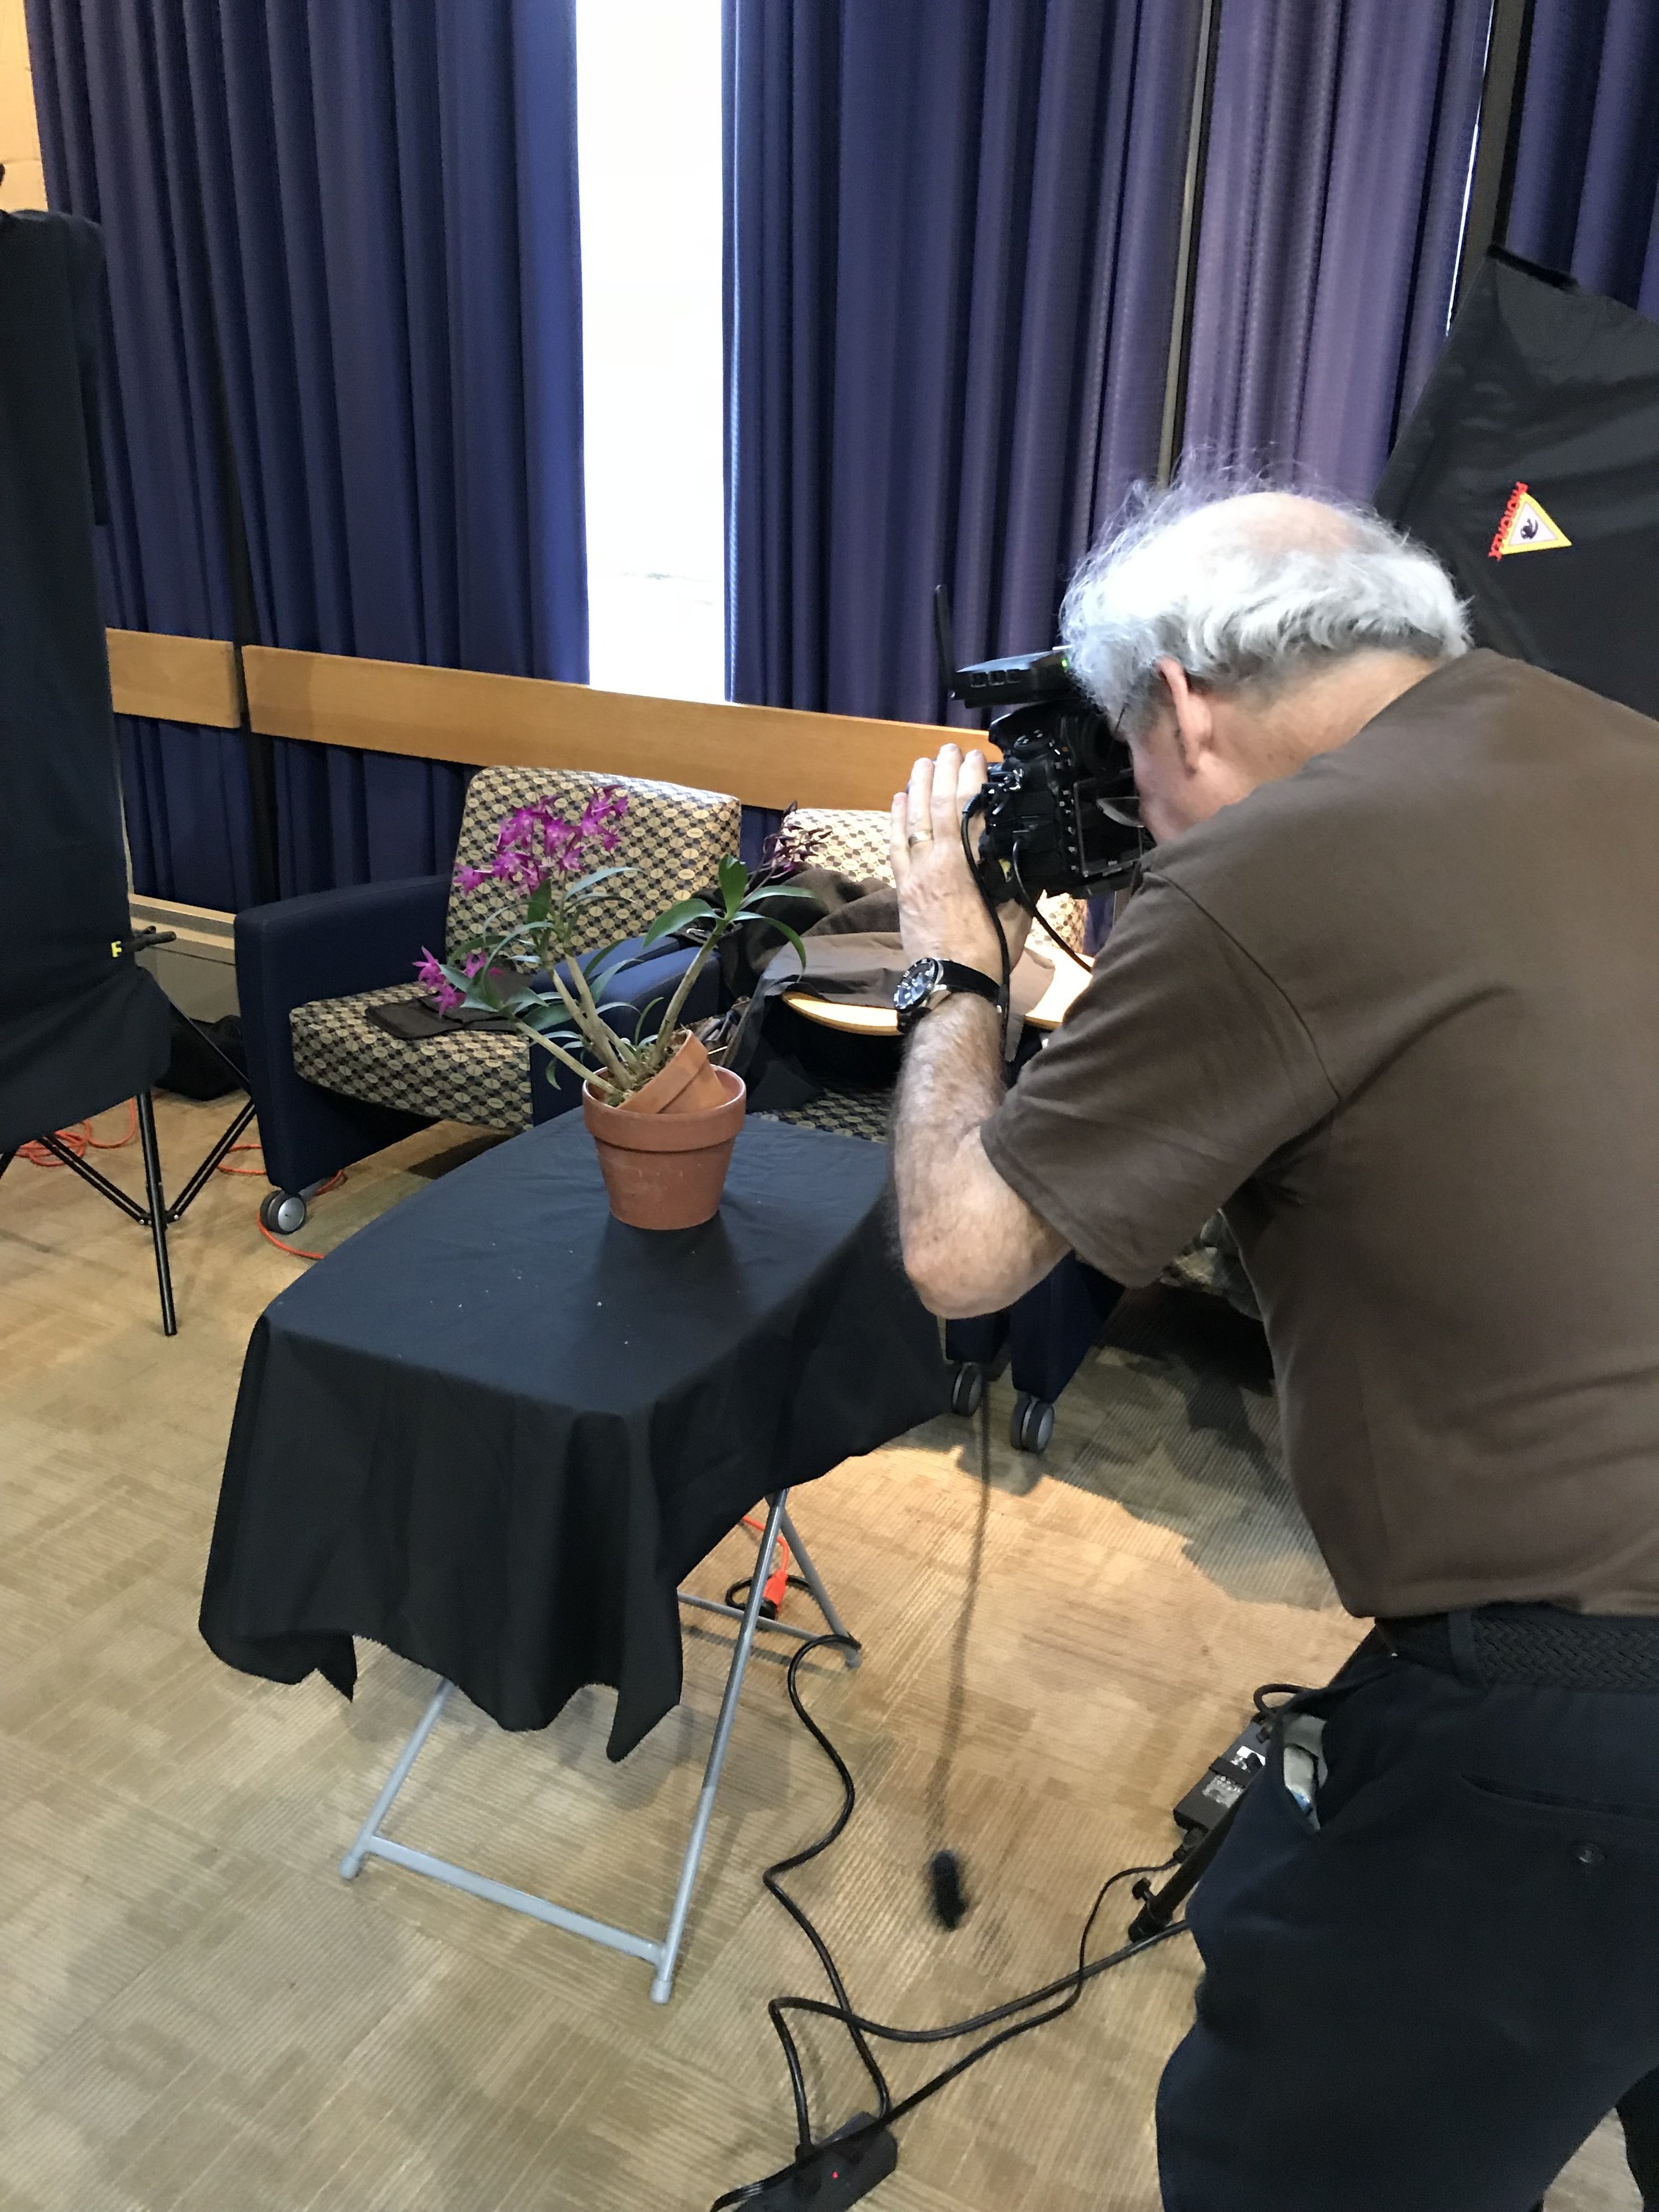
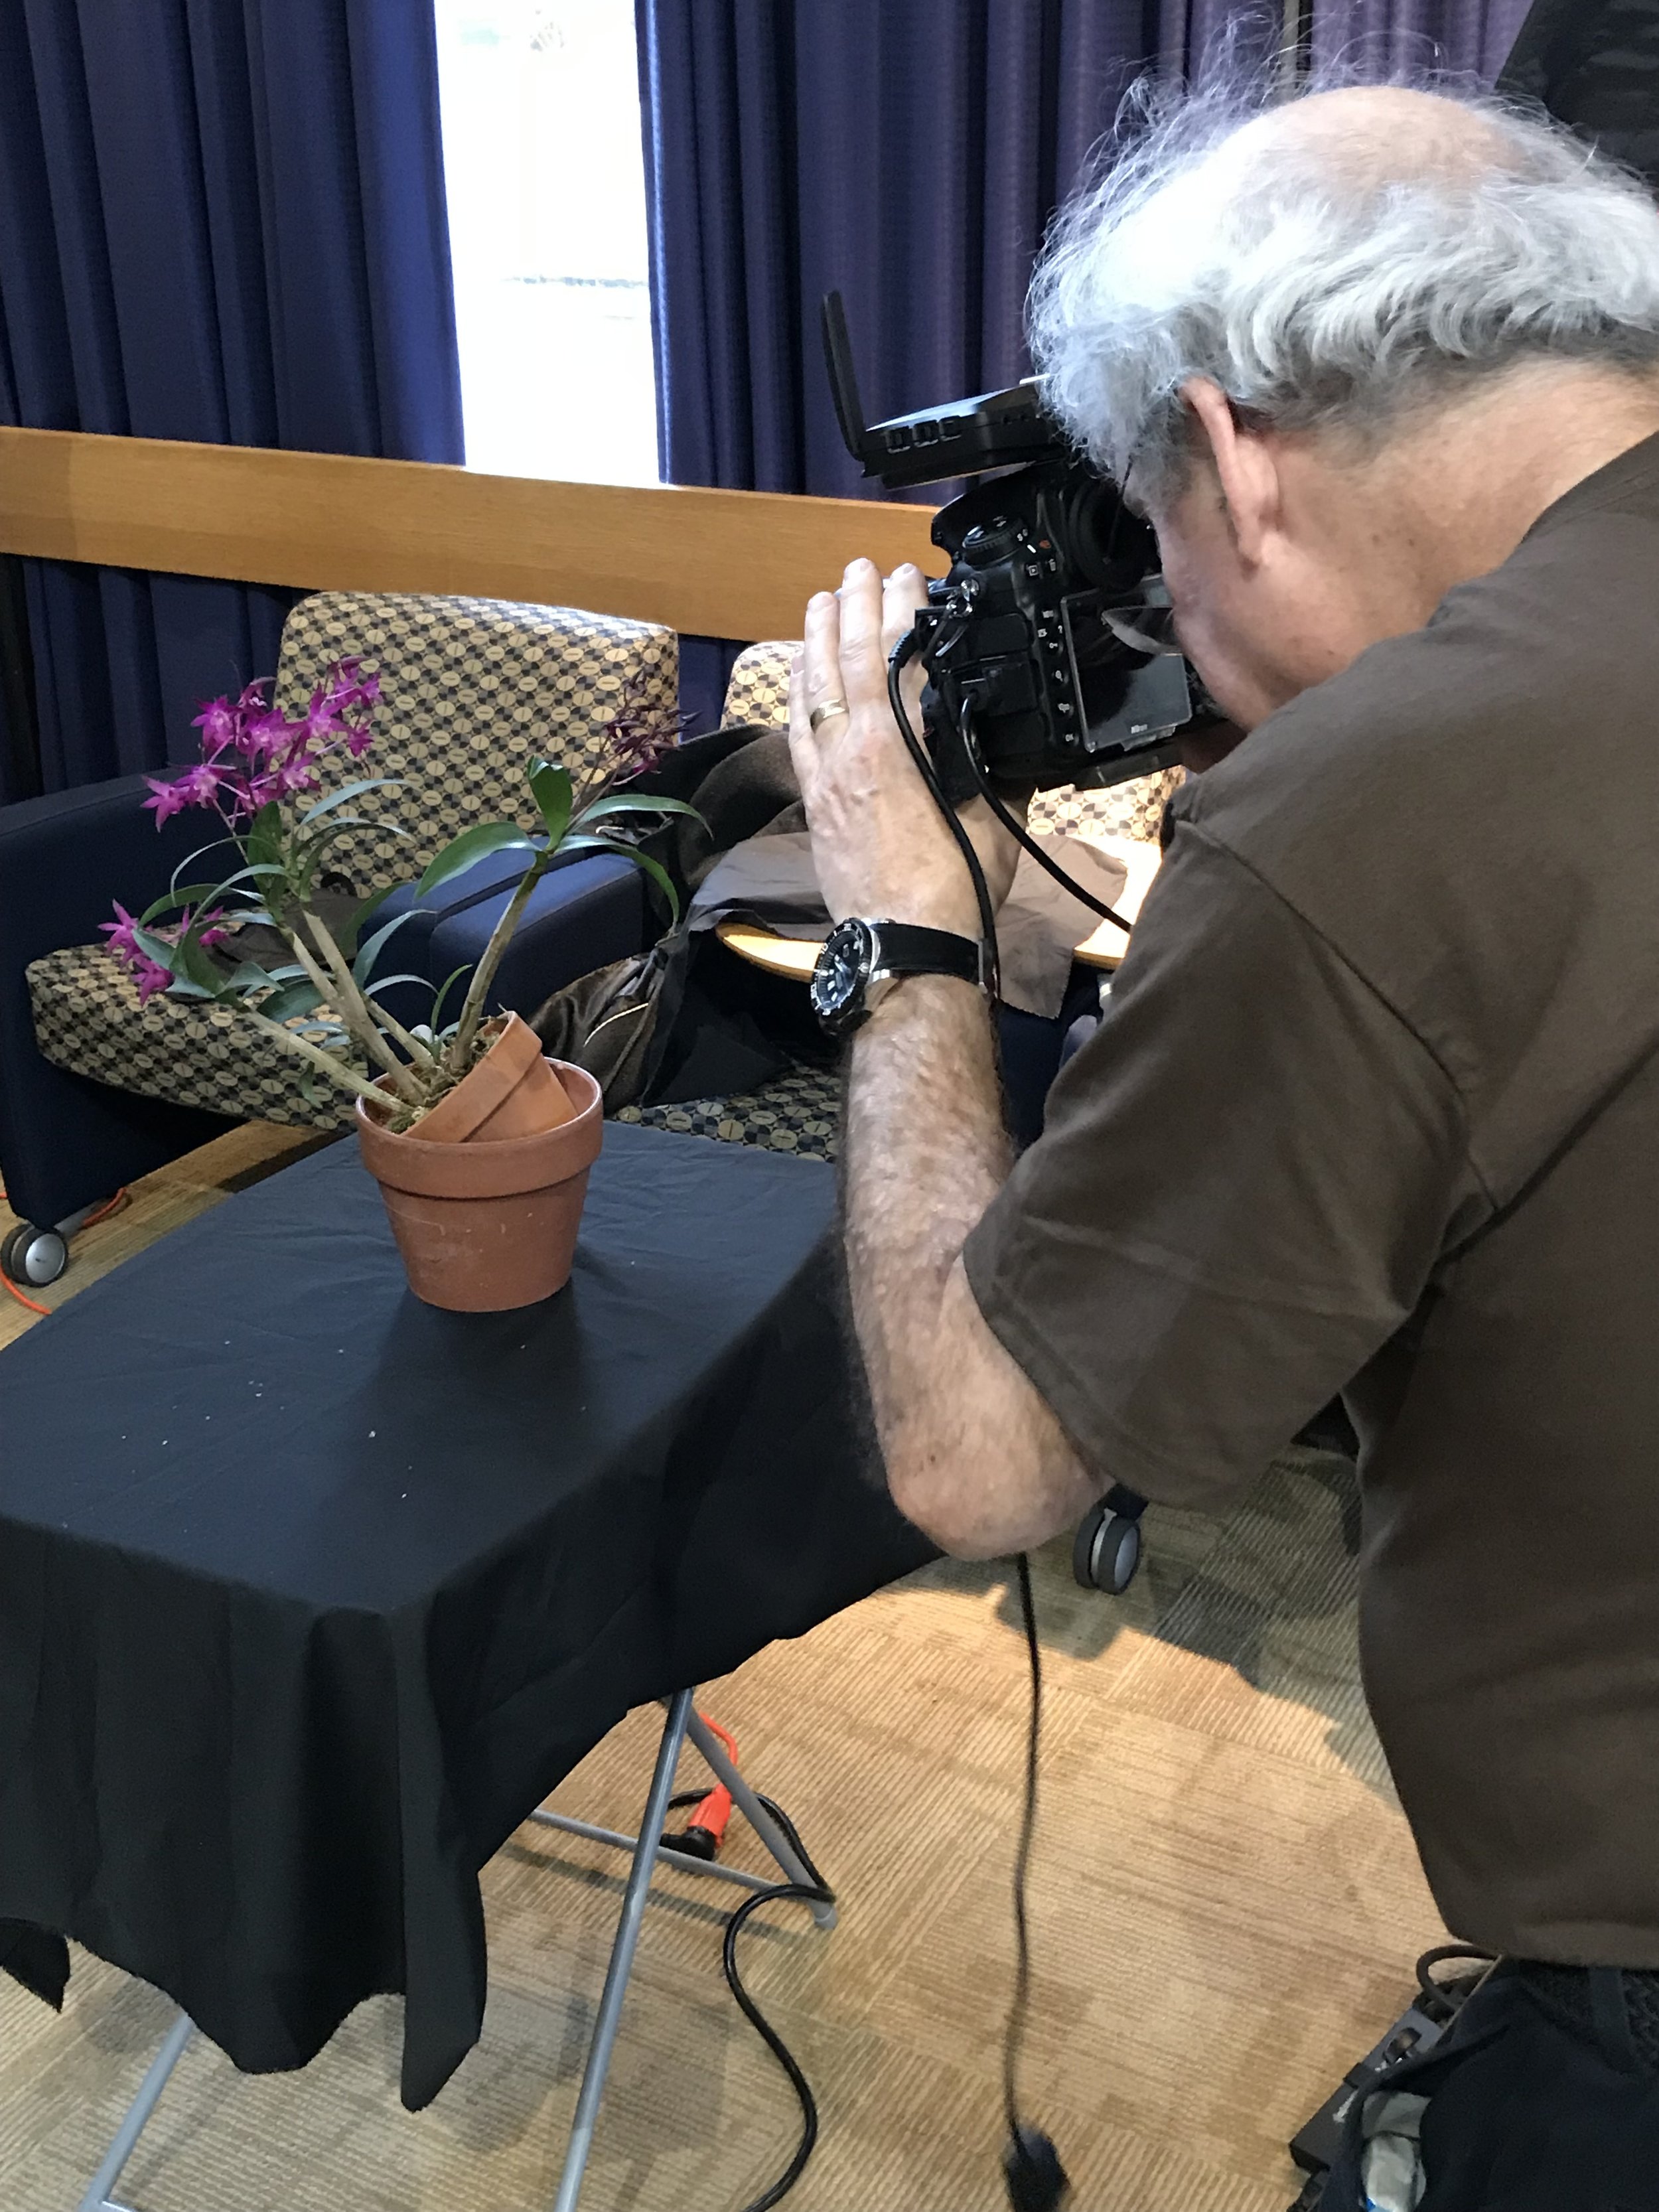
The judging process its self was really interesting. The team of judges (it takes 6-7 years to become an accredited judge) reviewed the plant, reviewed the parents and voted regarding the quality of the flowers, the plant and the overall inflorences. They provide their judgements in a blind ballot and the scores have to have a 6 point or less spread, then those numbers are averaged to arrive at the final score which determines the type of award. If the scores have a more than 6 point spread then they have to debate again and if they can't get it down to the range then nothing can happen. Den. Graham Spearman 'Ermela Kaferi' received 79 points which is a very respectable score, especially on a relatively young plant. If the judges come to an agreement on an award the next step is to write a detailed scientific description of the flowers and spike and then the plant is photographed with special attention paid to accurate color rendition. The description and photo are then recorded into the various national databases and the photo is published in the AOS Digest 'Orchids' Magazine along with the grower information and location the award was granted. 

Trying to transport the plant without damage was quite difficult and required a fair bit of creativity and slooow driving on wonderful Jersey roads. 

All in all this was a very interesting process that every orchid grower should give a try at, worst case you don't receive an award and you come away with heaps of knowledge, best case, your chosen name lives forever in orchid databases and collections. We will most definitely be making more of an effort to show our plants in the future and with the knowledge we have gleaned we will be able to make better choices in what we grow and breed in our own collection.

Arctic Descends

According to the Times, Bloomberg, NPR and the venerable Weather Channel we have just experienced record setting lows...temps so cold that we are of a mind to start our own Super PAC with the goal of getting the jet stream back where it is supposed to be. We didn't need any of those news outlets because the minute we stepped outside every bit of exposed skin let out a cry for help and then abruptly froze.

Naturally our deep seated basic instincts said find a warm cave and crawl inside; we obeyed in the modern sense. A warm place and a fire were a good start but the icing on the cake was a full rack of ribs slow cooked to perfection. The next morning we awoke to one of those crisp blue mornings, the kind where the beauty belies the comfort. Checking the chickens, walking the dog, inspecting the plants in the greenhouse those things are normal; doing them at "feels like -29" that's a truly visceral and memorable experience, made more so by seeing the sun come up through the trees. Just goes to show, even when farm life is downright uncomfortable, there is still beauty to be found. 


Birthday

Two wonderful ladies threw a big birthday for me (Graham) this past weekend. It was great to finally put the house through its paces and break the kitchen in a bit. A huge thanks to my wonderful wife Ermela and my talented mom Carol for putting this event together! And now, the pictures can do the talking:

Harvest

There is nothing quite like reaping the rewards of your labors. That's not to say that the actual harvesting isn't work in and of its self, but something about it is a wee bit more enjoyable than the digging, slogging, planting part of the year. This year Graham was slightly more restrained than last year in his potato planting and the harvest was spread out over several weeks. We were fortunate to have our good friend Henry visit with his family to help disinter the brown, purple and yellow nuggets of starchy goodness. There is something about digging in the soil and finding a perfect potato that really delights. 

Some other edibles were far easier to harvest and we are thrilled to finally have eggs! Of course our bird brain chickens keep laying them randomly in the straw on the ground instead of in their beautiful nests. 

And then of course there were the bees..we were hoping to have gallons of honey to harvest but alas the bees were just too busy setting up shop and getting established. We do enjoy suiting up and checking in on them though. 

Oh how we can't wait for the orchards to factor into harvest season. 

Harvestin'

Things are crazy here, the flowers are growing fast, blooming fast, and fading fast...we are learning as we go and trying to make the most of it all. There have been some real learning moments in regards to plant spacing, crop supports and marketing strategies, but we are taking it all in and already looking towards next year. We still have to finish this one though so for now we will just keep picking, planting and selling. Here are a few recent harvesting moments:
 

Upholstery Zone

It has been determined and proven already that Carol can do anything. It has also been determined that Graham enjoys purchasing fabric too much and Ermela comes up with too many ideas for said fabric....What does all this add up to? If Carol doesn't get an upholstery studio, Ermela wont get her chairs and Graham will bury everyone in yards of natural fibers. The obvious solution was to start converting one of the garage bays into a workspace, it has natural light, electricity and big spaces; or at least it will once we finish emptying it out of boxes. For now we have cleaned it up, turned a door into a table, set up a couple sewing machines and put down a sisal rug (we have learned that the quickest way to make a space feel more finished is to put down a sisal, its odd but true). So, without further ado:
 

Yes yes, you were expecting more, but it's a start, the true magic will be seeing what Carol turns out of this space.
 

Window on the World

Our kitchen is occupying the space in the house that appears to have been a kitchen for the better part of 250 years. That is great in that it has character and has probably seen more meals than a McDonalds at rush hour, BUT styles and equipment change with the times and our new kitchen necessitated some window reconfiguring. When we got the house the windows in this section were screwed and painted shut with cracked panes, missing glazing putty (the stuff that holds the windows in the mullions/muntins) and the lower panes were blocked by cabinets and looked in under the sink. We considered what felt like hundreds of different layout options but in the end realized that we just couldn't give up the counter space, but we also didn't like standing on the porch and looking through the lower window panes under the cabinets. With that decision made we started looking for replacement windows, custom windows, side sliders, the list goes on and on but none of them looked right. We are talking about original windows in one of the oldest parts of the house, we just couldn't muddle it with something that wasn't true to the original. That is when Carol had a brilliant epiphany - why not cut the original window down to a shorter height and rebuild the bottom sill? This epiphany could only come from someone with immense confidence in their millwork skills.... and that is what she did. We have the original window but at a counter height with the original hinges and some of the original glass... can't get much truer to the heart of the house than that!

At some point we will get around to doing a proper post on old window repair/rebuilding, there actually aren't many good sources of info out there on it. For now we will just go over the basics. The individual panes are held in place by metal points and glazing putty. Over time the putty dries out and the points work loose and the panes get loose, or sometimes they get broken by forgetting to open the window before throwing something out (another story). The re-glazing process takes several weeks because the putty has to dry and then be painted and then set aside to cure, so that is pretty much what happened over the winter months, those same winter months we had a lovely sheet of plastic for a window. While Carol re-worked the window and glazed it we had to frame in a new window sill. This is not terribly hard as long as you build with water in mind. Make sure there are no places for it to collect and make sure the shape allows the water to be shed. Carol again put her millwork skills to use by salvaging old wood framing from other demolished areas in the house to create the new window sill and frame; it matches the other windows perfectly. She even managed to find a piece that was stamped with one of the original owner's initials and used it for the window sill, it is really a great little touch of history.

With all that heavy lifting done it was just a matter of waiting for a sunny day, then all three of us pulled the old window out of its winter storage corner, found some good new screws, and put the window in. A true testament to Carol's skills in that it worked on the first try and swings perfectly. Now for some new hardware and it will be good to go for another hundred years.


Goodbye Sweet Dumpster

For the first time in almost a year we don't have a dumpster blocking the driveway (driveway is an exaggeration, dirt is more accurate). It was a bittersweet moment as we watched the dumpster leave. With one of those outside there is no project that feels like it cant be tackled. Now, we have to think, "ok, if we demolish this wall, where will the debris go?". But such is life and we will make do until we have enough debris piled up to warrant bringing a new metal box out for a dumpster filling weekend. We expected having it gone would make a big difference in how things felt, but I guess our minds always knew it was temporary because at the end of the day it was no big adjustment visually for us. Anyways, rambling is finished, now please enjoy these pictures:
 

We Have A Well

Yes... to say a rural farmhouse has a well is not exactly a groundbreaking (pardon the pun) statement, but this is an unexpected well. The house has a fairly new well with a new pump, but we had assumed the old wells were gone and forgotten. Then, Paul (our tree guy) asked if we wanted to see the well he found.... naturally we ran over.
 

In the course of tree removal he came across a cement well cap. Not a small chunk of cement by any means, but he had a nice handy skid steer and so picked the cap off and we looked down about 30' into our very own artesian well!. This is probably over 150 years old and is very well constructed. If we wanted to use it we would probably have to go down and dredge the bottom out a bit as it has silted in a bit. All in all a very exciting discovery and good to know that when the zombie apocalypse comes we will still have fresh drinking water. We put the cap back on it for now, but will eventually put a hand pump on top so we can pose in front of it like in old timey pictures.
 

The Orchard

It's taken us a couple weeks to recover from the planting ordeal and be able to mentally re-live the experience in order to put this post together. You may be thinking, ok, so you had to dig some holes and plant some trees big flippin' deal. No, oh no, aside from the fact that Graham fell into one of his own tree holes while trying to plant trees by the light of our truck's headlights it was also like a nightmare "I told you so" from middle school geometry. When are we ever going to need to know the Pythagorean theorem or inverse angles???? We'll tell you when, when you are trying to plant 100+ trees in proper offset rows running at right angles to a house that does not fall on a proper East/West axis, That's When!!! OK, now that that vent has been opened... We shall continue in a more productive tone.

The orchard, as it is envisioned will be about 120 trees in an offset grid pattern with 12' spacing between the trees. The pattern will be slightly offset again on the outer two rows to create a dead end when looking down the angled rows from the house. We ordered our trees from Stark Bros Wholesale. The commercial option saved a huge amount of money but created restrictions in terms of variety since you have to order minimum quantities of each variety and sizes range from almost fruiting ready to wee little things that will yield a few years out. To augment this we ordered a few trees from our wish list from their retail operation, those trees were more consistent in size and were pruned before delivery which is a nice touch. The trees were all delivered bare root and very well packaged with moist sawdust to keep them happy. The idea behind this orchard is to have more than enough fruit for ourselves, our friends and family and for various projects that Graham will inevitably come up with. With that in mind and since you have to plant trees years before you get to enjoy them, we figured it would be best to really mix it up now and hedge our bets that we will have exactly what we want in the future. We opted for a mixture of modern and antique hybrids and mixed in crabapples for pollination and cut flower use. Also, they will flower and look glorious.

Apples: Liberty, Macoun, Northern Spy, Calville Blanc, Ben Davis, Cox's Orange Pippin Antique, Enterprise, Granny Smith, Honey Crisp, Pristine, Wolf River

Crabapples: Manchurian, Whitney, Snowdrift

Apricots: Goldcot, Harcot, Harglow, Wilson Delicious

Sweet Cherries: Emperor Francis, Stella, Stark Gold

Sour Cherries (for pies): Suda Hardy

Peaches: Carolina Belle, Contender, Early Redhaven

Nectarines: Hardired, Stark Sunglo

Plums: Methley, Green Gage, Shiro, Santa Rosa, Spring Satin Plumcot (hybrid)

Pears: Anjou, Comice, Red Sensation, Seckel, Chojuro Asian

Quince: Orange

Of course, more will be added in future years and we still need to find a home for some figs, Arctic Kiwis, grapes, hazelnuts and persimmons.

The process for actually laying out the grid was tricky, we tried lasers at first, but they were no good during the daylight and right angles were too short, in the end we had to resort to strings and math. We took a 20' length of string and laid it next to the house foundation and measured 4' off the side of the house to create a consistent distance. Then we took another 20' length and tied it to a stick at the starting point of the other string. The internet came in handy next as we used a Pythagorean right angle web calculator to find the length of side "C" so to speak (the long side) and tied that to the stick at the other end of the line 4' off the side of the house. The way the theorem goes, we will get a right angle to the house once the end of the long piece meets the end of the 2nd 20' string leading away from the house. We know, this sucks and is annoying to read about, try actually doing it. As usual, Graham got tangled in the string multiple times and was on the verge of a fit. These pictures might make more sense than the verbage.

Once we had a true right angle line we extended it out to the far edge of the orchard area and marked that point. Then we took a still with two 12' strings attached to it and marked the locations for each tree with stakes. Because the trees are planted with equal 12' spacing, once we had two tree locations we could use the stick with the two strings attached to it to find the third location quite easily and consistently, we worked our way around the area with the stick, strings, and stakes and ended up with a very reliable spacing (adjusted for obstacles and pre-existing ornamental trees of course).

That was the boring part, the fun part came with the Ditchwitch and the 18" auger bit. This machine went through our soil and most roots/rocks without any trouble. We dug the holes excessively deep at first but got the hang of it after a while.
 

With the holes dig it was a "simple" matter of placing the trees, planting them and then watering. Unfortunately Graham was on his own for this and time got away from him. The planting went till about 11pm and finished by the light of our truck. Towards the end it was impossible to find the hose, see the bobbex (dear repellent) that was being sprayed on and avoid the unfilled holes.


 It was pretty fantastic to wake up the next morning and look down on our future orchard (currently a forest of sticks)... deer fence is the next project, but we will take a breather before getting to that.


Kitchen Reminiscent

It is still far from complete, but the kitchen is starting to take shape. There will be lots more details to follow regarding tiling and lighting and layout choices, but for now, here are a few pictures to prove that we do intend to cook in the big house one of these days.
 

Hosebib Numero Uno

Water water everywhere but not a drop where we needed it, in this case, outdoors. Yup, this house was blessed with multiple acres and no way to water them. Sure sure, years ago prior to frozen pipes there were ways, but not since we have been here. So it is with great pride that we show off our very first exterior hosebib.
 

This is located right next to the orchard, which is a vast improvement over last weeks 5 connected hoses with lots of running back and forth attempt at watering the newly planted trees. We will get around to showing that ordeal, but for now Graham is still getting over the trauma of falling in one of his own tree holes.

This hosebib is no ordinary hosebib, it is a frostfree sillcock. yeah we don't know what that means either, but the end result is that it wont freeze over winter, a big plus. The plumbing for this required a whole lot of cutting out old pipes that snaked across the basement ceiling. Many of which were insulated with horse hair and rags (not fun to stand under and cut) we are talking a ton of pipes mind you, and then the running of a single new pex line, a dream of simplicity and modernity by comparison. Then some crimping connections and opening the valves, super easy and oh so convenient. Tune back for lots of pictures this summer of us using this bad boy!
 

UPDATE - Raised Beds

Last November, prior to snowmageddon, snowpacalypse, snow in general, we planted our raised beds. Now, we are happy to share the first update on how they faired. It's still early in the season yet, but we are seeing distinct signs of life from the majority of the species planted.

Tulips are up and looking very healthy. Ermerus (foxtail lilly), one has sprouted, it looks like a plant version of a squid mouth...that analogy may be lost on those of you who have not made calamari. Lilies are sprouting in quantity, as are the aliums, fritillaries, and narcissus. Of the Iris so far only two are showing, in truth we left them in their shipping containers too long last year so we suspected losses would be a sure thing from that bed. We will continue to keep you posted and of course, here are some pictures:
 

First Glaze Firing

We finally got around to glazing and firing our first set of pots! they came out 90% awesome. Thanks to the tutelage of Dustin ( @ceramicism www.ceramicismxoxo.com ) we figured out what we were doing and had some pretty cool if unexpected results. For those of you who have not been in middle school recently... first you shape the clay, then you harden it in a light firing, then you paint it with the glaze. The glaze changes appearance drastically after the firing from what it looks like in the container, also, glazes tend to react in unexpected ways with other glazes.
 

More detailed pictures of the post-firing results to come, just waiting for a nice sunny day and a minute to spare.
 

Amenia Bobsled Team

That's the name for our tub removal crew, a big thanks to Dustin Barzell, and Oren Petranker for helping to haul the old castiron beast out of the upstairs hallway. It actually was in the pink bathroom, but the spot it graced for near on 100 years will become a hallway and thus improve the flow immeasurably.  Now, we don't know the exact weight on the tub, but Oren and Graham have hauled ovens, coal stoves, butcher blocks etc.. with nary a grunt, but this thing damn near killed the team. Not only was it heavy, it also had to come down a curved staircase without damaging the plaster or railing, not an easy task.

Behold....
 

It got much easier to move once we realized that the slip nuts on the plumbing had not released, so out came the sawzall and it cut just like buttah'. A special thanks to Julie for documenting the process and doing some solid pre tub removal demolition. Go to our instagram page for a fun video of the final push @brokenchimneyfarm
 

Grounded

So lighting has been around for a long time, one can almost imagine cave men peaking their heads out of caves after storms and running around looking for lighting strikes in the hopes of scoring some fire (It's how we imagine it at least). Then man built houses and we unanimously decided lightning was not so helpful anymore, so man put up lightning rods, and connected them to the ground with copper wires. Then internal plumbing was harnessed and copper wires were connected to copper pipes and electrical systems were connected to copper pipes and everything was ok for a while (may not be historically accurate). Then Graham came along and cut almost all the copper pipes out of our house and replaced them with pex pipes. Then he had a nighttime epiphany (others call them dreams) that the house was no longer grounded since the pipes were gone and the breaker panel ground was hanging loose. Long story short, an 8' copper pole had to be sunk into the ground outside and attached by a thick copper wire to the main circuit breaker. In new construction the wire is usually attached to the rebar used in the foundation, but rebar wasn't around when this house was built. The copper line is then attached to the copper pipes in the water system so that the highly conductive wet areas of the house can't shock people with stray currents. The pictures are pretty self-explanatory; Graham spent time in his least favorite crawl space drilling a hole through the external wall and feeding the copper wire through it. Once that was done he pounded the copper grounding rod into the ground with the head from an old sledgehammer - it turned out to be pretty easy, a testament to our good soil. Then it was all clamped together and voila, the farm was grounded.  

First Firing

In continuing pursuit of our artist community like dream, we fired the kiln for the first time this weekend. It was a bit of a test run, done with some trepidation given that the kiln was an Ebay find. Fortunately it all worked like a charm and shut itself off at just the right time. These pieces are by Graham and his very talented friend Dustin Barzell (ceramicismxoxo.com or @ceramicism for you instagramers). The symmetrical/larger pieces in these pics tend to be by Dustin. This was just the bisque firing, so now they are ready to be glazed and made pretty, hopefully in the works this coming weekend. For those of you who know Dustin's work, you know this is just the blank canvas for color.  
 

New Old Floors

This house lacks for many things (a functioning shower comes to mind quickly) but one thing it does not lack for is copious amounts of very old wood flooring. For many of you that probably brings to mind images of wide plank boards with enough character that each plank could tell a story, and it's true, we have that. What we also have in a couple areas is vertical grain or "quarter sawn" heart pine flooring dating to the turn of the century. It is a much narrower plank, about 3" and so a very different look. We had high hopes for these floors, tempered by the fact that they have been heavily abused, stained, sanded, pummeled, dented, scraped, cut and painted….but they do tell stories. The TV room floor which does happen to be wide plank for the most part is a great example of story telling. If you walk into the room it looks just like that, a room. BUT, if you look at the flooring you will see a very clear history of the combination of two separate rooms and patching of what must have been plumbing holes in the smaller room. We went back and forth for months as to how to deal with them. Are they good enough to hand scrape? Do we have time to hand scrape? Is there enough to sand? Will we lose character? Should we just paint them? In the end the decision was to sand the floors in the kitchen (heart pine) and the TV room (wide plank old growth pine) and stain. We found a great local floor finisher who was reasonable and professional and who followed our request of "sanding without losing character", flawlessly. This sanding request is most evidenced by a step from the kitchen down to the pantry area, it has been worn down in the center by 100 years of use and he preserved that while bringing the grain back to life. With the floors sanded they looked 1000 times better than we expected, no, they aren't perfect, but they are exactly what we dared hope for. The heart pine turned out to have such beautiful natural color that we just sealed it and left it at that. The TV room floors would have also looked beautiful with a similar treatment but we wanted something dark and rich to go with the furnishings and rugs we have planned for that room. After much back and forth and custom stain attempts we ended up settling on a standard Minwax color, "Provencial" and then a satin topcoat for protection and sheen. The staining was arduous, first Carol and Semi (Ermela's mom) had to vacuum the entire room, then go over all the surfaces with tac cloths to make sure it was all clean as possible. Then they worked their way down the planks with one applying the stain and the other wiping it off with a rag. Because of the three different types/cuts of wood used in this one room they had to play with the application to wiping time for each one to keep the colors as consistent as possible. This is an example of when it is good to know what type of wood you are working with. The heart pine (yes there was some in this room used as a patch) being very dense and cut in a "quarter sawn" or rift cut was much less absorbent than the wide plank old growth pine which was plain sawn (the type of cut where you see more squiggles and patterns). Once the staining was done it was allowed to cure for a day and then the oil based satin top coat was applied. Normally we would use a two part water based sealer but we were not able to source it in the timeframe we were working with.

So, judge for yourself, what do you think of the end results?   
 

Unfortunately, we only got a couple days to enjoy the new floors. Construction waits for no man so we had to cover them up with builders board and tape the seems (for those of you who haven't guessed, we did this work on Easter). The trick now is to remember that the floors are done under the protection and that we have to be careful while moving drywall, appliances and equipment around.


Drywalling

In our slow march towards TV room completion we tackled drywall most recently. Fortunately we had three things going for us. #1, Ermela is a very quick study and after a day she had the measuring and cutting down. Not an easy task in this room since we kept as much trim in place as possible; including the wonderful arch right in the middle of the room. #2, Graham got a new toy (shocking) in the form of a drywall hoist, truly a gift from the heavens. #3, our friend Oren was up and threw himself enthusiastically into the project with Ermela as his sheetrock instructor. By the end of the weekend they were a team to be reckoned with; working in tandem to put some very intricate pieces up.  
 

Overall drywall is really about learning rules and being able to keep a flexible mind. Most mistakes seem to be in reversing measurements from the floor to the wall, and in not planning ahead. With this house one of our biggest hurdles is that the blocking in the walls was set up for plaster, which is very different in application to drywall so we occasionally ad to add extra blocking in the walls to have something to attach the sheets to. The other headache is that the drywall is thinner than the plaster that used to be there so we will have to go around all the trim in the room and add a layer of wood to blend it all in.

With the drywall in and the walls sealed up and insulated this is now the warmest room in the house, it's really amazing considering it is the north side of the house and only has one heat register. Proof that some demolition headaches are worth it, at least that is what we will tell ourselves while watching movies curled on the couch this coming winter.