Birthday

Two wonderful ladies threw a big birthday for me (Graham) this past weekend. It was great to finally put the house through its paces and break the kitchen in a bit. A huge thanks to my wonderful wife Ermela and my talented mom Carol for putting this event together! And now, the pictures can do the talking:

Harvest

There is nothing quite like reaping the rewards of your labors. That's not to say that the actual harvesting isn't work in and of its self, but something about it is a wee bit more enjoyable than the digging, slogging, planting part of the year. This year Graham was slightly more restrained than last year in his potato planting and the harvest was spread out over several weeks. We were fortunate to have our good friend Henry visit with his family to help disinter the brown, purple and yellow nuggets of starchy goodness. There is something about digging in the soil and finding a perfect potato that really delights. 

Some other edibles were far easier to harvest and we are thrilled to finally have eggs! Of course our bird brain chickens keep laying them randomly in the straw on the ground instead of in their beautiful nests. 

And then of course there were the bees..we were hoping to have gallons of honey to harvest but alas the bees were just too busy setting up shop and getting established. We do enjoy suiting up and checking in on them though. 

Oh how we can't wait for the orchards to factor into harvest season. 

Work Crew


It's mid august and it's so hot the hens are laying hard boiled eggs....or at least we wish they were, so far it's more like a farmyard version of Jurassic Park with "nature always finds a way" since every time we turn around one of our "hens" has started crowing. Well now that that rant is out of the way... It's really hot here in upstate NY so we have been trying to do our outside work in the morning and the evening and do interior work during the heat of the day. A great plan unless that interior work happens to be tearing plaster walls out, in which case it's a crummy crummy plan. Fortunately we had help this weekend in the form of the always reliable Oren and Julie and a first visit north by our good buddy Jesse. We feasted on food catered by Babettes Kitchen courtesy of our top West Coast supporters Toni, Frank and Zak (a very talented designer).

After lunch it was back to destruction in all it's various forms. Check out @brokenchimneyfarm to see a video of Oren AKA The Hulk attacking a plaster wall in slow mo. Before too many of you lament the loss of old plaster walls please keep in mind that we are saving all the plaster we can, but some areas are too damaged to save and or will be put to purposes not compatible with plaster.

The guys spent the whole day in demo mode - locked inside rooms with no AC and sweat obscured vision, but they got a lot done. The Girl crew spent a good chunk doing more methodical demolition and then put the kitchen together now that the floors are finished. Getting the fridge in and plugged in was a big moment! Eventually the heat got the better of everyone and one by one we hit the floor, wrestled with Cercei and cooled off with drinks and played Cards Against Humanity. All in all it was a very productive and fun day. Let us not forget the high point of the day (in Oren's opinion) Mama Carol threw together some blueberry tarts and home made whipped cream; they were the perfect antidote to summer heat and grime.
 

Harvestin'

Things are crazy here, the flowers are growing fast, blooming fast, and fading fast...we are learning as we go and trying to make the most of it all. There have been some real learning moments in regards to plant spacing, crop supports and marketing strategies, but we are taking it all in and already looking towards next year. We still have to finish this one though so for now we will just keep picking, planting and selling. Here are a few recent harvesting moments:
 

Upholstery Zone

It has been determined and proven already that Carol can do anything. It has also been determined that Graham enjoys purchasing fabric too much and Ermela comes up with too many ideas for said fabric....What does all this add up to? If Carol doesn't get an upholstery studio, Ermela wont get her chairs and Graham will bury everyone in yards of natural fibers. The obvious solution was to start converting one of the garage bays into a workspace, it has natural light, electricity and big spaces; or at least it will once we finish emptying it out of boxes. For now we have cleaned it up, turned a door into a table, set up a couple sewing machines and put down a sisal rug (we have learned that the quickest way to make a space feel more finished is to put down a sisal, its odd but true). So, without further ado:
 

Yes yes, you were expecting more, but it's a start, the true magic will be seeing what Carol turns out of this space.
 

Window on the World

Our kitchen is occupying the space in the house that appears to have been a kitchen for the better part of 250 years. That is great in that it has character and has probably seen more meals than a McDonalds at rush hour, BUT styles and equipment change with the times and our new kitchen necessitated some window reconfiguring. When we got the house the windows in this section were screwed and painted shut with cracked panes, missing glazing putty (the stuff that holds the windows in the mullions/muntins) and the lower panes were blocked by cabinets and looked in under the sink. We considered what felt like hundreds of different layout options but in the end realized that we just couldn't give up the counter space, but we also didn't like standing on the porch and looking through the lower window panes under the cabinets. With that decision made we started looking for replacement windows, custom windows, side sliders, the list goes on and on but none of them looked right. We are talking about original windows in one of the oldest parts of the house, we just couldn't muddle it with something that wasn't true to the original. That is when Carol had a brilliant epiphany - why not cut the original window down to a shorter height and rebuild the bottom sill? This epiphany could only come from someone with immense confidence in their millwork skills.... and that is what she did. We have the original window but at a counter height with the original hinges and some of the original glass... can't get much truer to the heart of the house than that!

At some point we will get around to doing a proper post on old window repair/rebuilding, there actually aren't many good sources of info out there on it. For now we will just go over the basics. The individual panes are held in place by metal points and glazing putty. Over time the putty dries out and the points work loose and the panes get loose, or sometimes they get broken by forgetting to open the window before throwing something out (another story). The re-glazing process takes several weeks because the putty has to dry and then be painted and then set aside to cure, so that is pretty much what happened over the winter months, those same winter months we had a lovely sheet of plastic for a window. While Carol re-worked the window and glazed it we had to frame in a new window sill. This is not terribly hard as long as you build with water in mind. Make sure there are no places for it to collect and make sure the shape allows the water to be shed. Carol again put her millwork skills to use by salvaging old wood framing from other demolished areas in the house to create the new window sill and frame; it matches the other windows perfectly. She even managed to find a piece that was stamped with one of the original owner's initials and used it for the window sill, it is really a great little touch of history.

With all that heavy lifting done it was just a matter of waiting for a sunny day, then all three of us pulled the old window out of its winter storage corner, found some good new screws, and put the window in. A true testament to Carol's skills in that it worked on the first try and swings perfectly. Now for some new hardware and it will be good to go for another hundred years.


Goodbye Sweet Dumpster

For the first time in almost a year we don't have a dumpster blocking the driveway (driveway is an exaggeration, dirt is more accurate). It was a bittersweet moment as we watched the dumpster leave. With one of those outside there is no project that feels like it cant be tackled. Now, we have to think, "ok, if we demolish this wall, where will the debris go?". But such is life and we will make do until we have enough debris piled up to warrant bringing a new metal box out for a dumpster filling weekend. We expected having it gone would make a big difference in how things felt, but I guess our minds always knew it was temporary because at the end of the day it was no big adjustment visually for us. Anyways, rambling is finished, now please enjoy these pictures:
 

Kitchen Reminiscent

It is still far from complete, but the kitchen is starting to take shape. There will be lots more details to follow regarding tiling and lighting and layout choices, but for now, here are a few pictures to prove that we do intend to cook in the big house one of these days.
 

New Old Floors

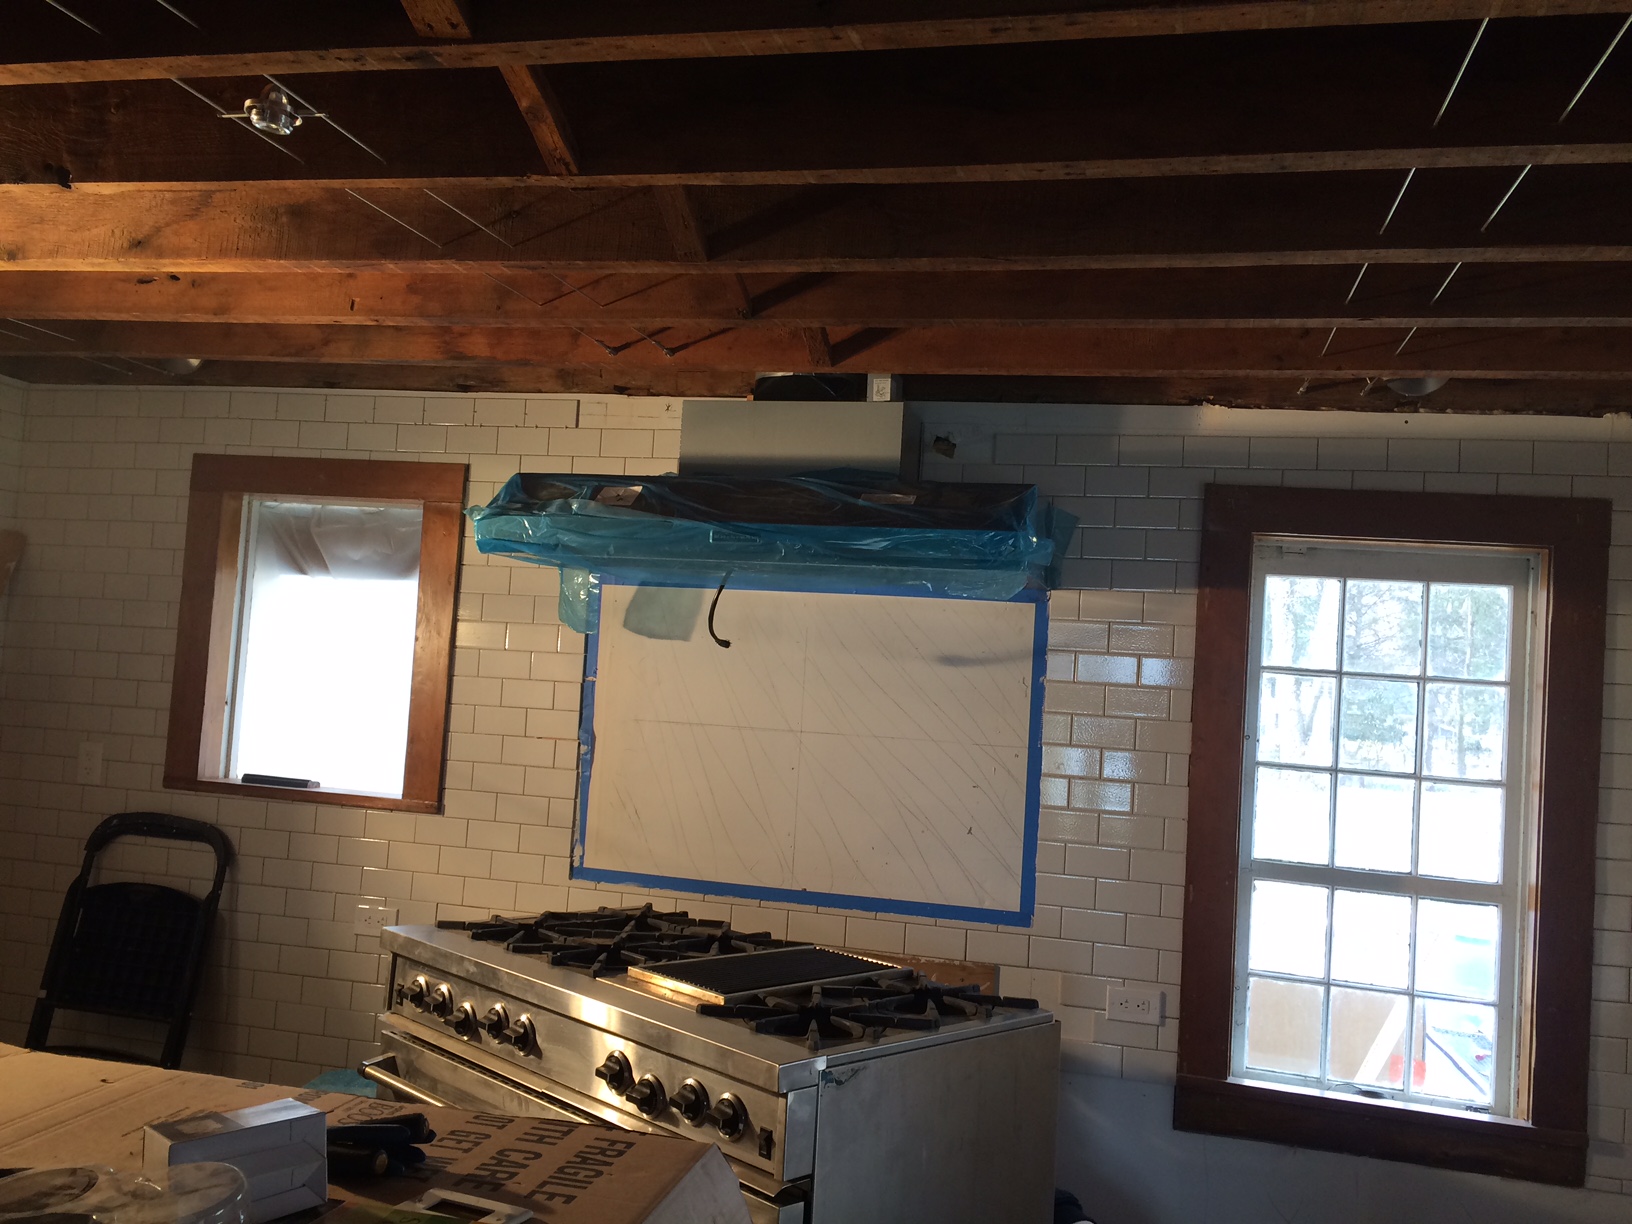
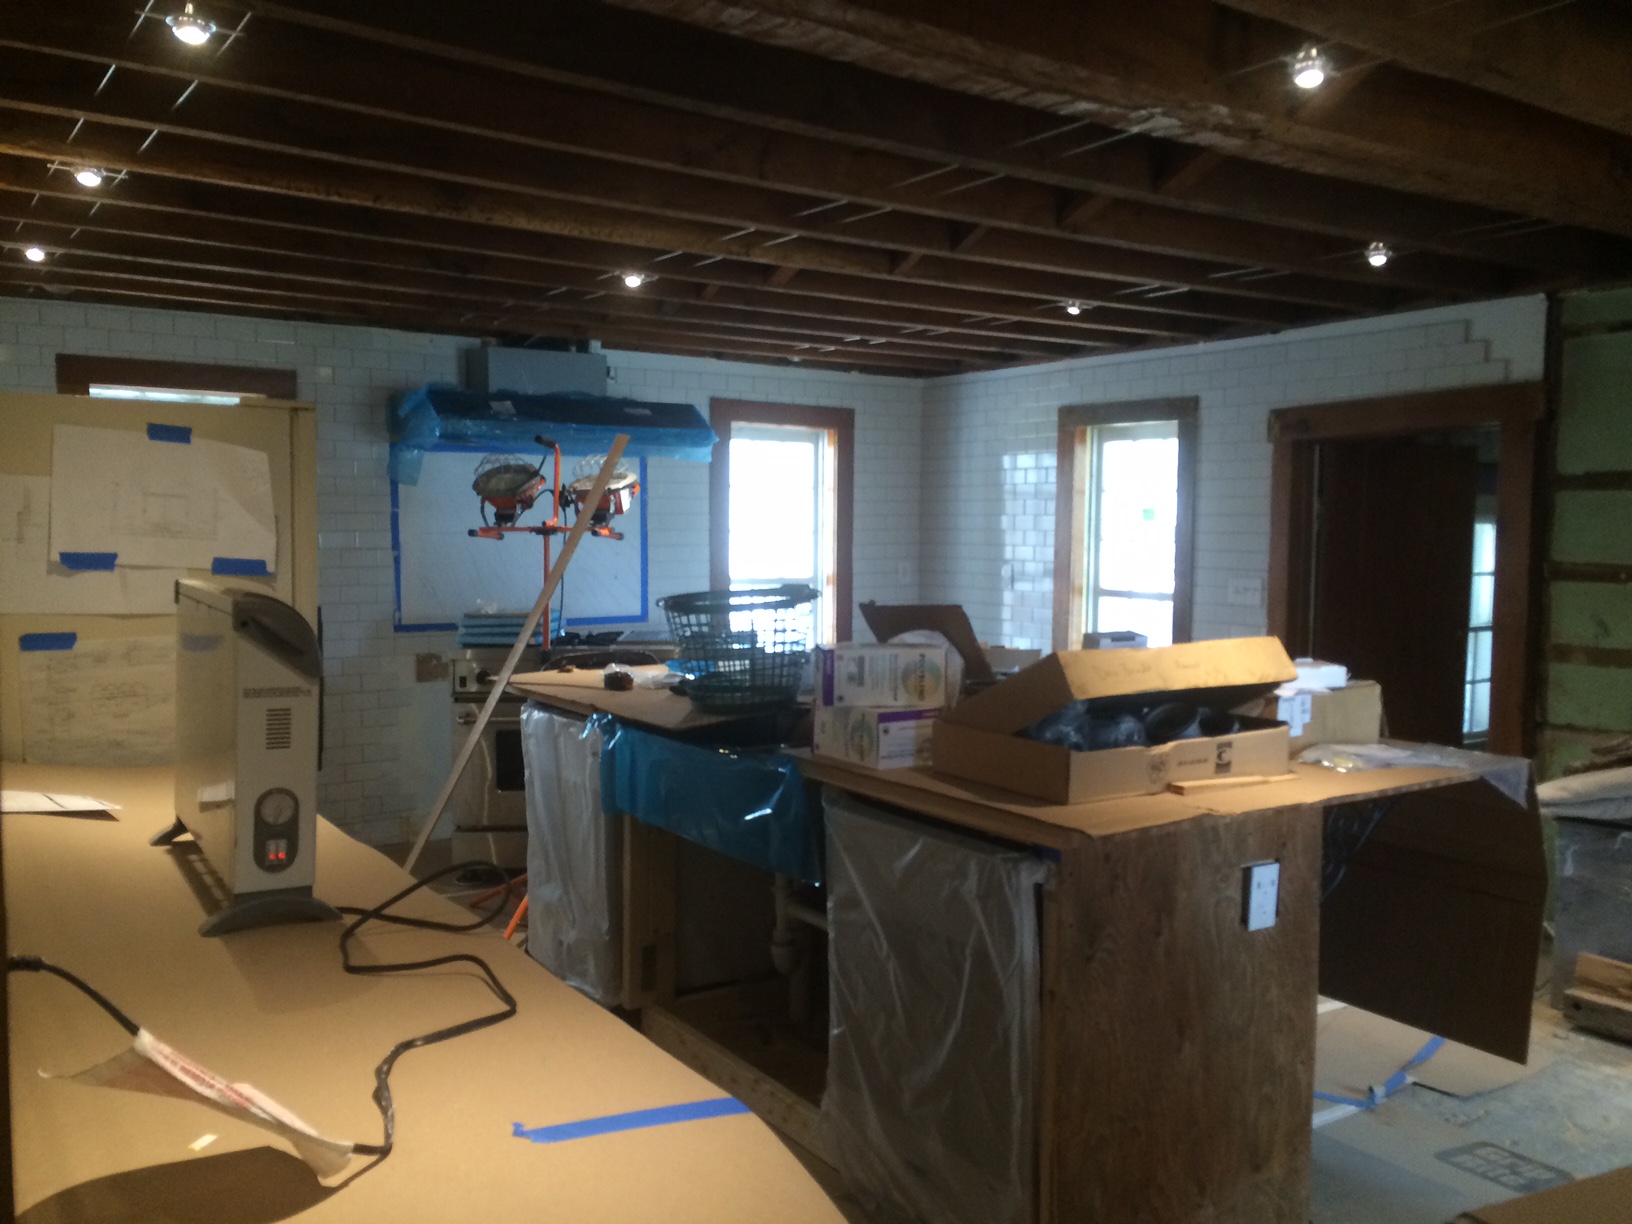
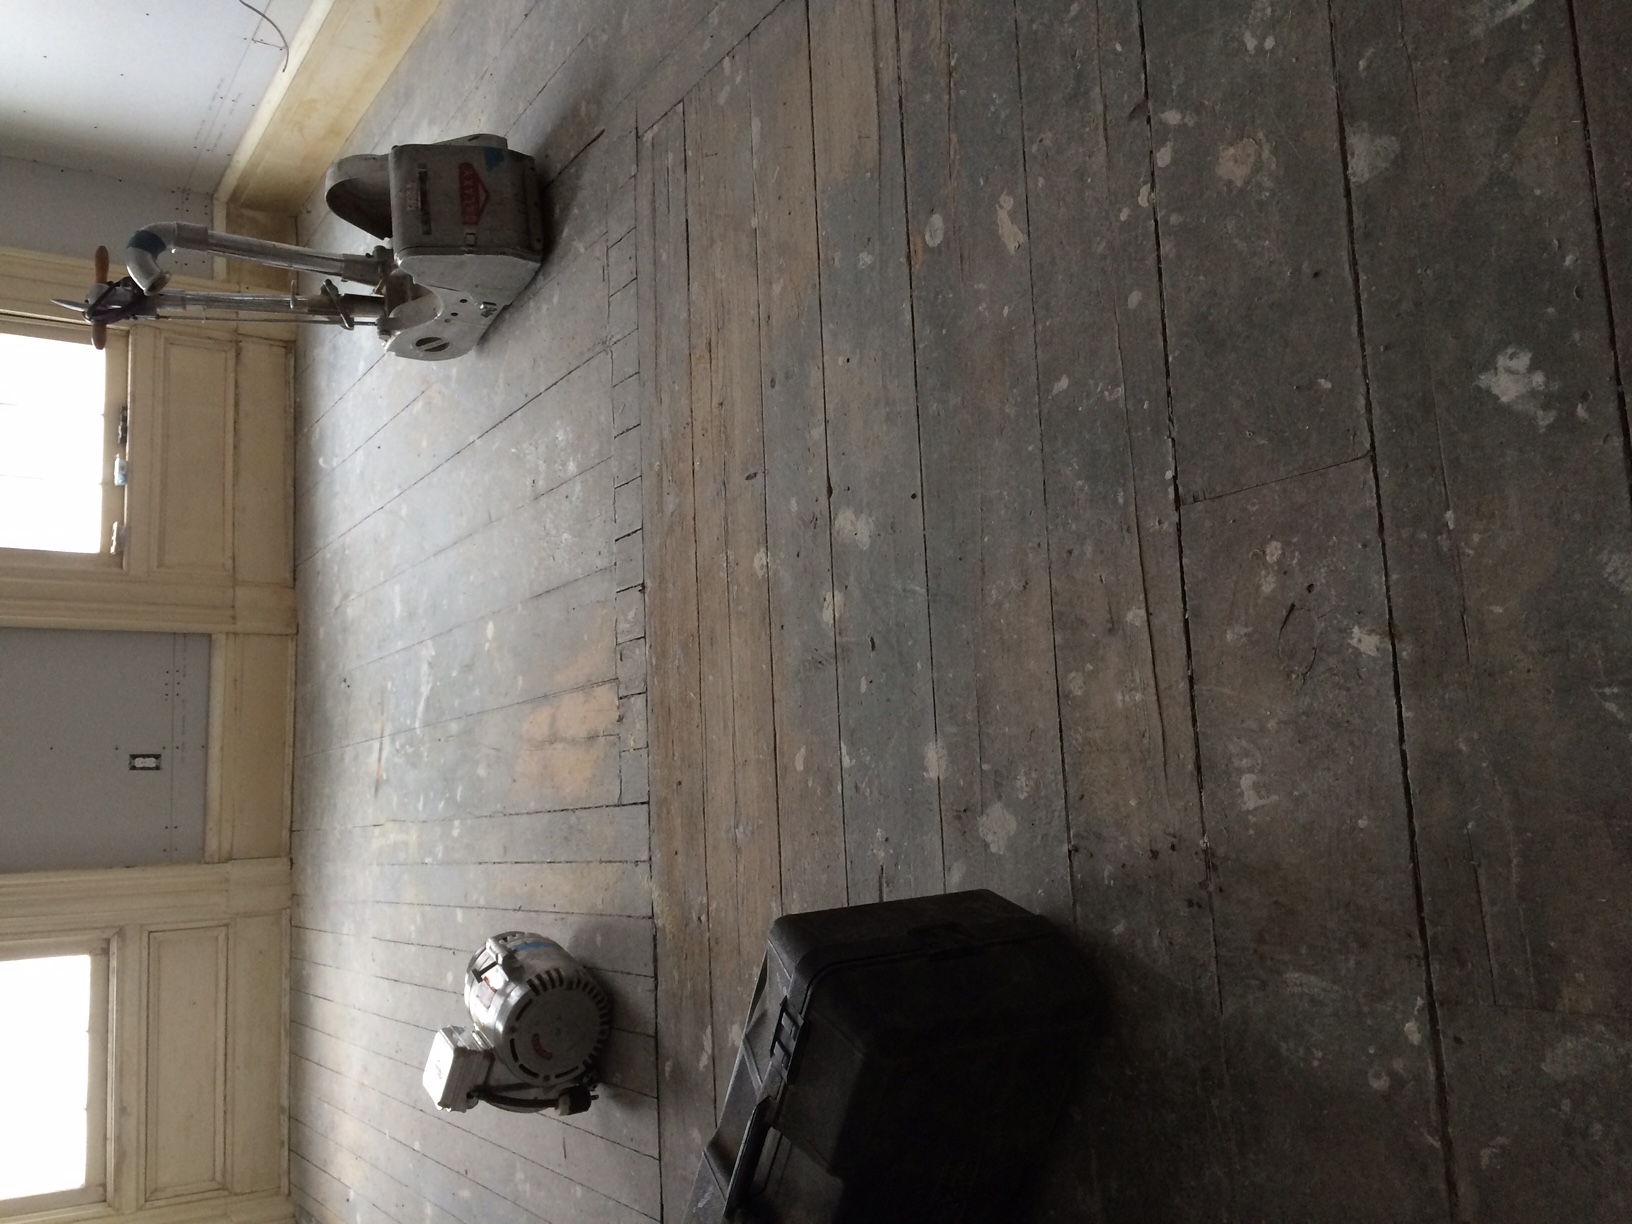
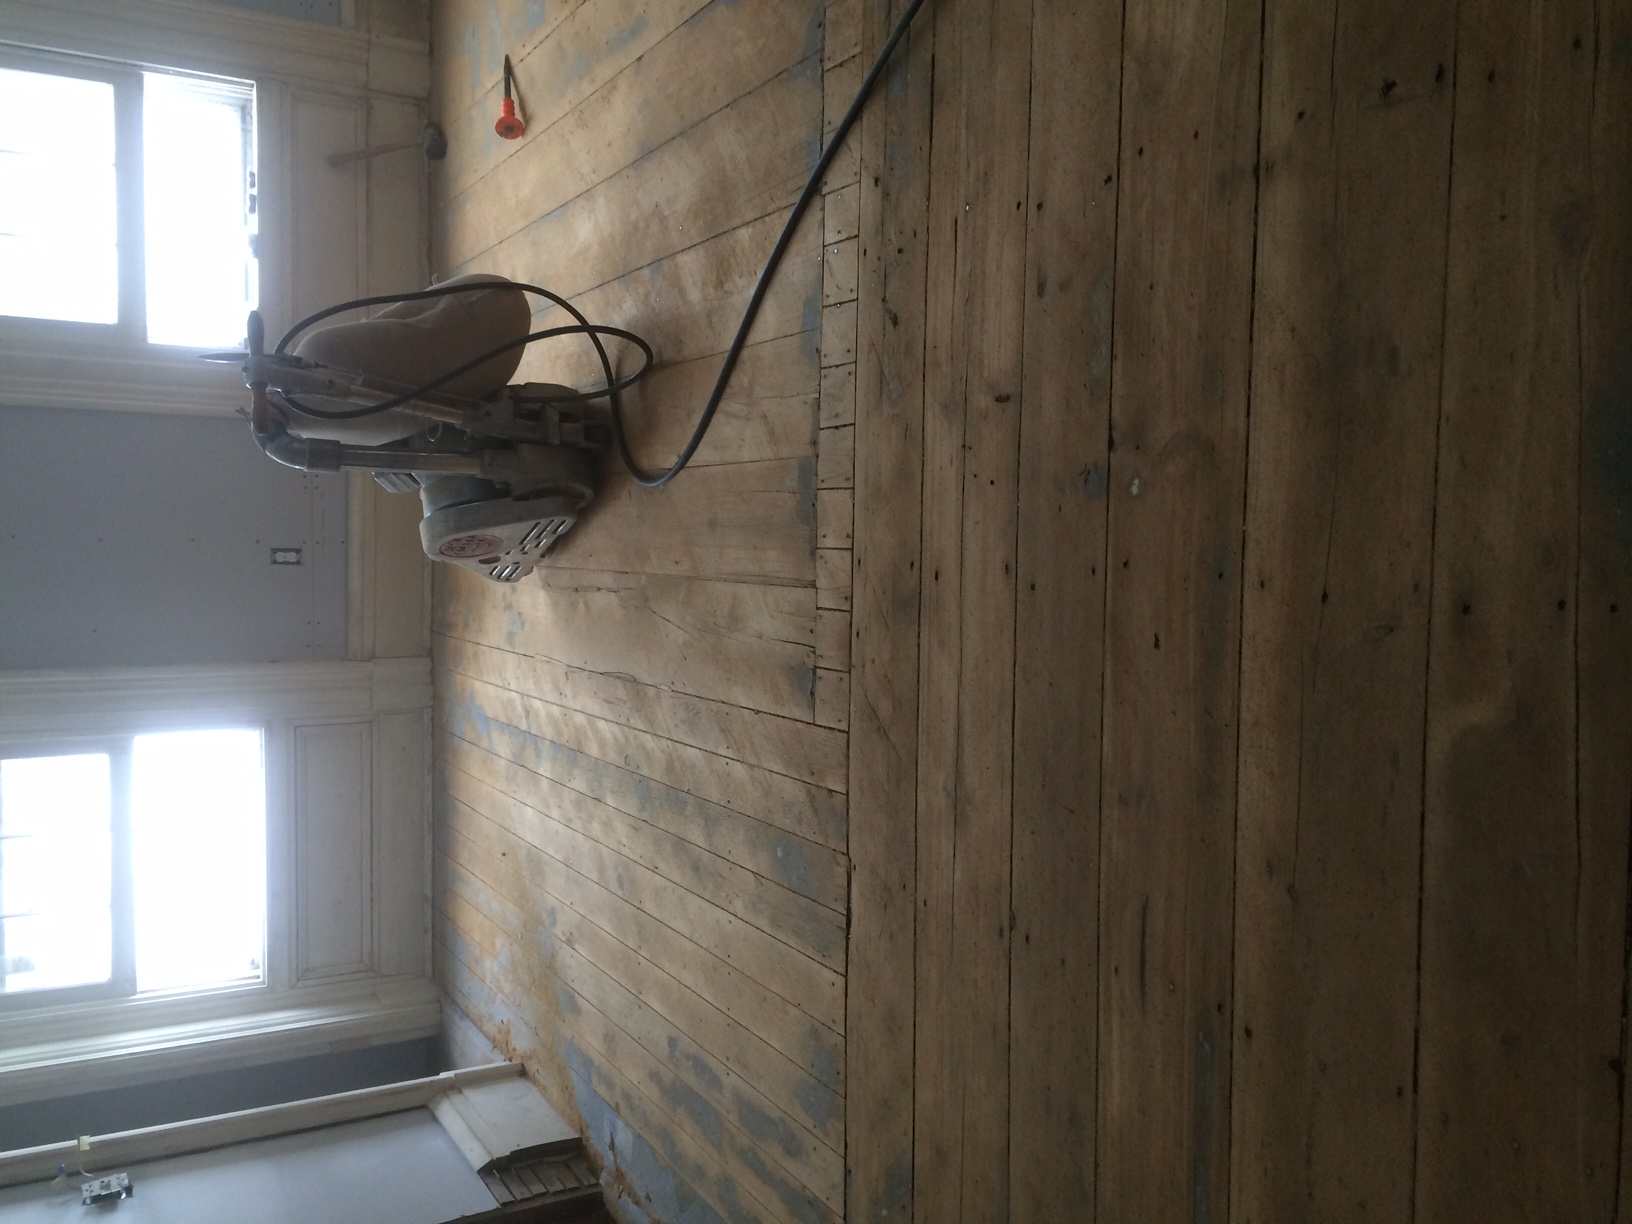
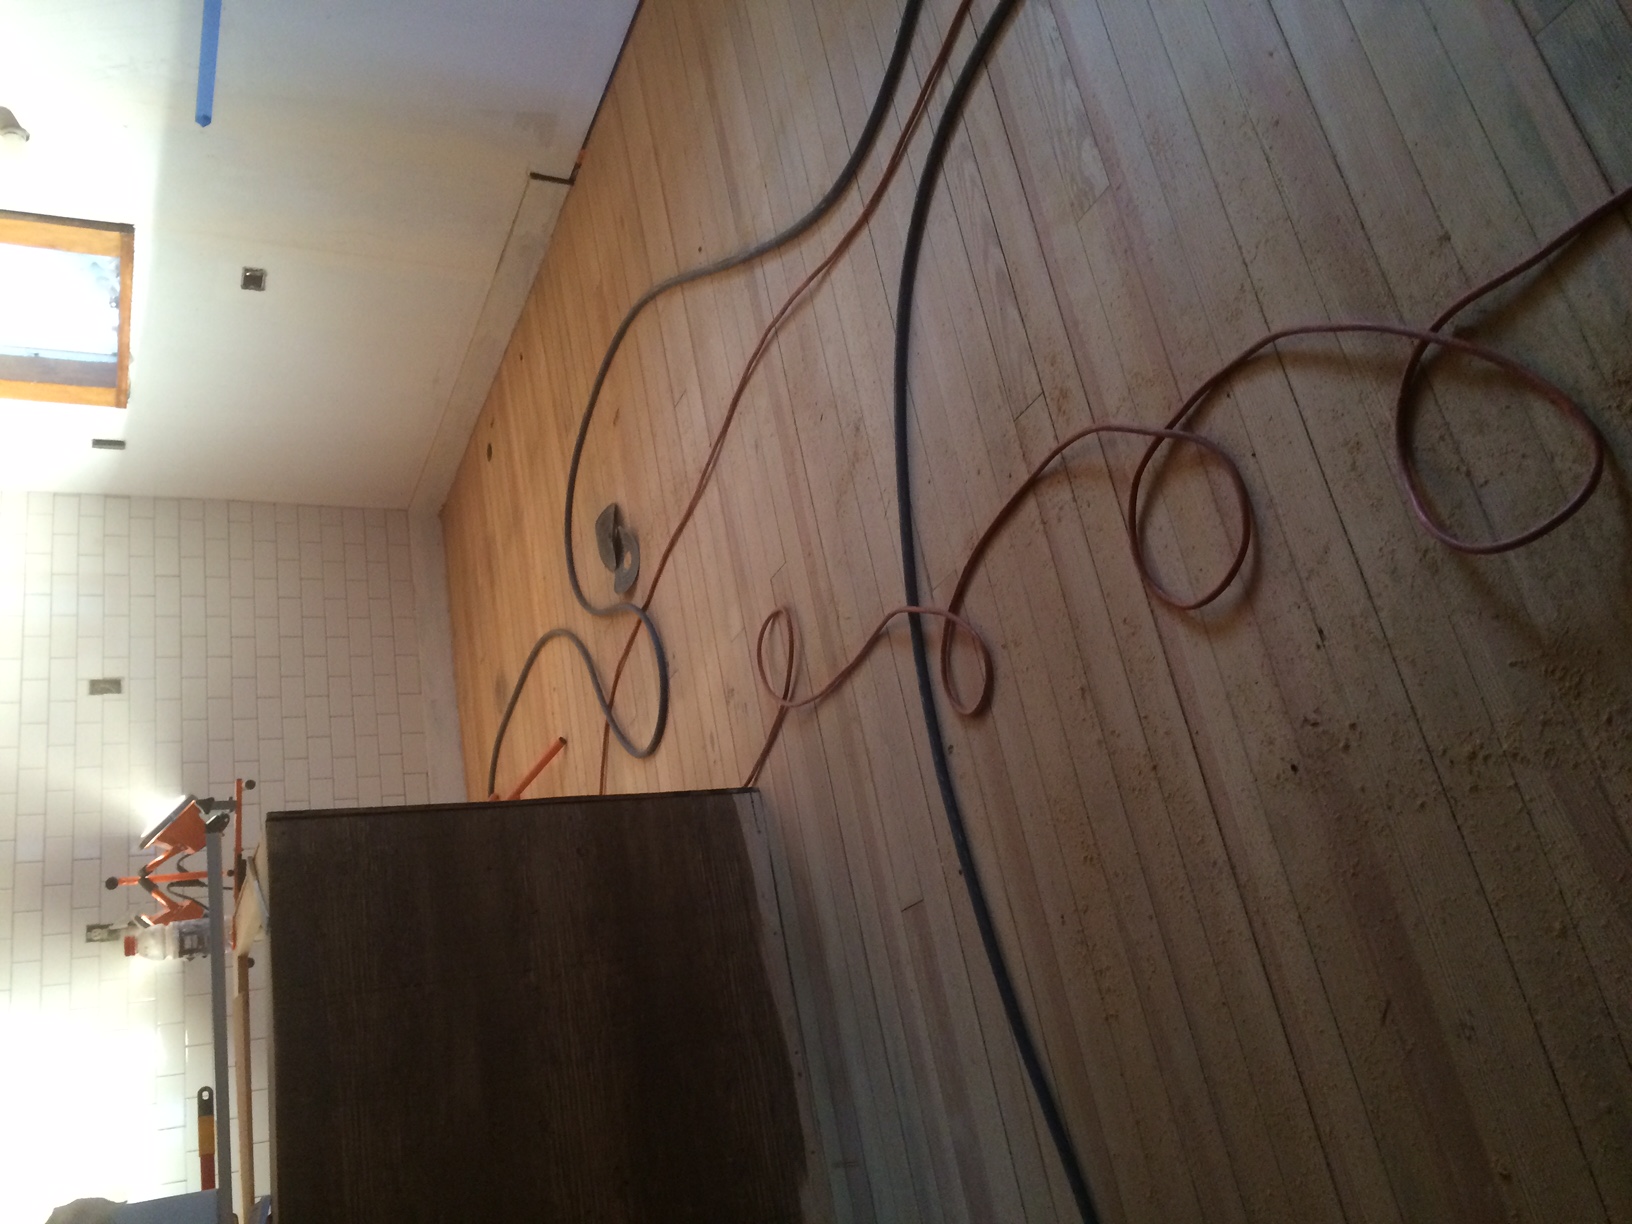
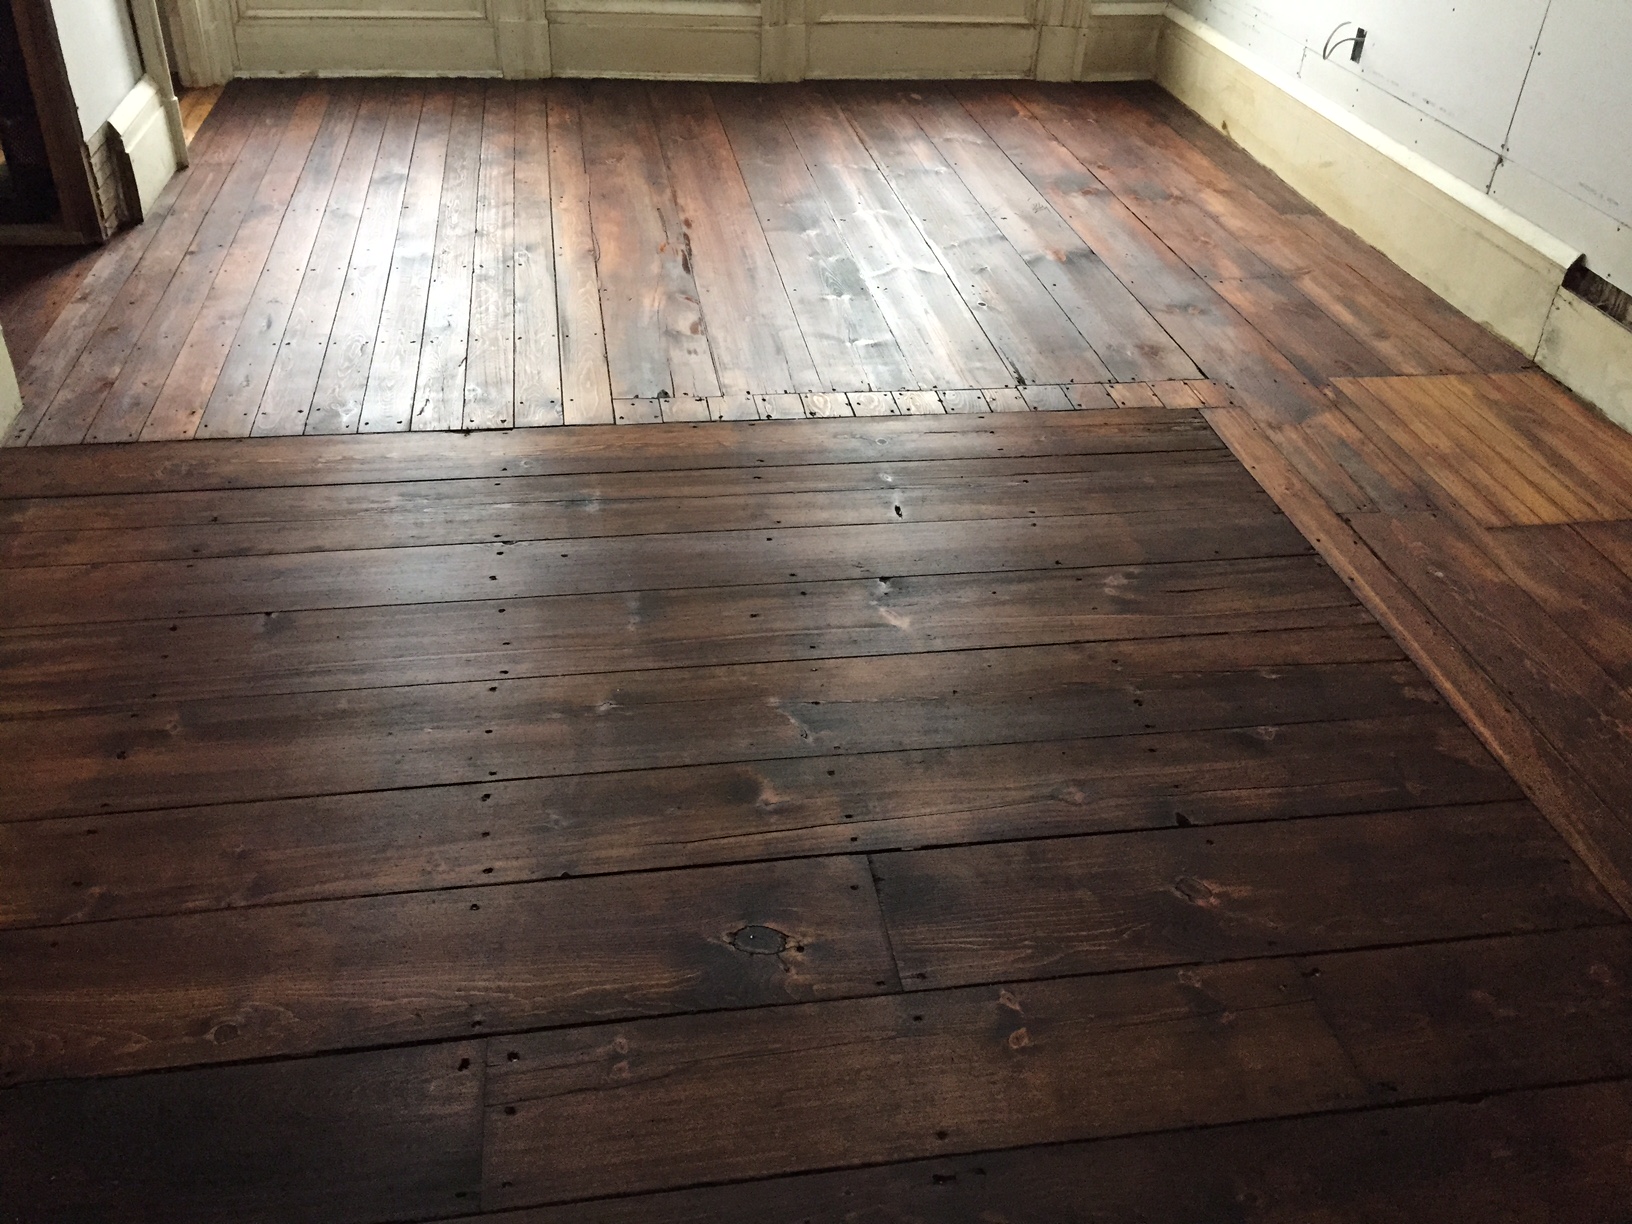
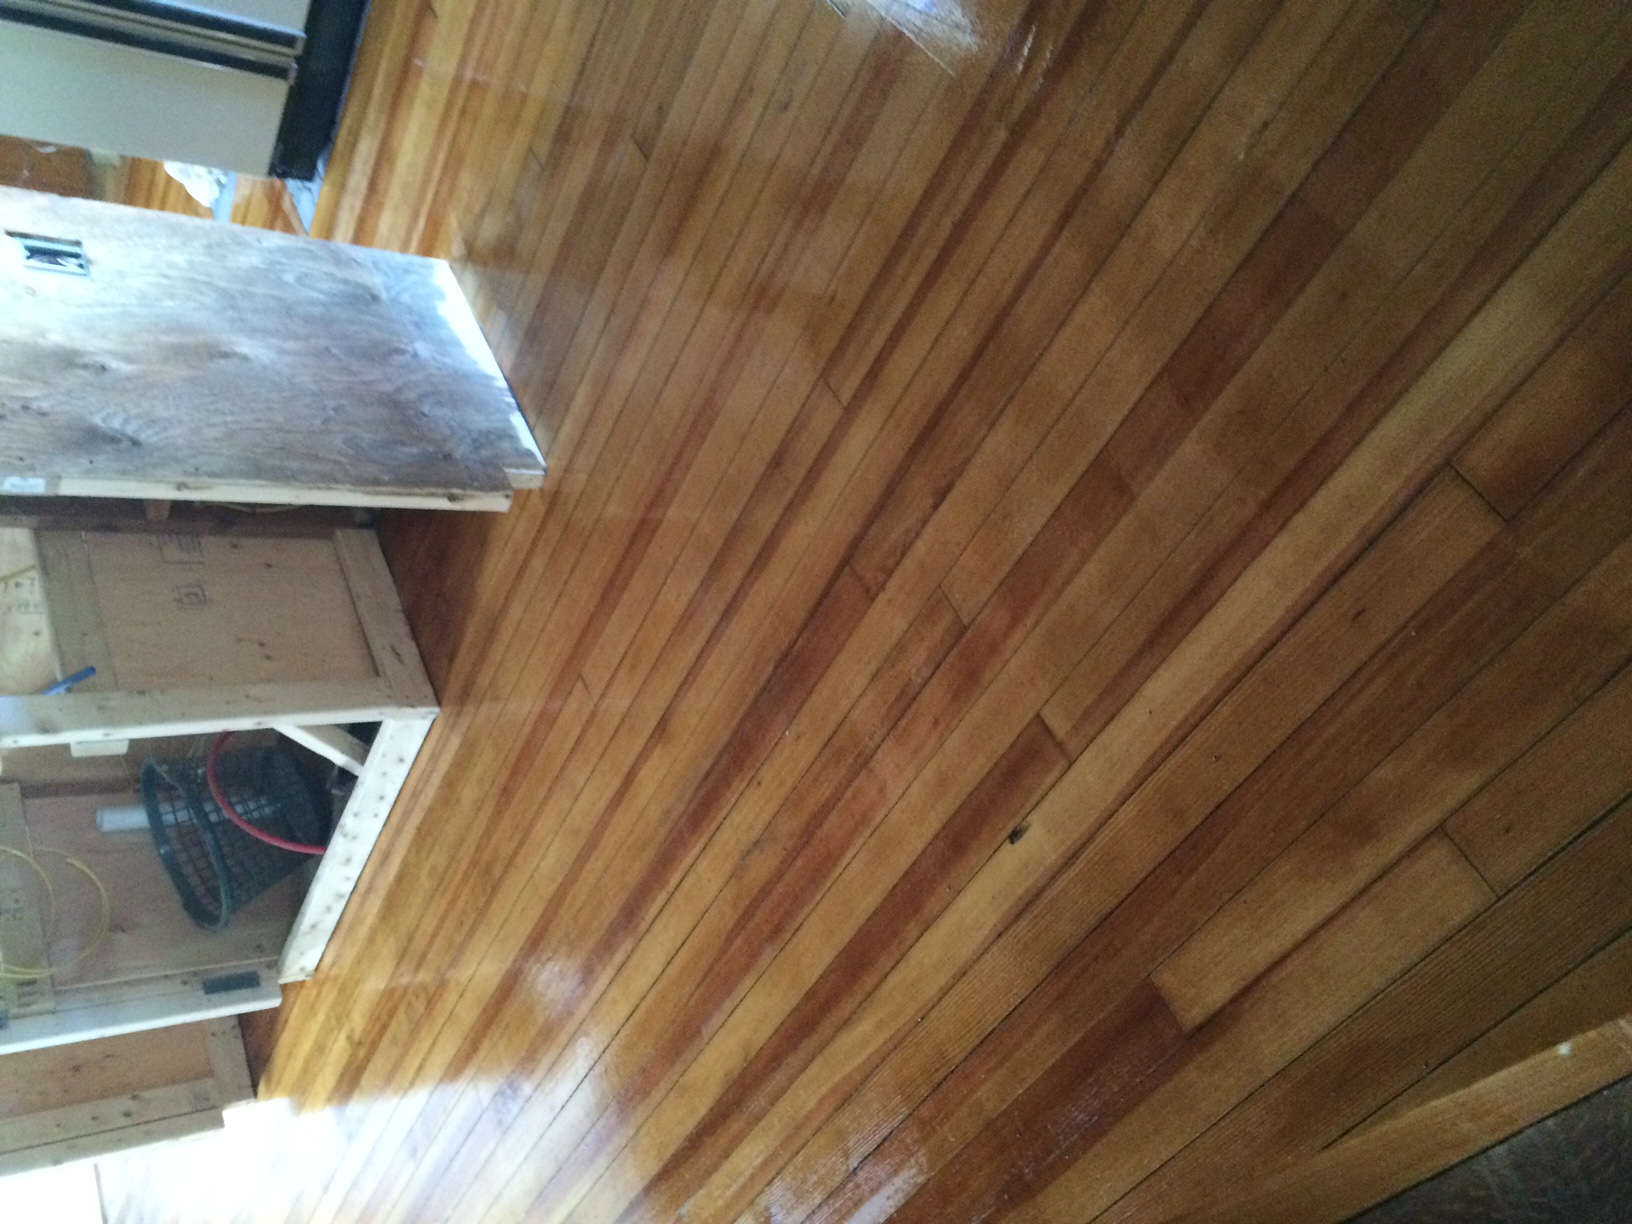
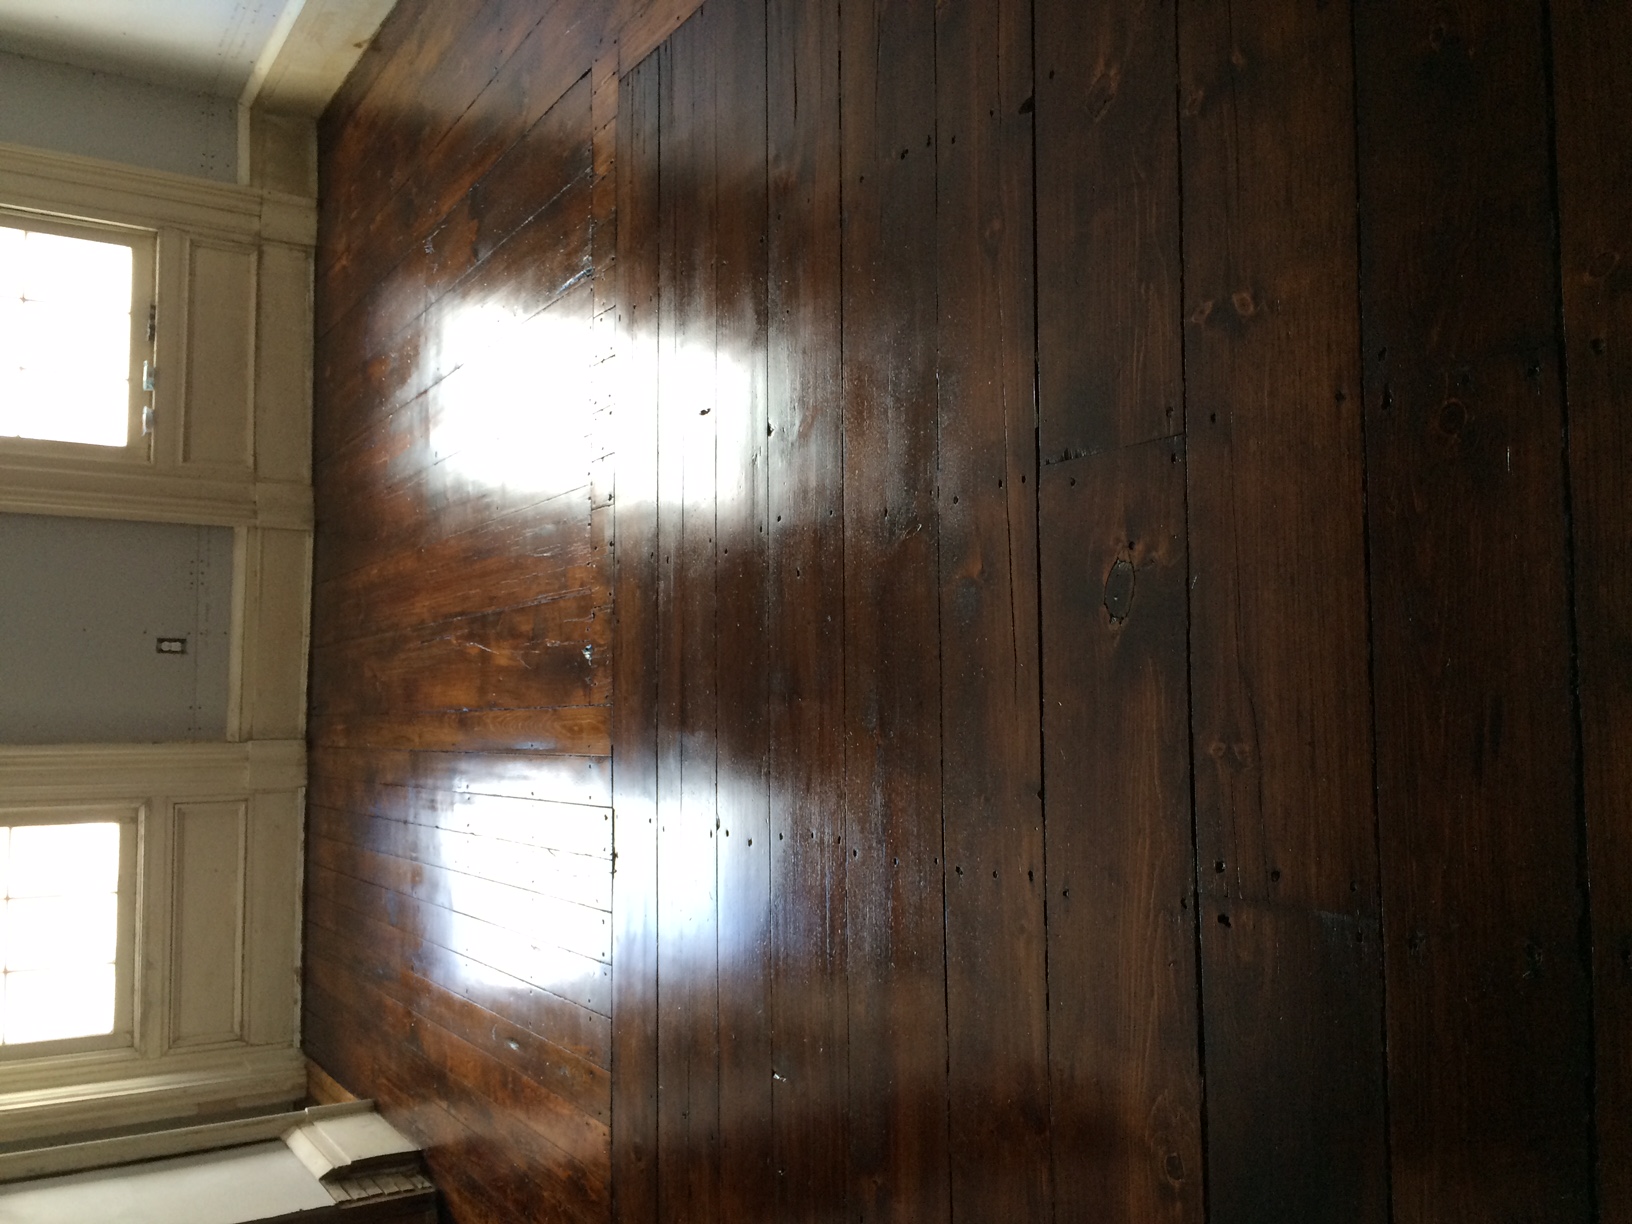
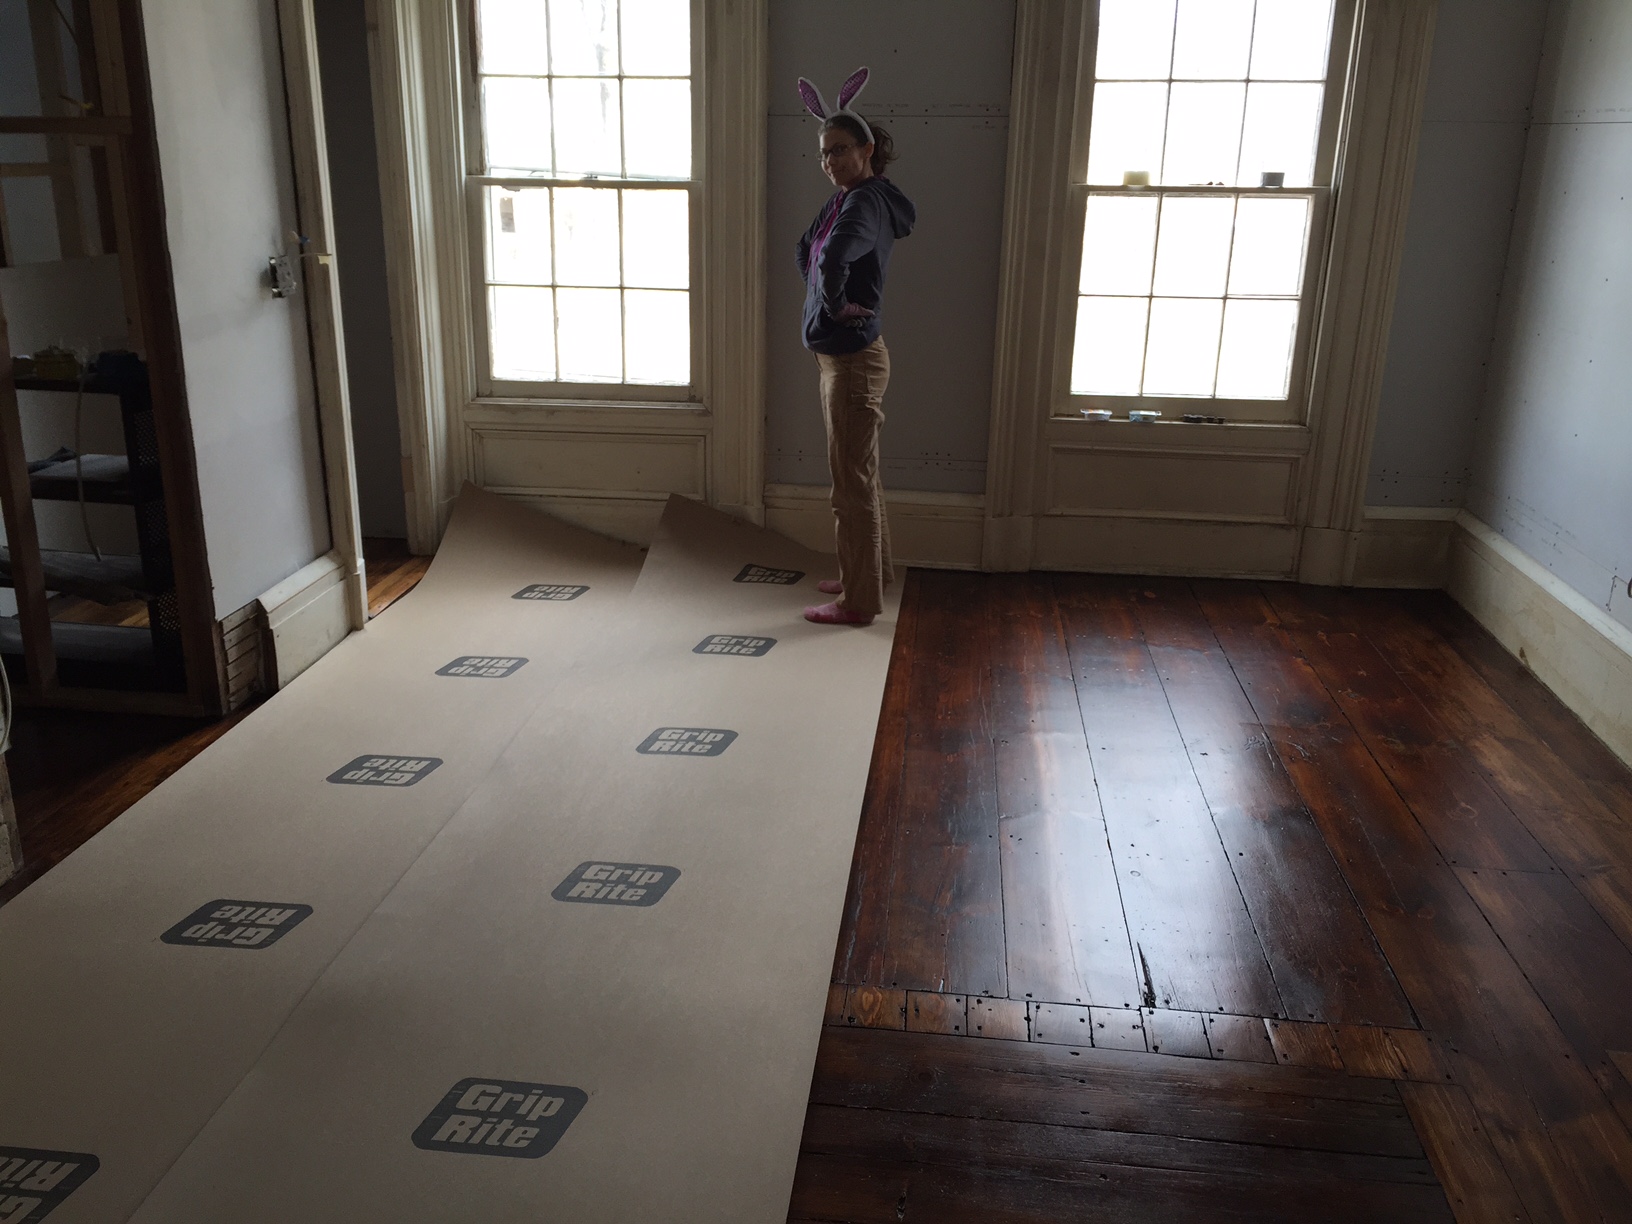
This house lacks for many things (a functioning shower comes to mind quickly) but one thing it does not lack for is copious amounts of very old wood flooring. For many of you that probably brings to mind images of wide plank boards with enough character that each plank could tell a story, and it's true, we have that. What we also have in a couple areas is vertical grain or "quarter sawn" heart pine flooring dating to the turn of the century. It is a much narrower plank, about 3" and so a very different look. We had high hopes for these floors, tempered by the fact that they have been heavily abused, stained, sanded, pummeled, dented, scraped, cut and painted….but they do tell stories. The TV room floor which does happen to be wide plank for the most part is a great example of story telling. If you walk into the room it looks just like that, a room. BUT, if you look at the flooring you will see a very clear history of the combination of two separate rooms and patching of what must have been plumbing holes in the smaller room. We went back and forth for months as to how to deal with them. Are they good enough to hand scrape? Do we have time to hand scrape? Is there enough to sand? Will we lose character? Should we just paint them? In the end the decision was to sand the floors in the kitchen (heart pine) and the TV room (wide plank old growth pine) and stain. We found a great local floor finisher who was reasonable and professional and who followed our request of "sanding without losing character", flawlessly. This sanding request is most evidenced by a step from the kitchen down to the pantry area, it has been worn down in the center by 100 years of use and he preserved that while bringing the grain back to life. With the floors sanded they looked 1000 times better than we expected, no, they aren't perfect, but they are exactly what we dared hope for. The heart pine turned out to have such beautiful natural color that we just sealed it and left it at that. The TV room floors would have also looked beautiful with a similar treatment but we wanted something dark and rich to go with the furnishings and rugs we have planned for that room. After much back and forth and custom stain attempts we ended up settling on a standard Minwax color, "Provencial" and then a satin topcoat for protection and sheen. The staining was arduous, first Carol and Semi (Ermela's mom) had to vacuum the entire room, then go over all the surfaces with tac cloths to make sure it was all clean as possible. Then they worked their way down the planks with one applying the stain and the other wiping it off with a rag. Because of the three different types/cuts of wood used in this one room they had to play with the application to wiping time for each one to keep the colors as consistent as possible. This is an example of when it is good to know what type of wood you are working with. The heart pine (yes there was some in this room used as a patch) being very dense and cut in a "quarter sawn" or rift cut was much less absorbent than the wide plank old growth pine which was plain sawn (the type of cut where you see more squiggles and patterns). Once the staining was done it was allowed to cure for a day and then the oil based satin top coat was applied. Normally we would use a two part water based sealer but we were not able to source it in the timeframe we were working with.

So, judge for yourself, what do you think of the end results?   
 

Unfortunately, we only got a couple days to enjoy the new floors. Construction waits for no man so we had to cover them up with builders board and tape the seems (for those of you who haven't guessed, we did this work on Easter). The trick now is to remember that the floors are done under the protection and that we have to be careful while moving drywall, appliances and equipment around.


Bzzzzzzzzzzzzzzzzzzzzzz

Bees, yup, we are getting bees, partially to ensure good harvests in the orchard and veggy garden but really so we can have real artisanal honey. Bees are not as easy as one would think though, they take a lot of setup and maintenance, their rewards are worth it though so this week Carol spent hours and hours assembling their future homes. Supers, frames, hives etc.. it all came in pieces and had to be put together nail by nail. She did a great job and we think the bees will be very happy come May when we pick them up and move them in!
 

Shifting Gears

Spring is here! Actually, that's a lie, but, it is time to start planning for spring, plants take time to grow and we want to maximize the growing season. First order of business, planting plans, I.E. figuring out what seeds we have (Graham got carried away ordering and at last count we had about +/- 30,000 to plant) so that will be fun. Organization is the order of the day, essentially making a page of notes for each variety that covers spacing, planting notes, harvest notes, planting successions etc...  
 

With those notes sorted out it was time to plant, so Carol got right to it....the pictures show flats of delphiniums, callas, geraniums and rhubarb. This is just a small taste of what is to come, by the time the last frost happens we will have thousands of plants eager to go out into the ground. It's is going to be a very colorful year on the farm. But wait, there was more planning to be done, the orchard had to be sorted out. So we ordered trees from Stark Wholsale, which is great from a price standpoint, but resulted in us having an orchard twice the size of what we were intending....as of now we need to find homes for about 140 trees.
 

So, there you have it, proof that spring is here, in a way. We are just holding on to dreams of sitting in the orchard, enjoying the fruits of our labor.
 

The Making of a TV Room

A TV room....what makes a TV room? The obvious answer would be "a TV" but here at the farm we take our small modern pleasures seriously. So, what makes OUR tv room a tv room? The answer is... copious amounts of thermal insulation to make it warm and cozy, huge sheets of rubber acoustic insulation to make it quiet, enough data cables and lines to make it look like we have a nest of skinny snakes in the walls and of course, a free standing popcorn maker. We may have jumped the gun on the popcorn maker, but seeing it's box offers incentive to finish the room. The TV room has been one of the most complicated spaces for us because it has lots of architectural detail to work around, and with the walls and ceiling open it provided opportunity to upgrade and run wiring, heat ducts and plumbing lines to several areas.... Never fail to take advantage of an open wall or ceiling. This past weekend as the snow was falling outside and the car was getting harder and harder to see under the drifts, we decided it was time to start closing things back up.    
 

The view from the TV room while we were working. Our mini orchard will probably go in this area in the spring.
 

So while mother nature provided ample incentive to stay indoors, we got to work. The first thing to do was make sure all the wiring was clearly labeled so that once the drywall is in we will still know what goes to what. With that done we got down to insulation. Normally when insulating a ceiling the joist spacing is standard and you can just use pre-cut wires that spring in between the joists and hold the insulation up. Our framing is anything but standard so we had to custom cut every single wire, (think thick hard to cut wire) about 200 of them. So the room is split by a beautiful old arch, the outside side of the arch has roof above it, so requires insulation similar to an attic. The inside side of the arch has the second floor above it so requires an interior level of insulation. We used an R-38 fiberglass batt with vapor barrier for the exterior exposed side and an R-13 without vapor barrier for the interior side. We cut the batts to fit snugly (Carol does this with scissors and affords each batt the same level of attention as she would were she making a dress). Graham pretty much stood on the ladder cursing most of the day, not unusual behavior for him. The trick with insulation batts is to get a tight fit so that air cant pass around them, but not to compress them so that they lose insulating ability... not hard, just time consuming, and if you are using the yellow contractor grade stuff, make sure you wear a mask and glasses.  
 

If you look closely at the pics you can see some of the IC rated high hats, they will provide even lighting, but the intent is to put them on a dimmer so that we can get that little theatre experience of the lights going down before the show. With the room insulated and immediately warmer and more comfortable to work in, it was time to run the data lines. Things are moving more and more wireless, but we still wanted to have enough HDMI/composite/Cat6/optical cables to be able to put things in the tech closet and not have to have visible wires hanging down from the TV. It was not too hard, just a matter of ordering a bunch of 10' cables and running them through the wall so that eventually they can be hooked to boxes which will be behind the TV and behind the cabinet where the electronics will be stored. A little planning here should (fingers crossed) save us trouble down the road.

Now for the fun part, the acoustic matting. This stuff is dense, and heavy and it does not want to unroll. It really just takes some practice, and thankfully it cuts easily. Our system was to unroll it up the wall and staple the top edge and then work our way down. We used 1/2" staples, anything shorter just ripped out under the weight. Once the matts were up we went over the seems with high quality duct tape. The drywall will go right over it just like a normal installation.
 

So, what makes a tv room a tv room??? A whole lot of advance planning. Can't wait till we can kick back and watch a movie in here.

Women of Patience

"Women of Patience" is the nickname for Ermela and Carol's "crew" (we still need to get the shirts made). Over the winter break the crew made significant progress in the very careful deconstruction of a door frame/molding in the TV room and the de-fenestration of many many old windows (can you de-fenestrate a window?...taking the glass out, let's keep it simple here). The future TV room is graced with not one nor two, but three different entrances. The largest of which had a temporary cover of drywall and leads to the central living room, the second goes to what will be the downstairs full bath, and the third comes off the front entry hall. After tinkering with imaginary couches and TV's on floor plans we decided that door number one makes the most sense for furniture layout and flow. The problem with door number one is that it lacks trim, shocking because trim is not something this house generally lacks, but there you have it, we were at a trim deficit. To make matters more problematic, the trim in the future TV room is perhaps some of the most beautiful and hard to replicate in the house. We noodled on it for a while and finally decided to remove the trim from around the closet which will be re-worked as a media niche and move it door number one. Easier said than done. Our predecessors on this house going as far back as the beginning had no concept of task appropriate nails. Every bit of that beautiful trim is held together with big hand cut framing nails. The only solution was for the Women of Patience to spend hours with thin chisels, hammers and scrapers carefully cutting the paint at joints and opening small gaps to allow the chisels in to cut the nails. It is important to cut the paint first as it prevents splintering of the delicate edges. It really was amazing to see how these massive moldings were put together, true skill and artistry from another era.
 

With the individual pieces out the next step was to repair any damage, and clamp the pieces back together to prepare them to re-installation and finishing.
 

The next trick will be mounting the trim we just removed to the inside of the door to the living room, the inside trim is for a slightly smaller door so we will have to create some sort of step down that looks appropriate to the trim style visible on the living room side of the door which is completely different. It is the little differences and clues like this that help us piece the story of the house together.