Drywalling

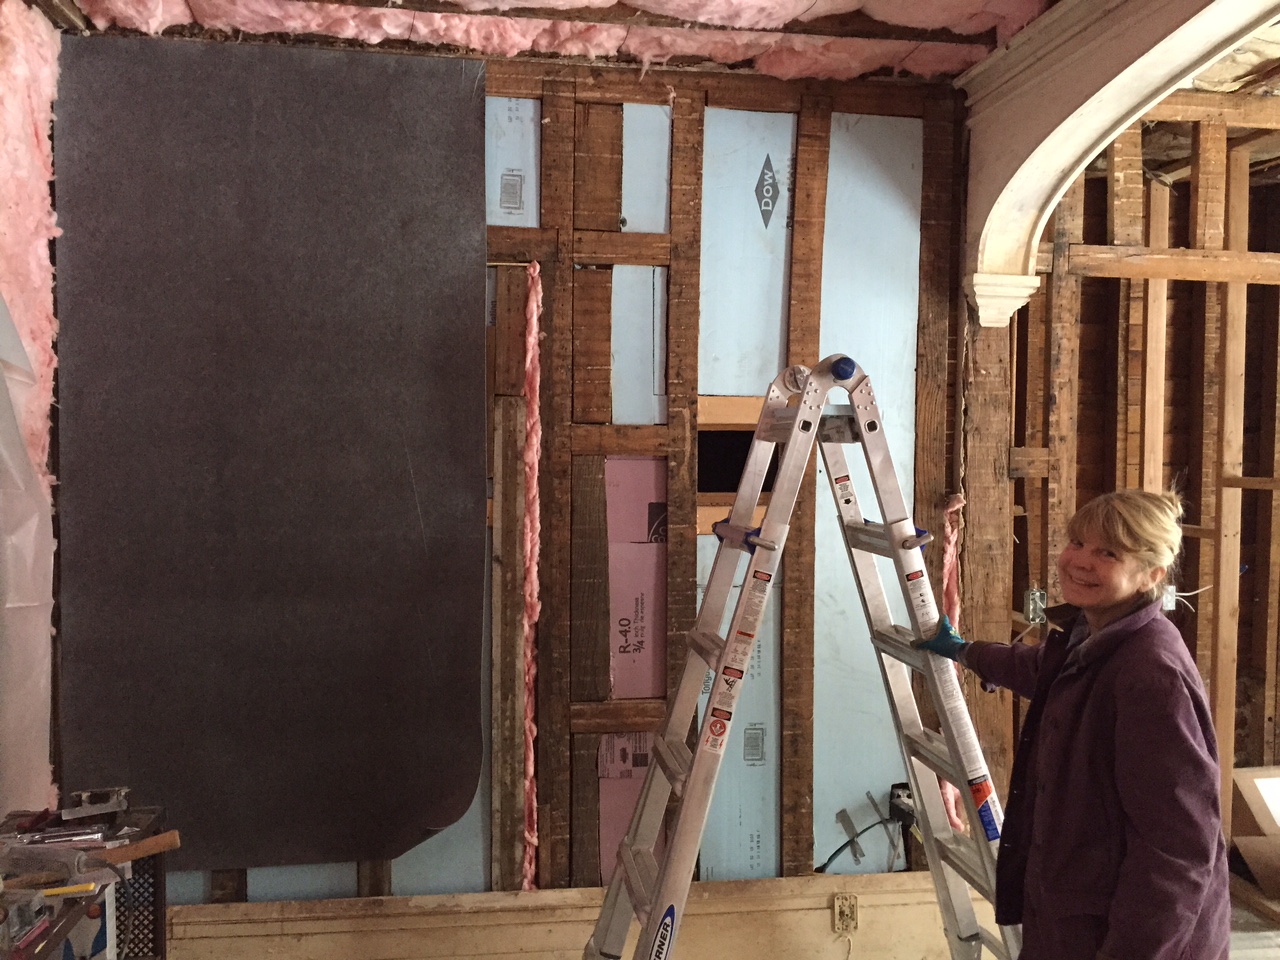
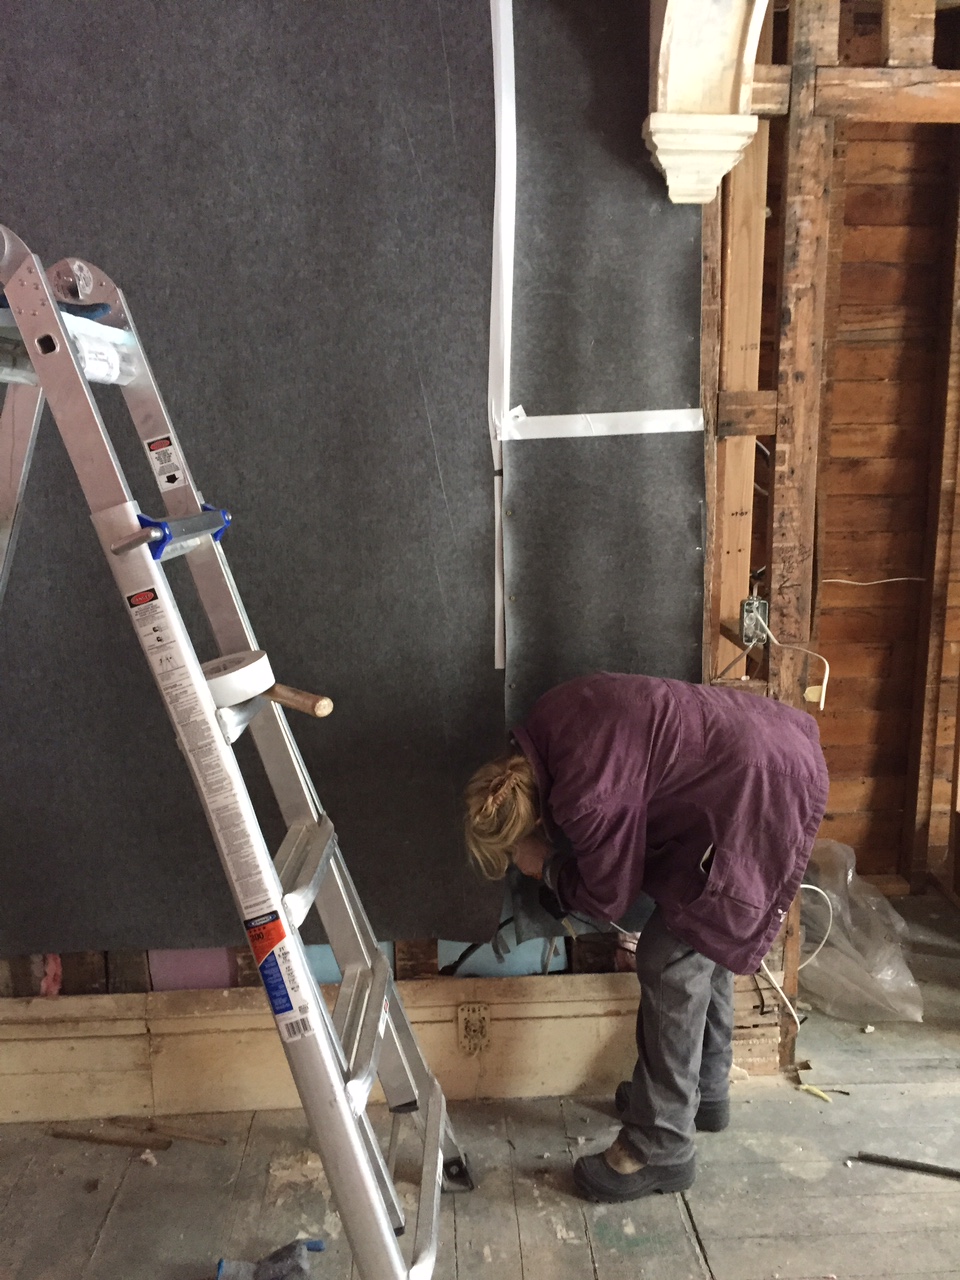
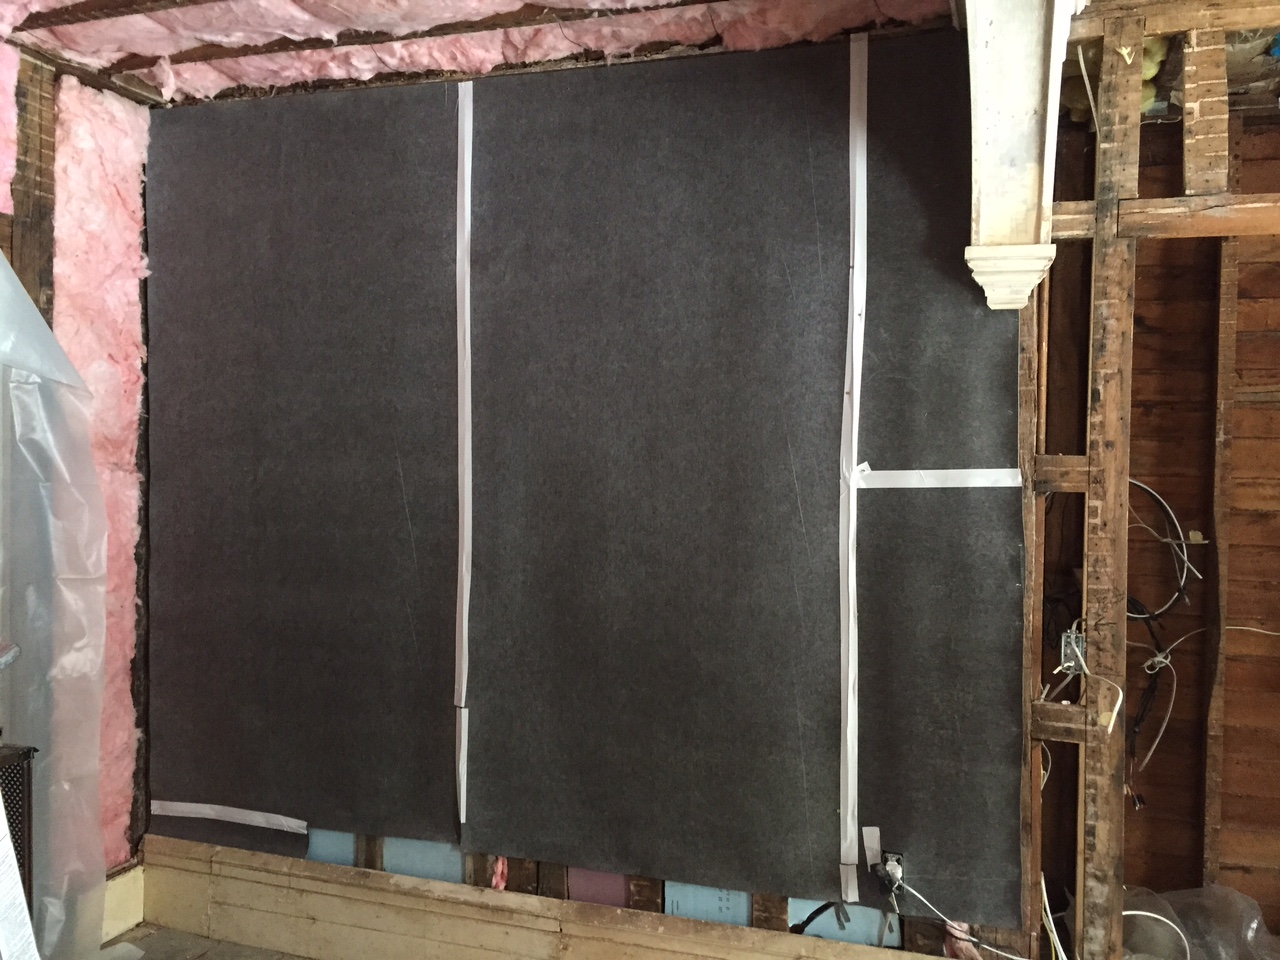
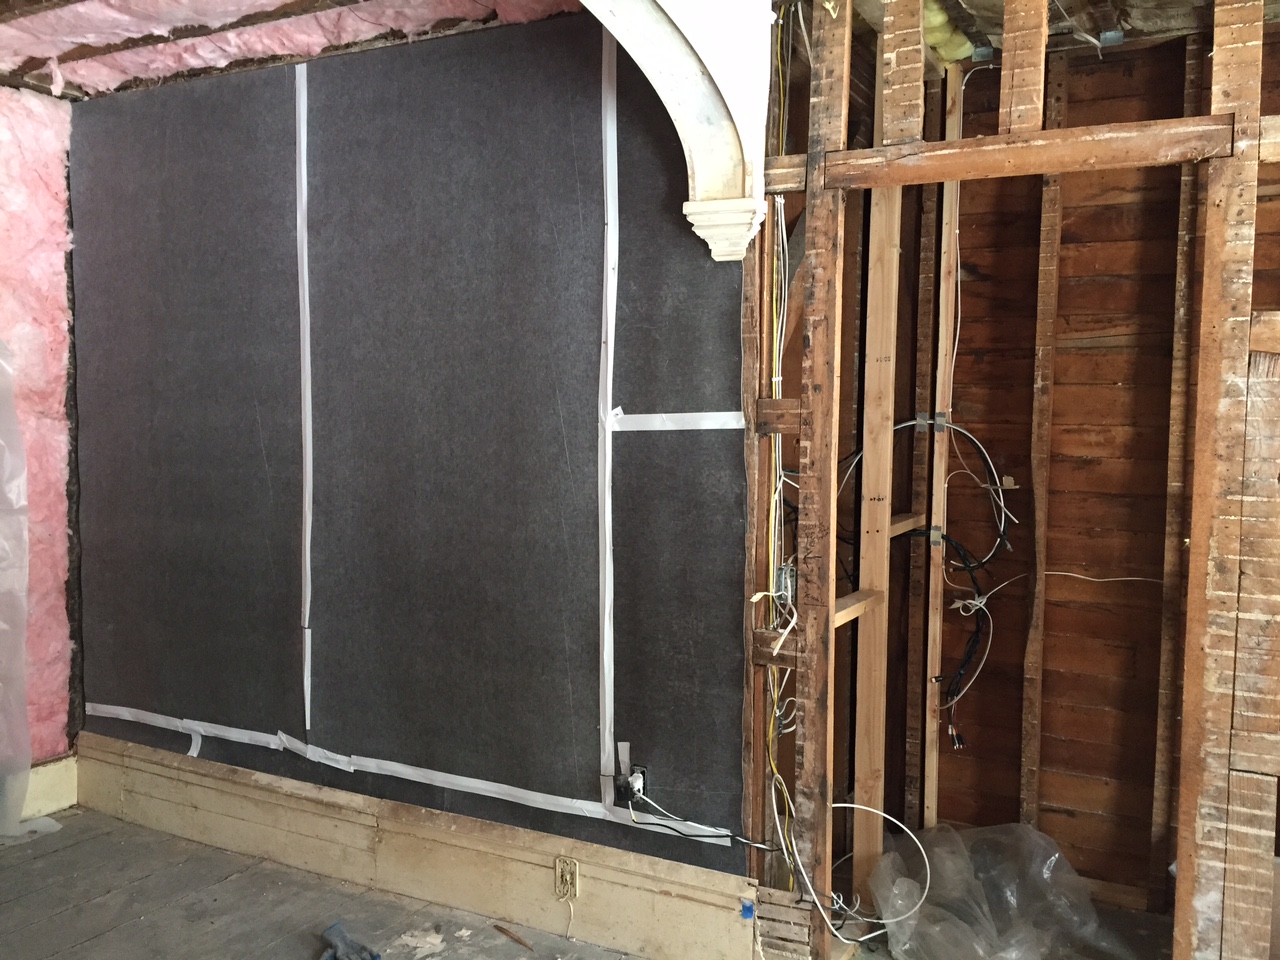
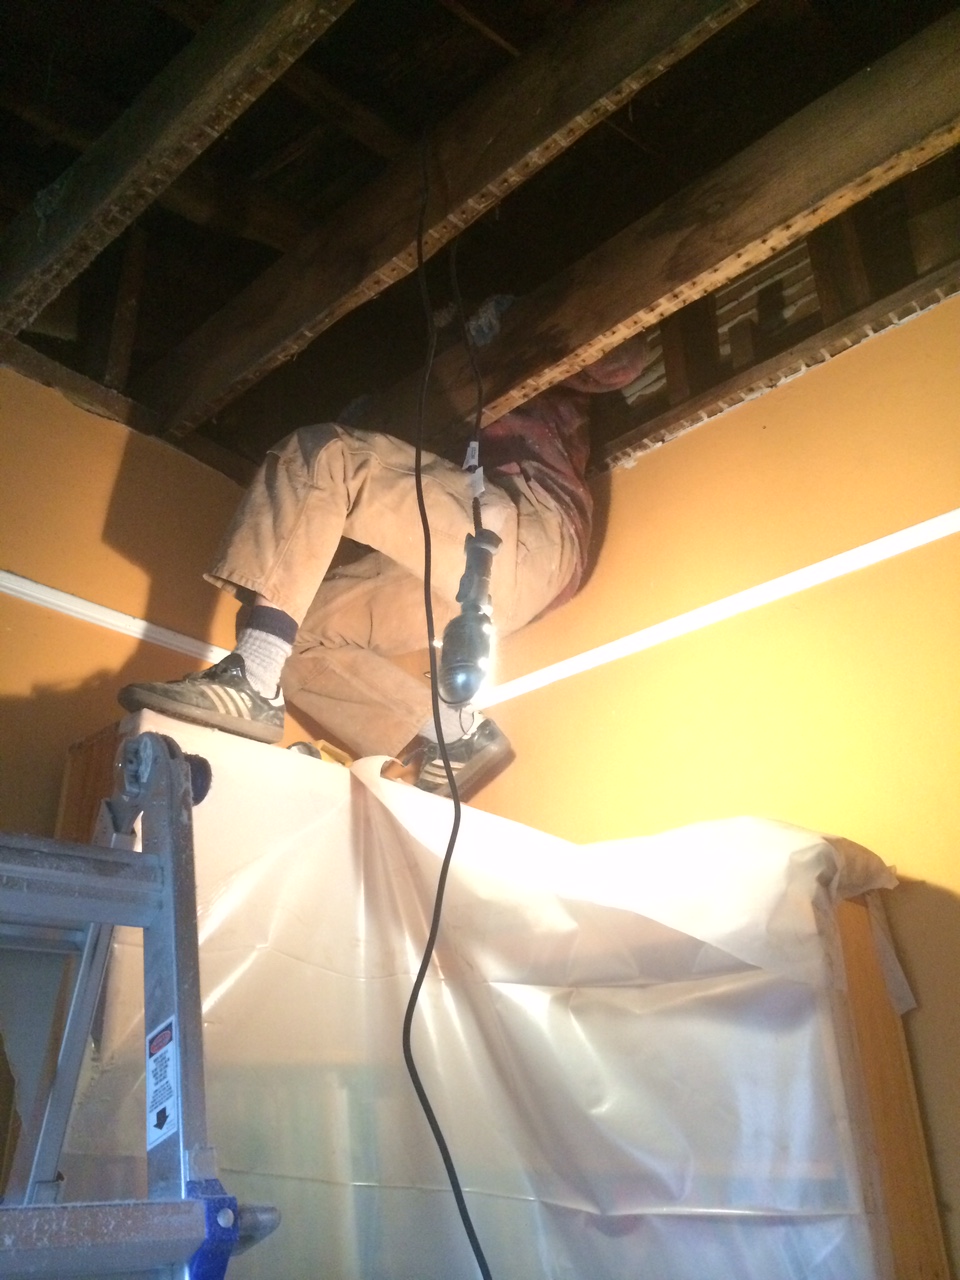
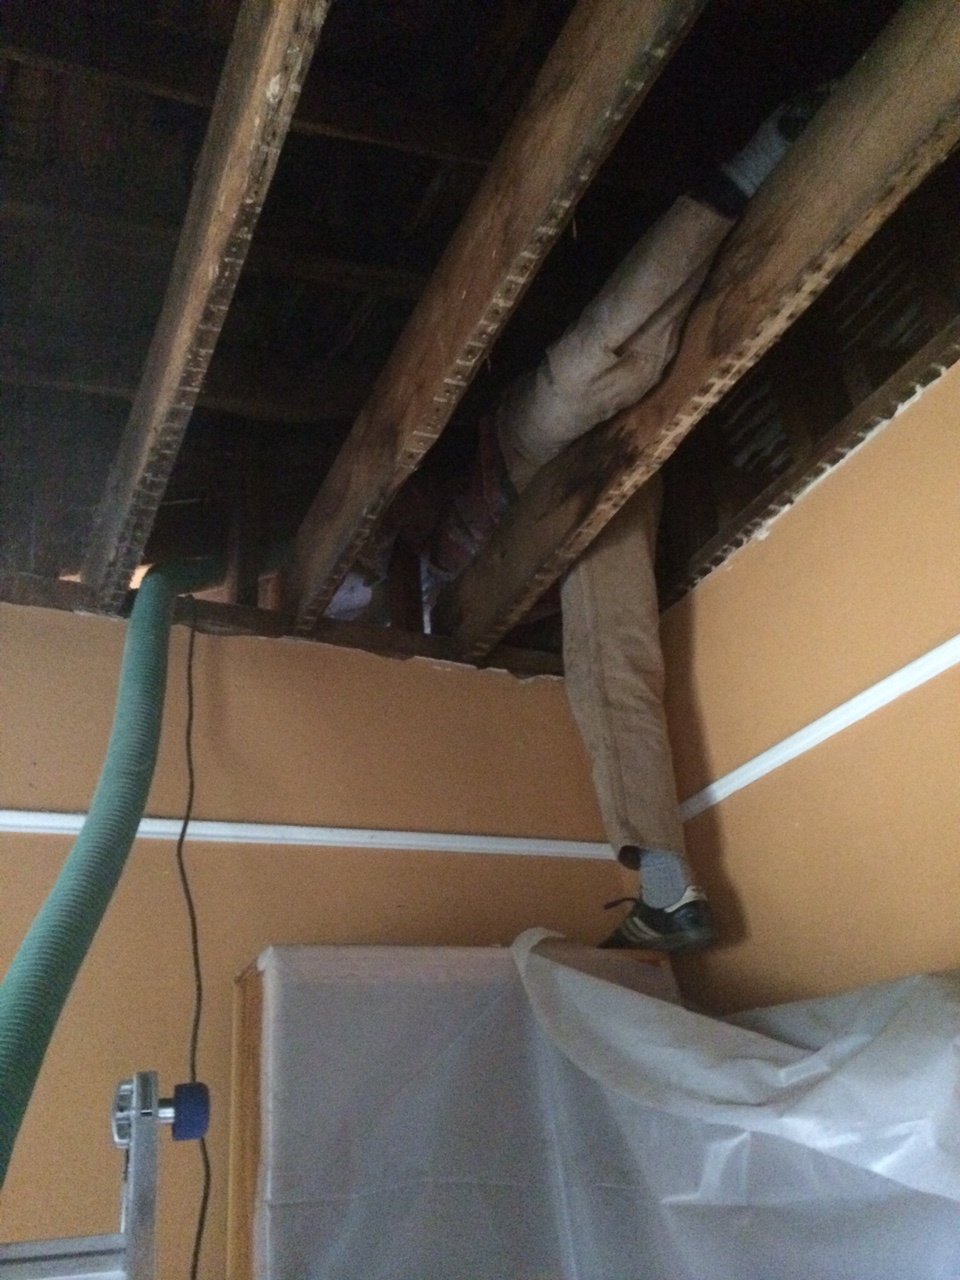
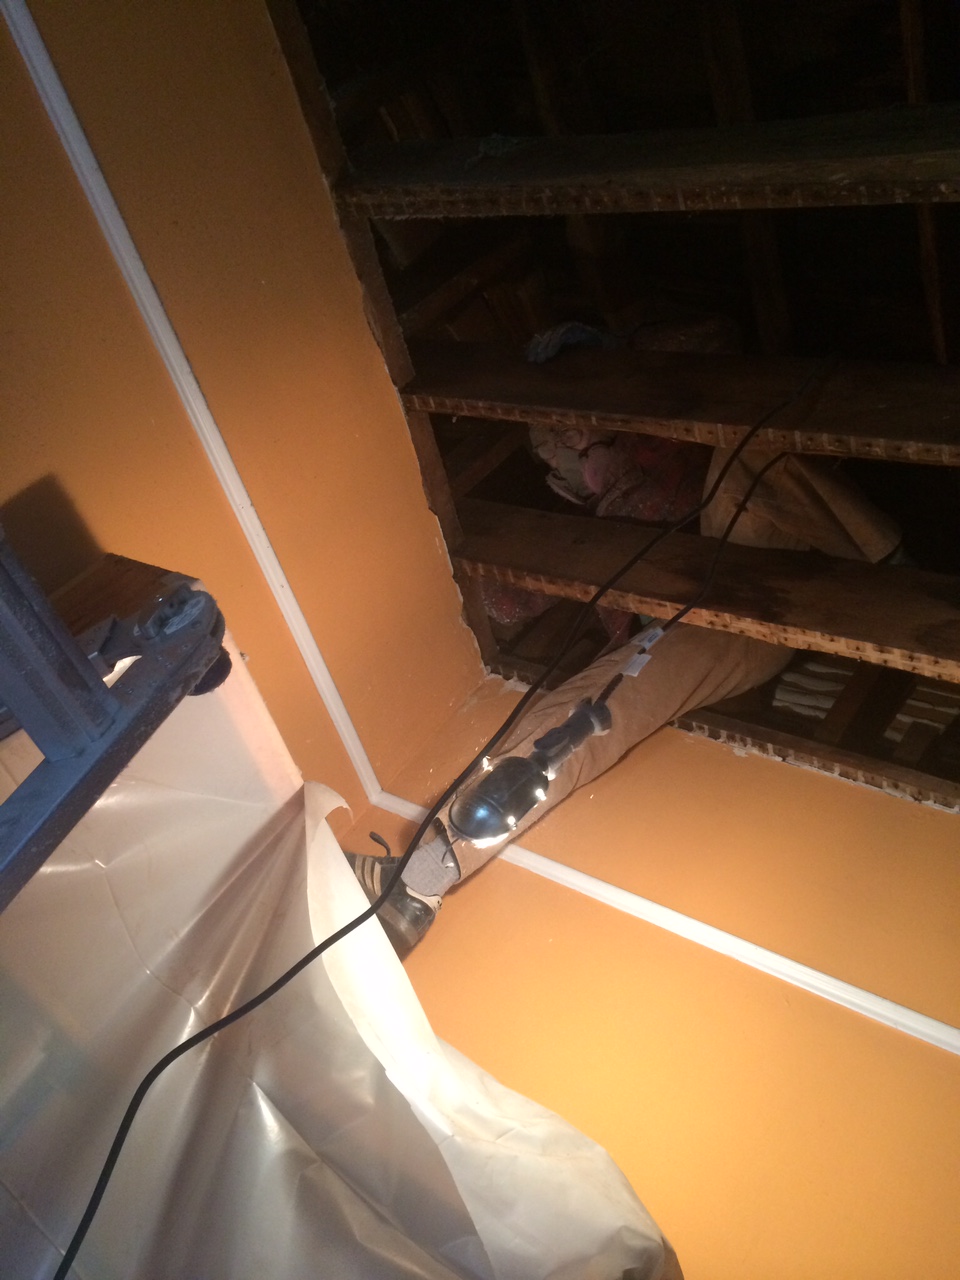
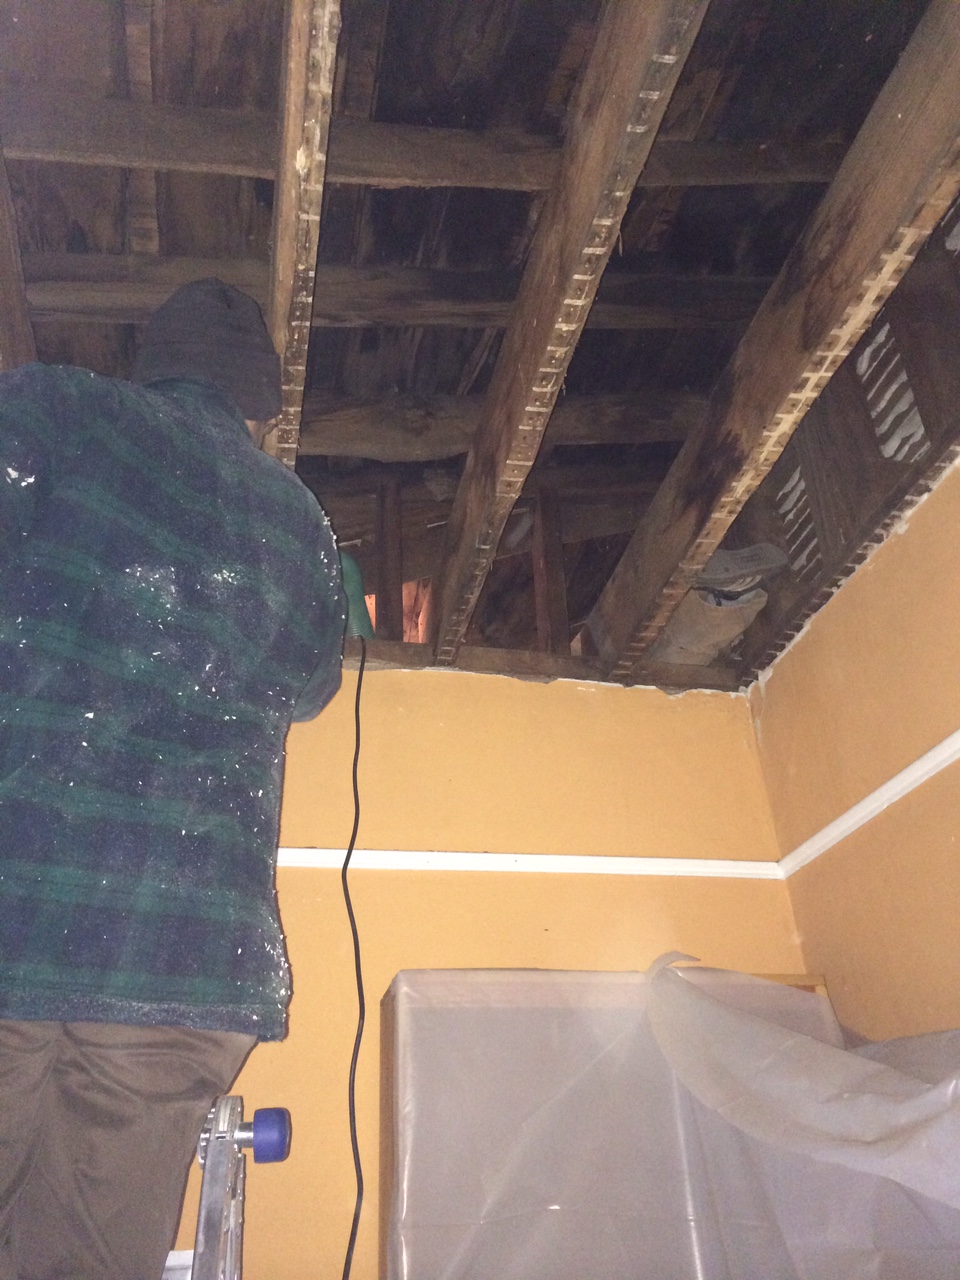
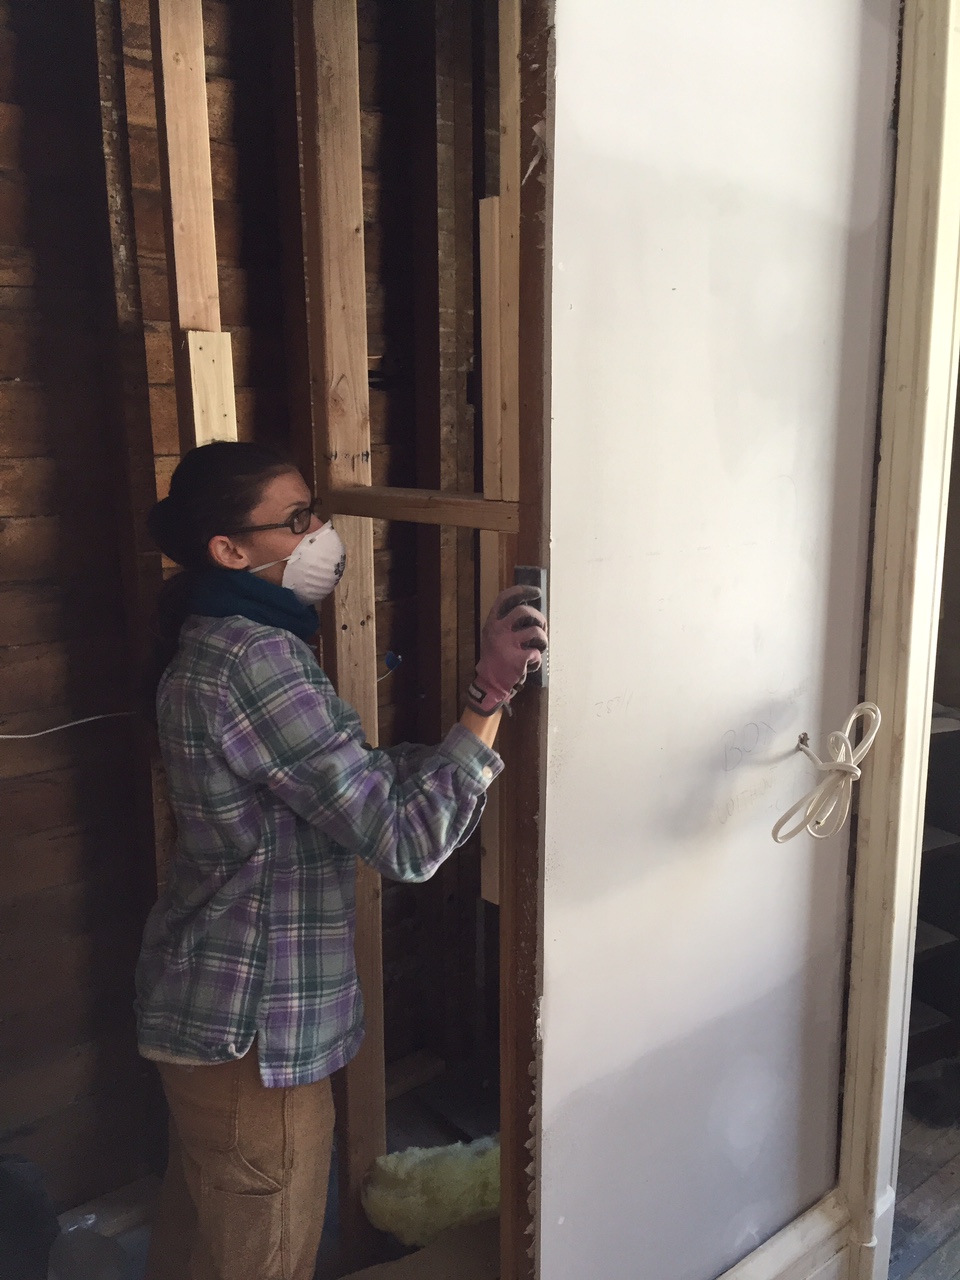
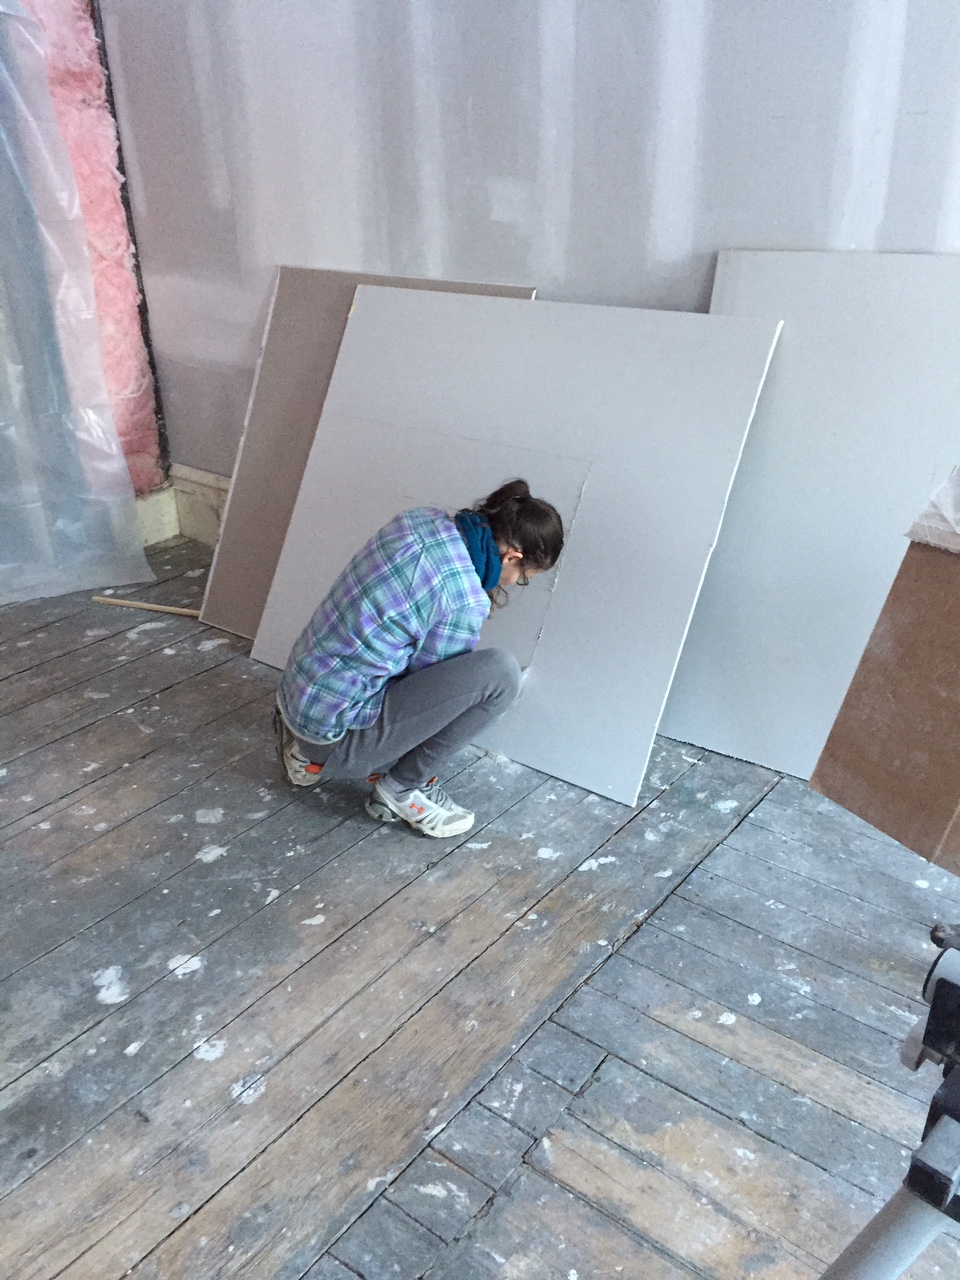
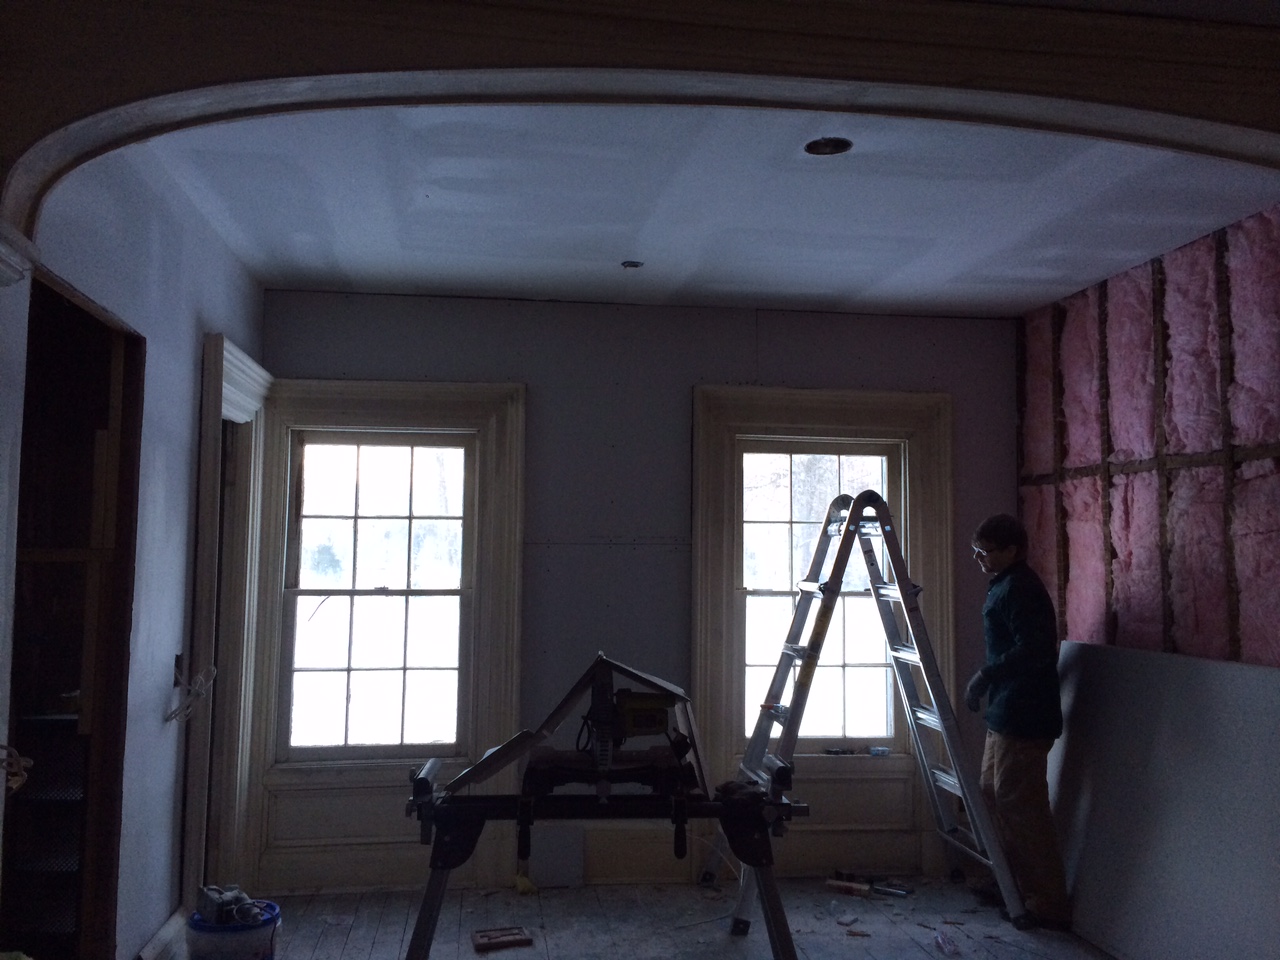
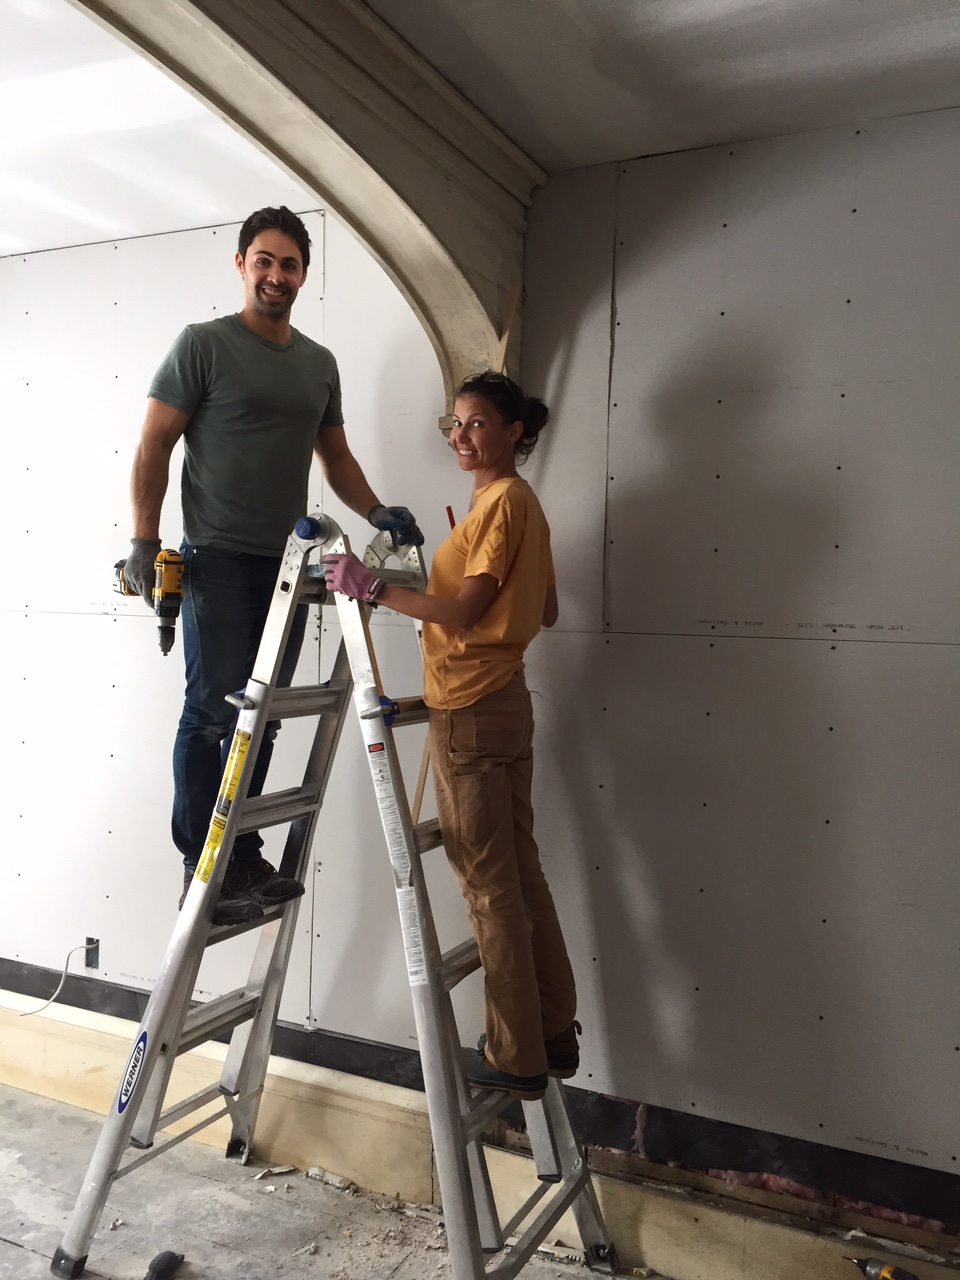
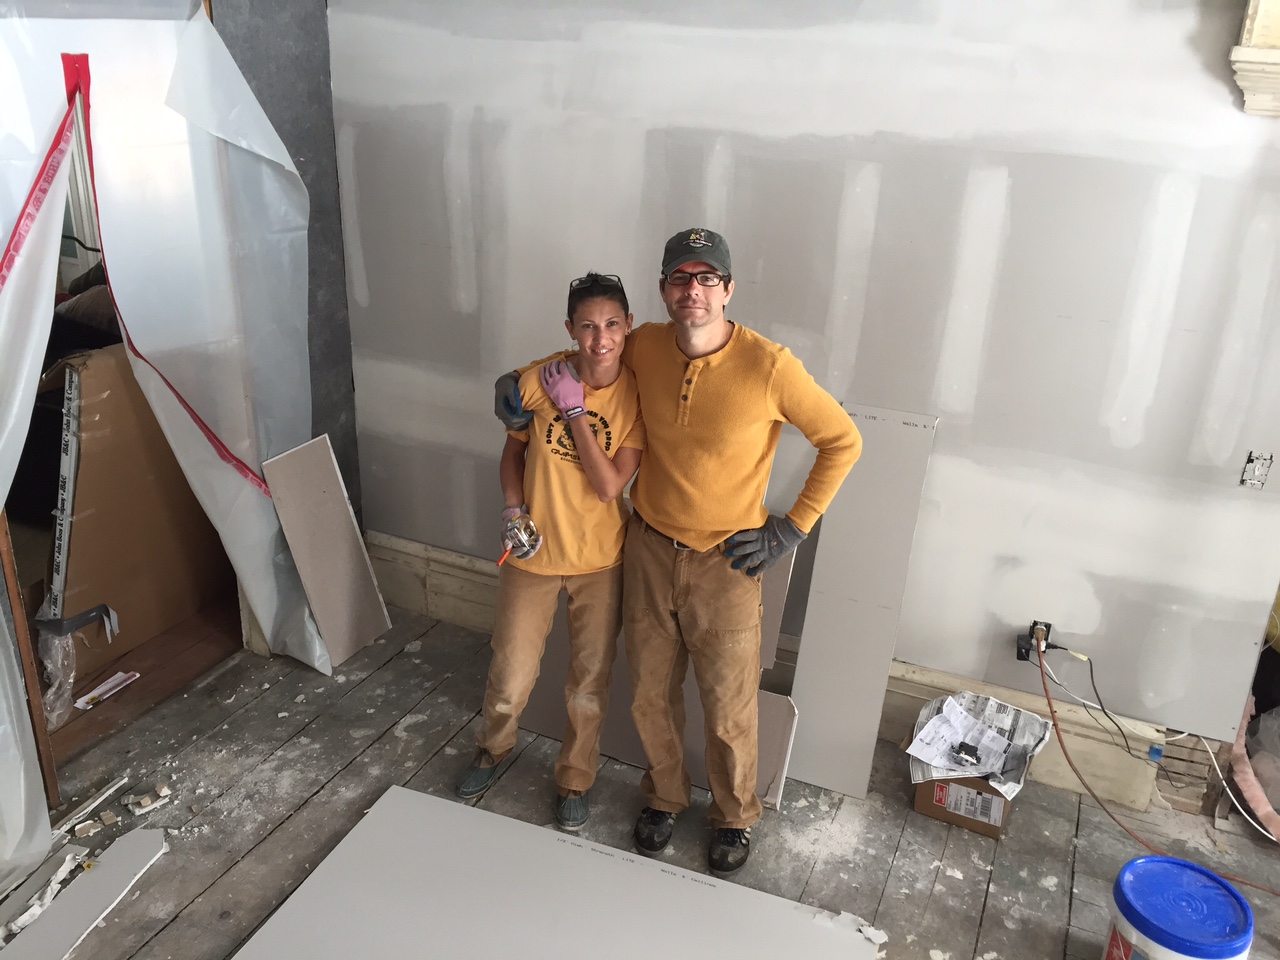
In our slow march towards TV room completion we tackled drywall most recently. Fortunately we had three things going for us. #1, Ermela is a very quick study and after a day she had the measuring and cutting down. Not an easy task in this room since we kept as much trim in place as possible; including the wonderful arch right in the middle of the room. #2, Graham got a new toy (shocking) in the form of a drywall hoist, truly a gift from the heavens. #3, our friend Oren was up and threw himself enthusiastically into the project with Ermela as his sheetrock instructor. By the end of the weekend they were a team to be reckoned with; working in tandem to put some very intricate pieces up.  
 

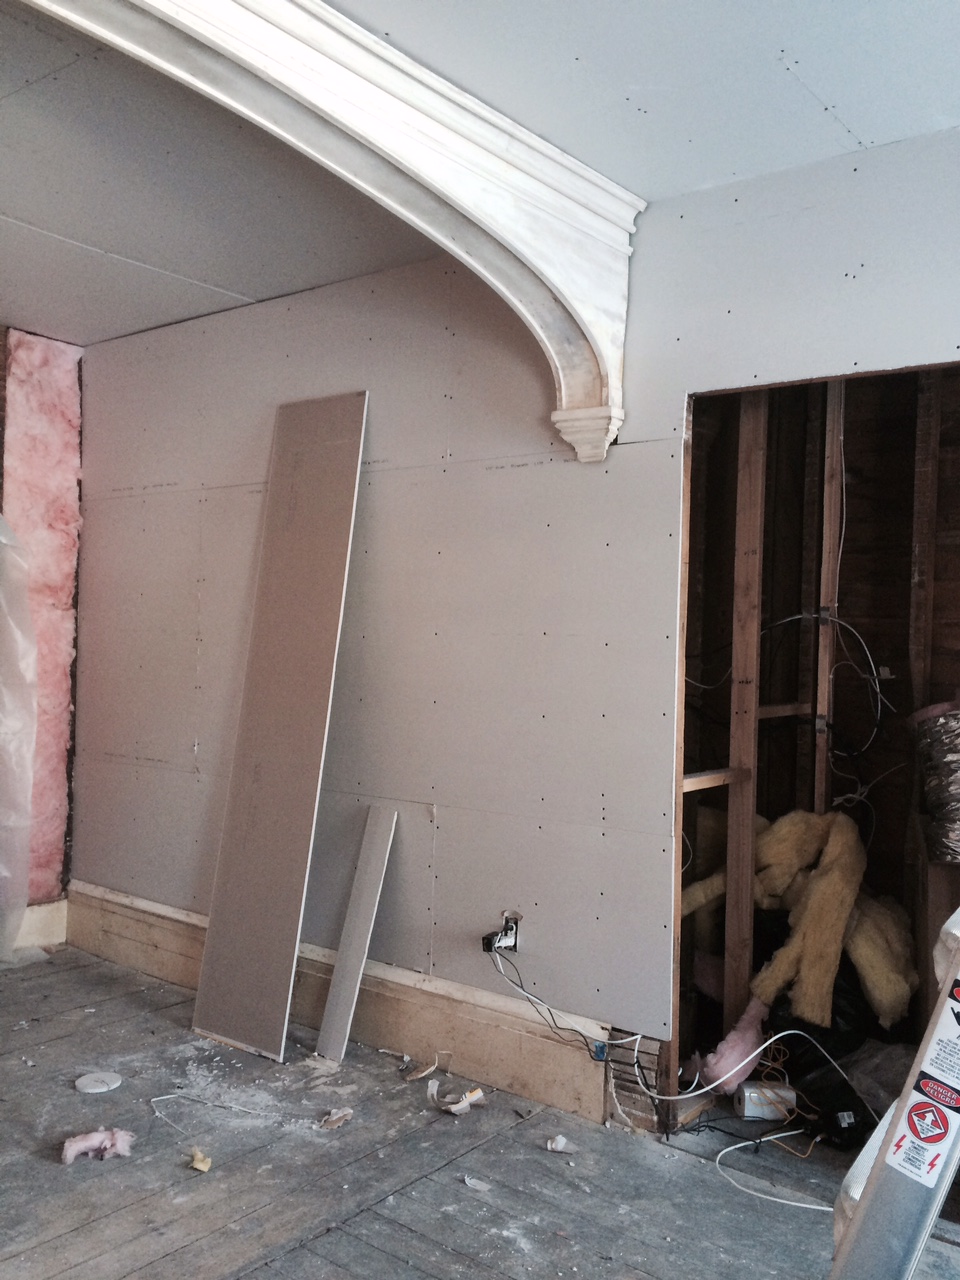
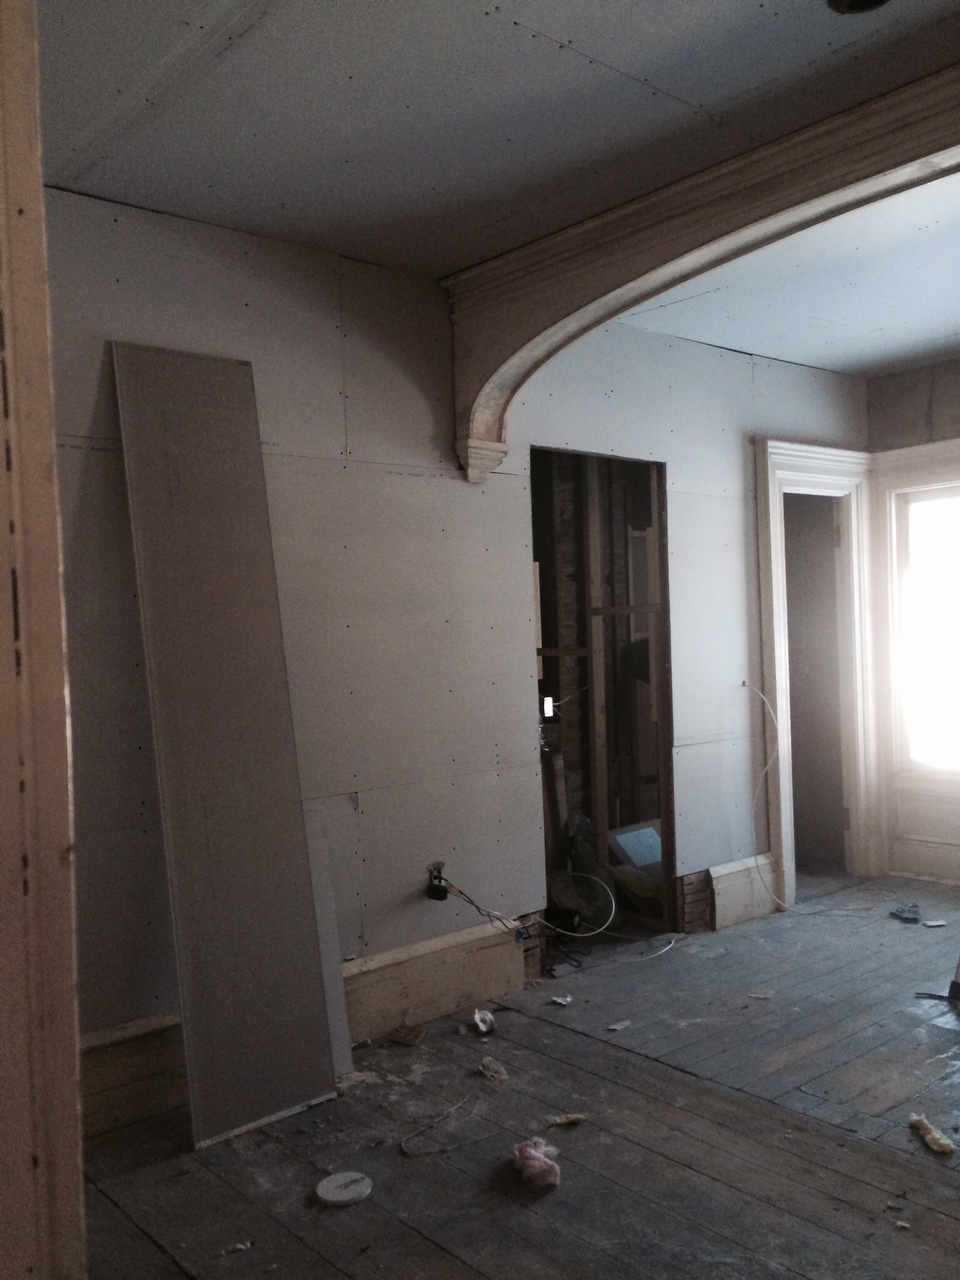
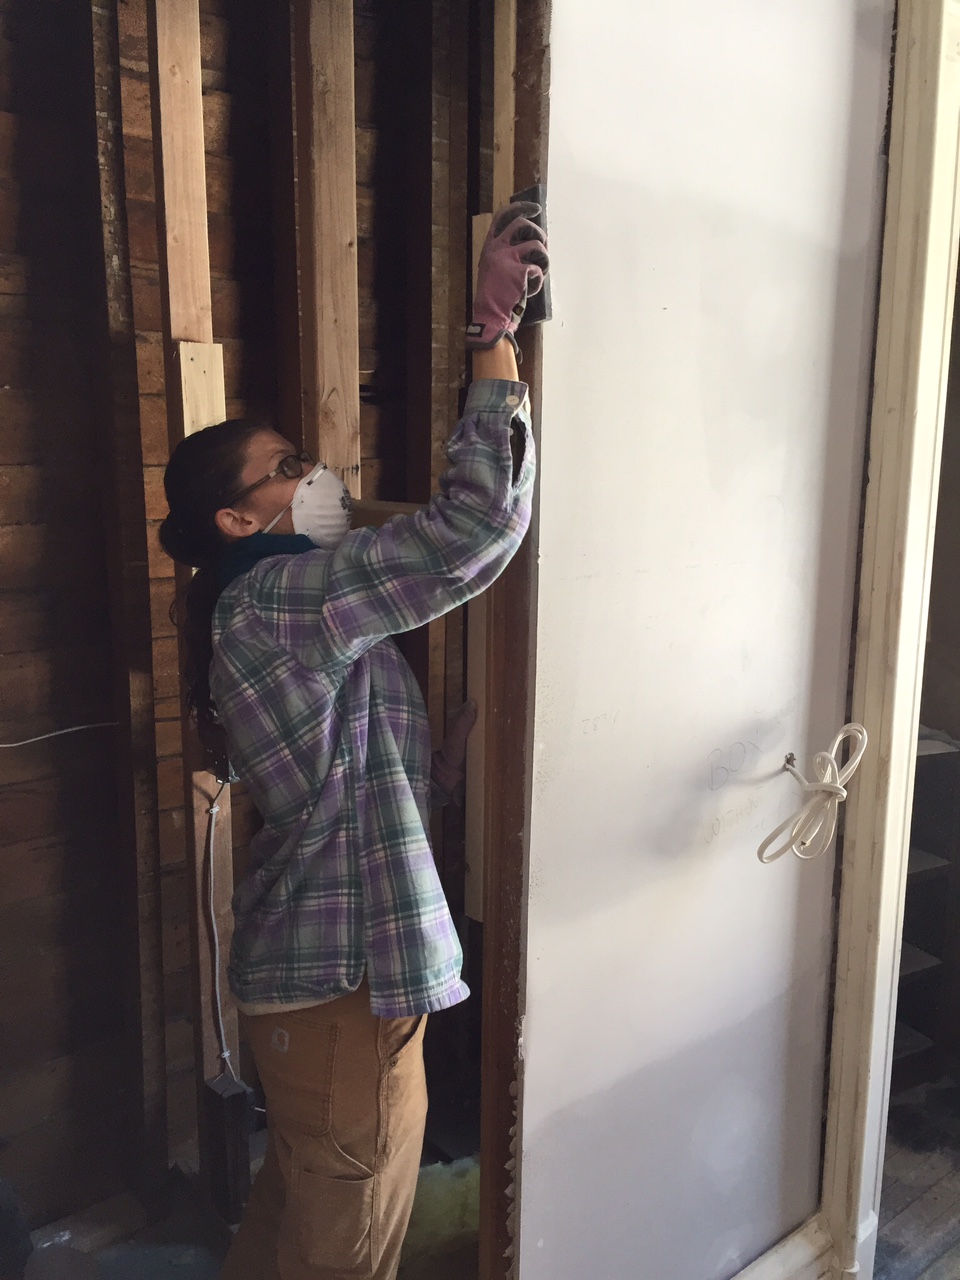
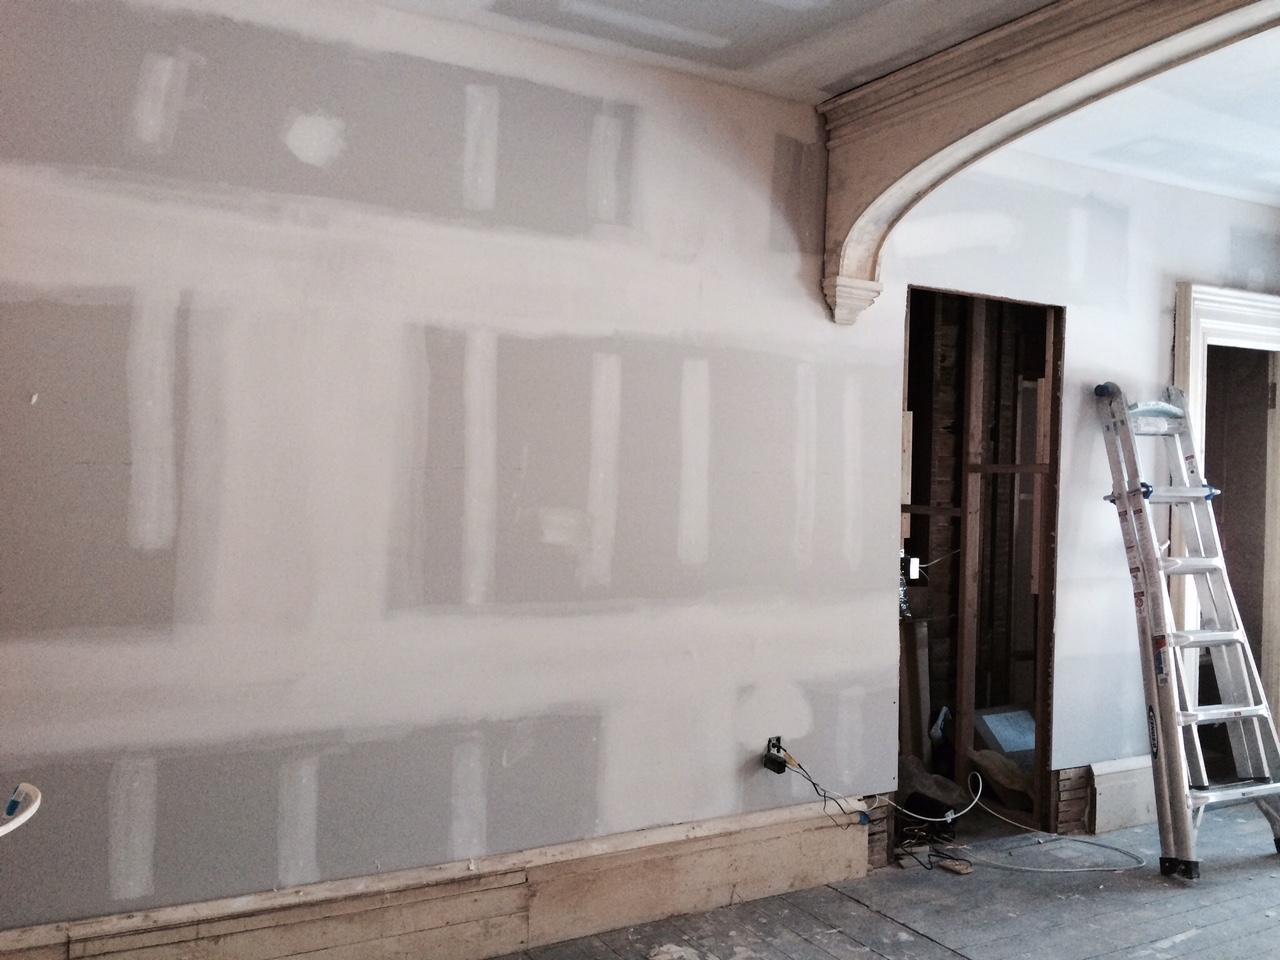
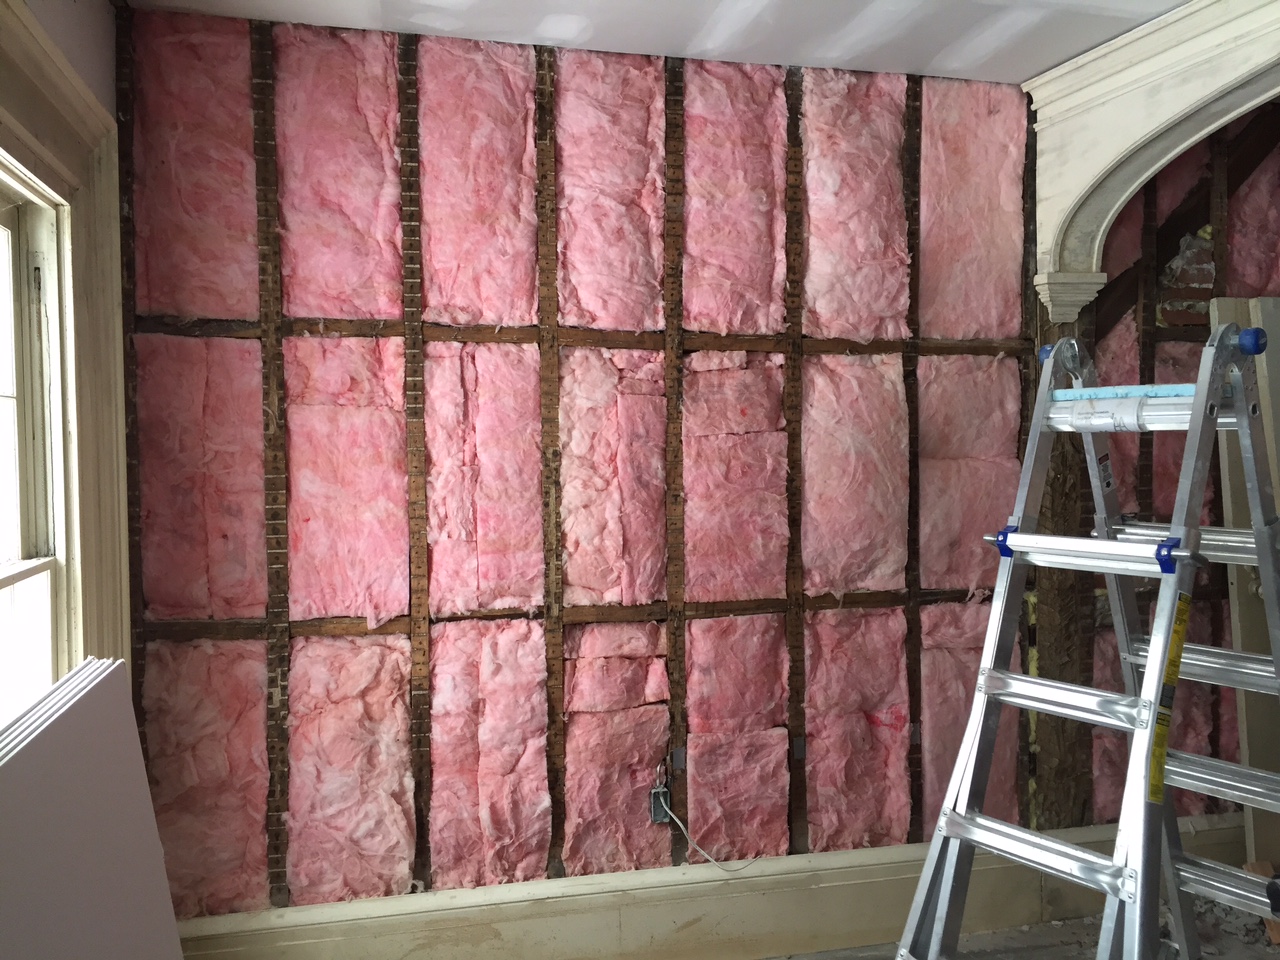
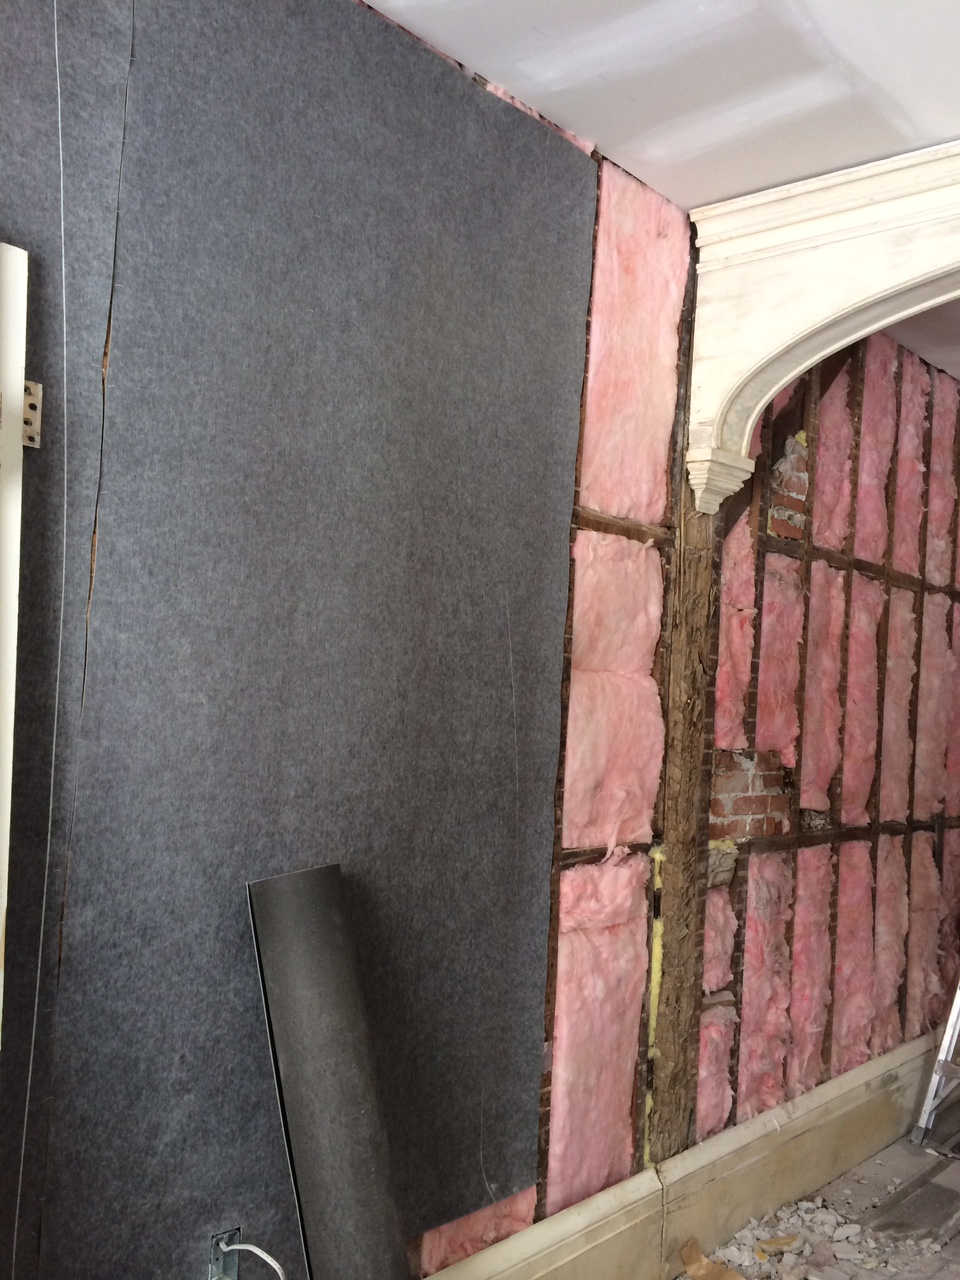
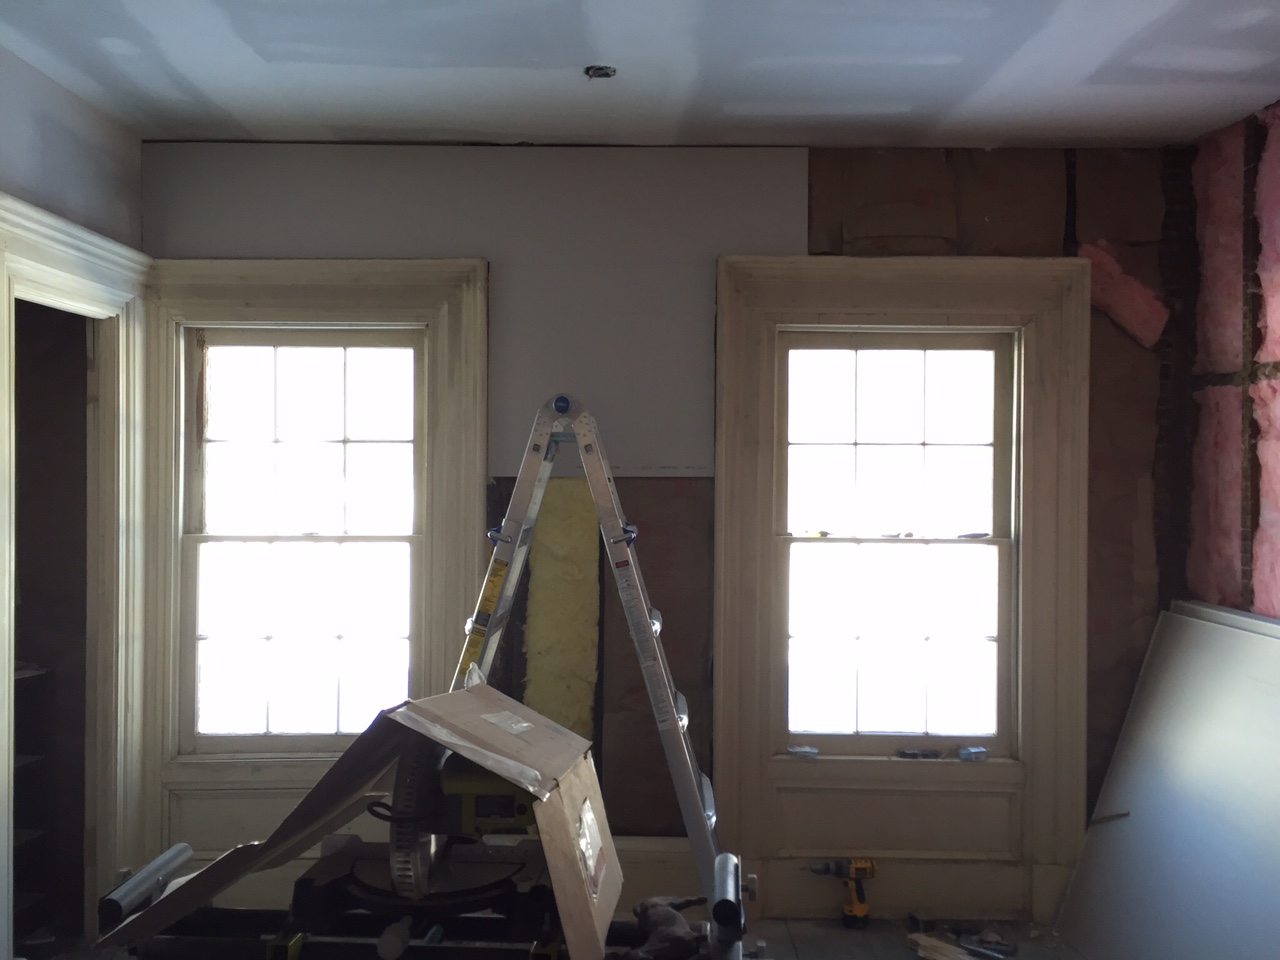
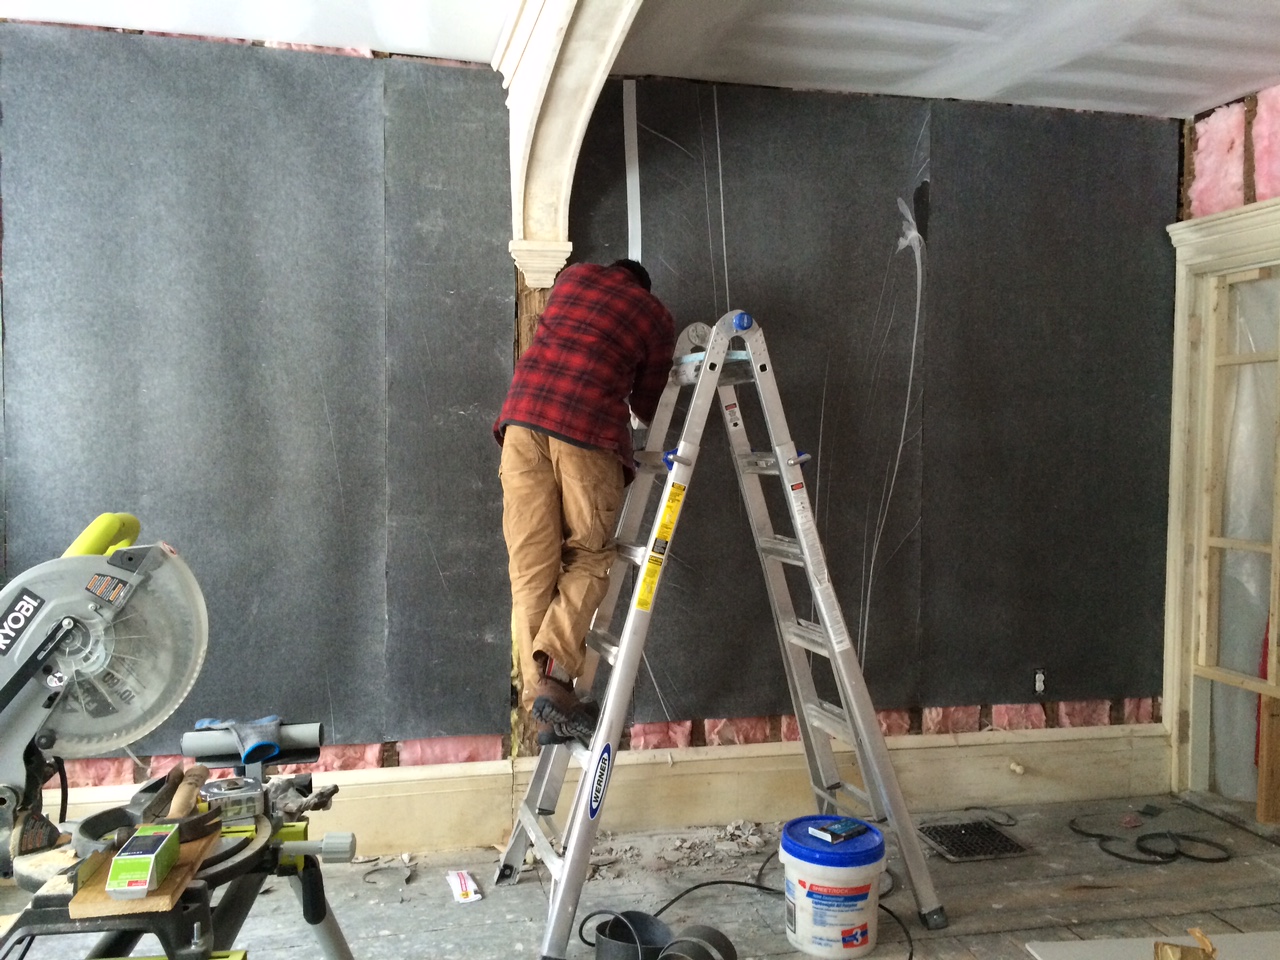
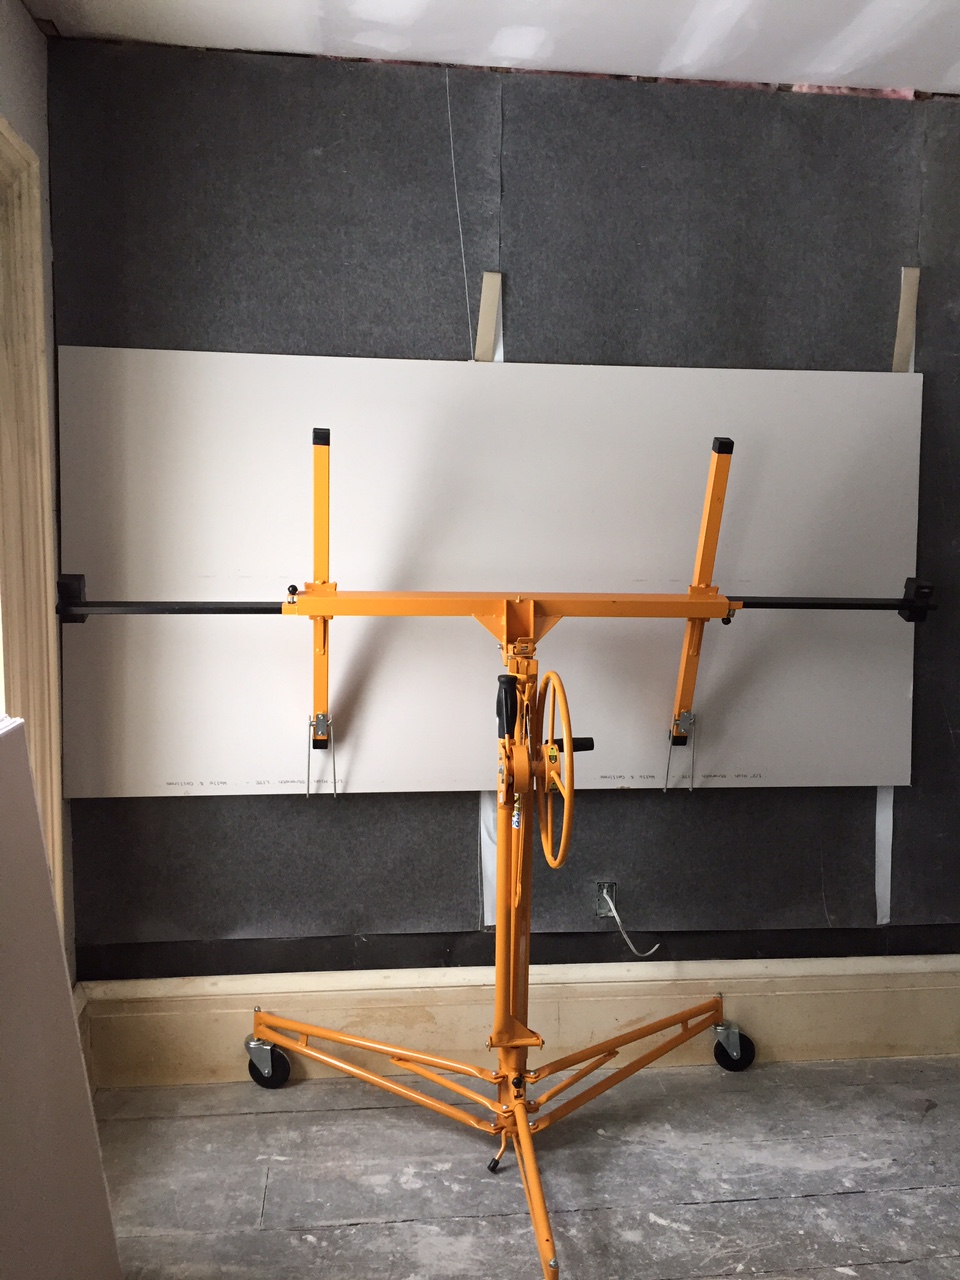
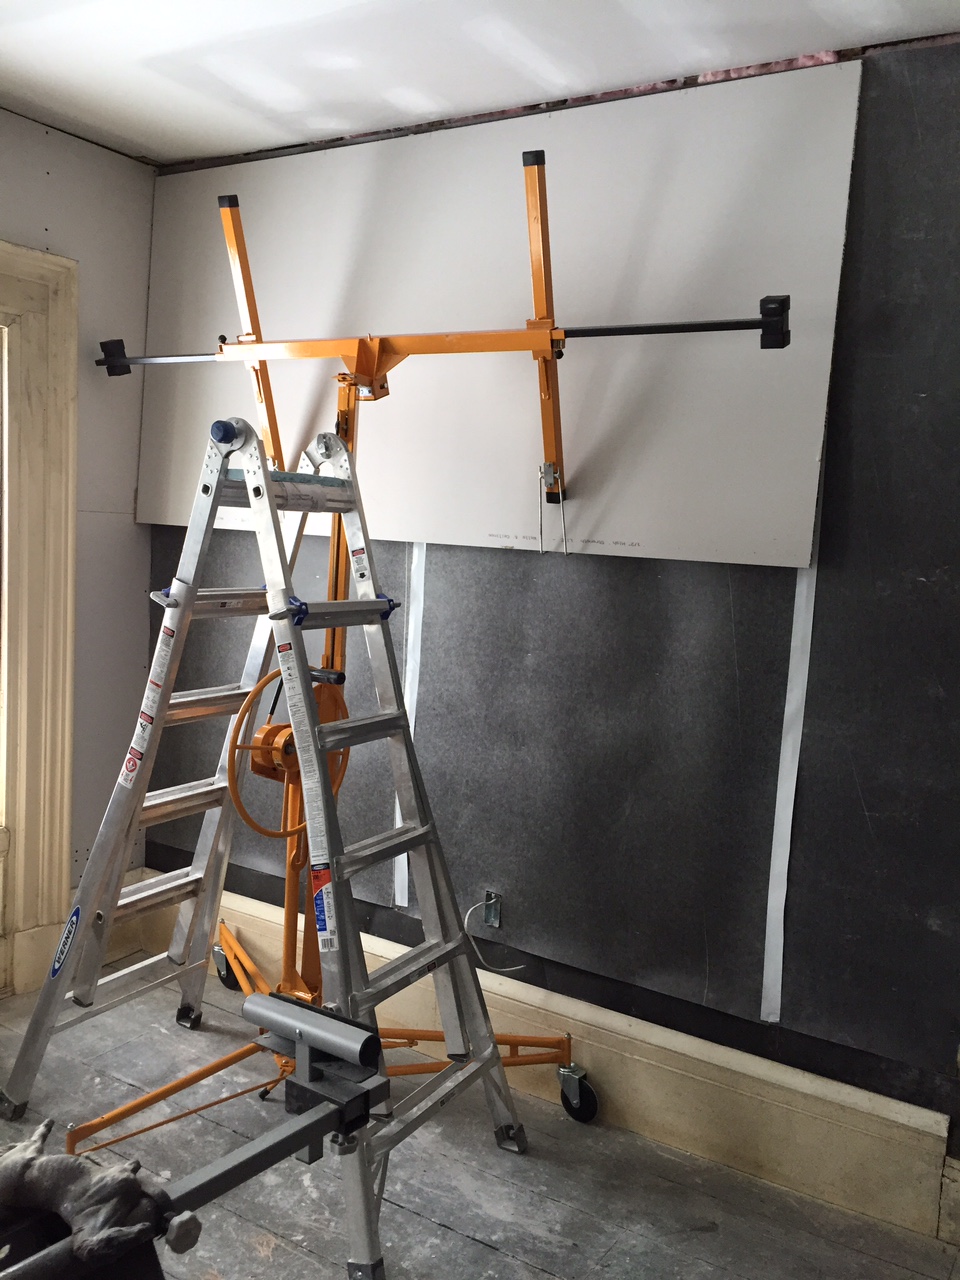
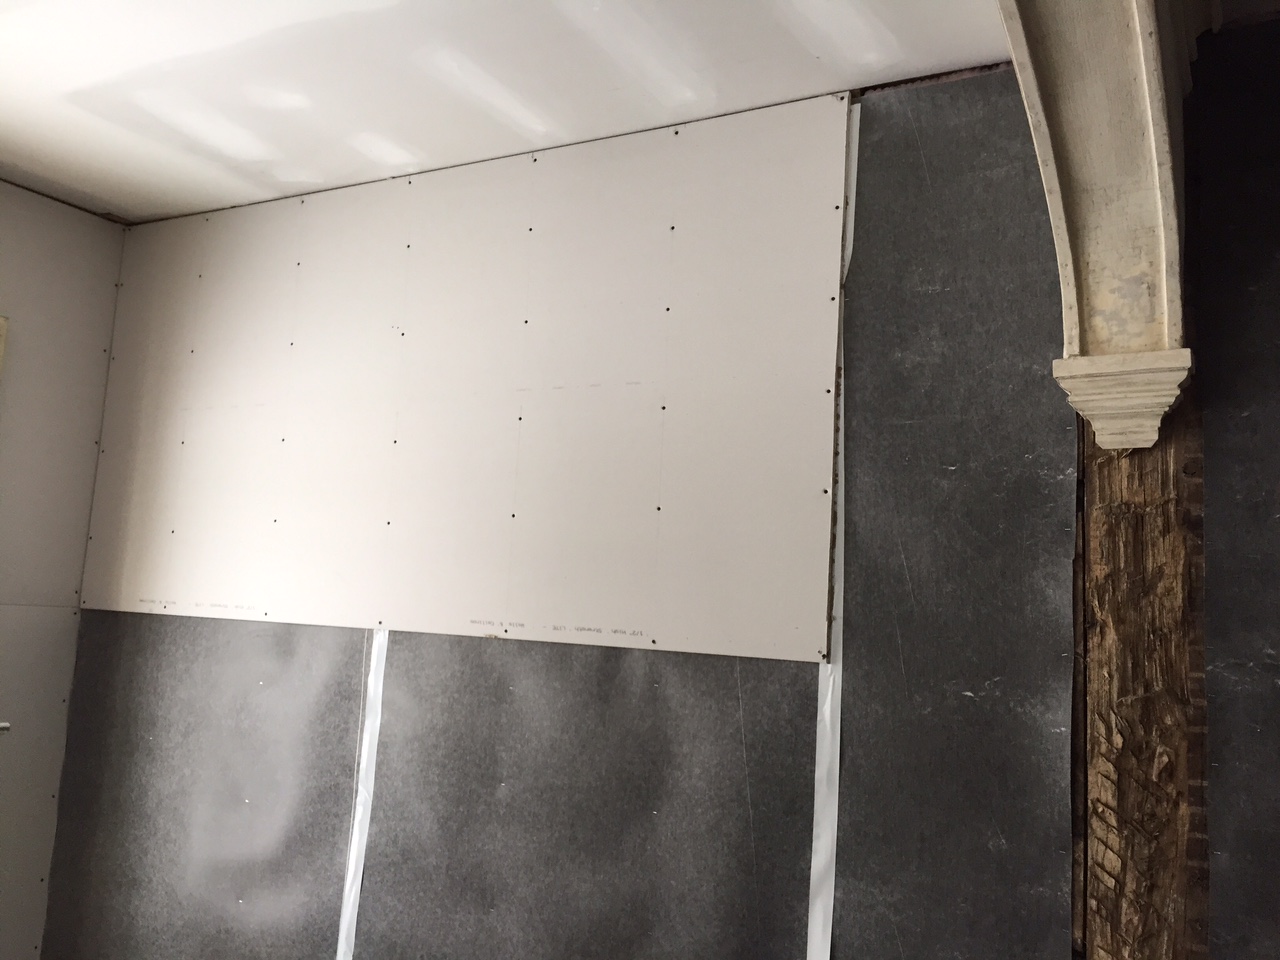
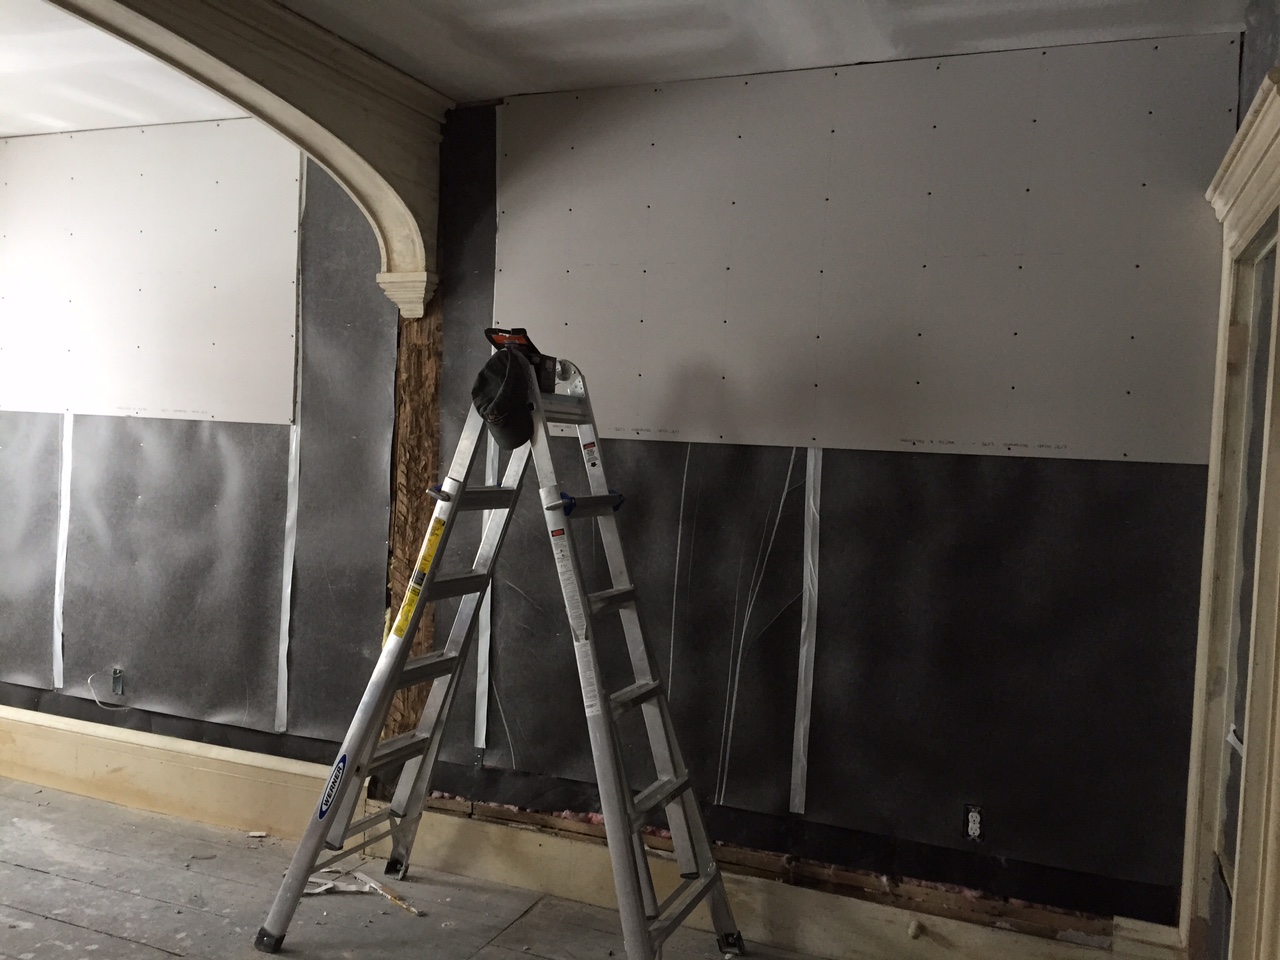
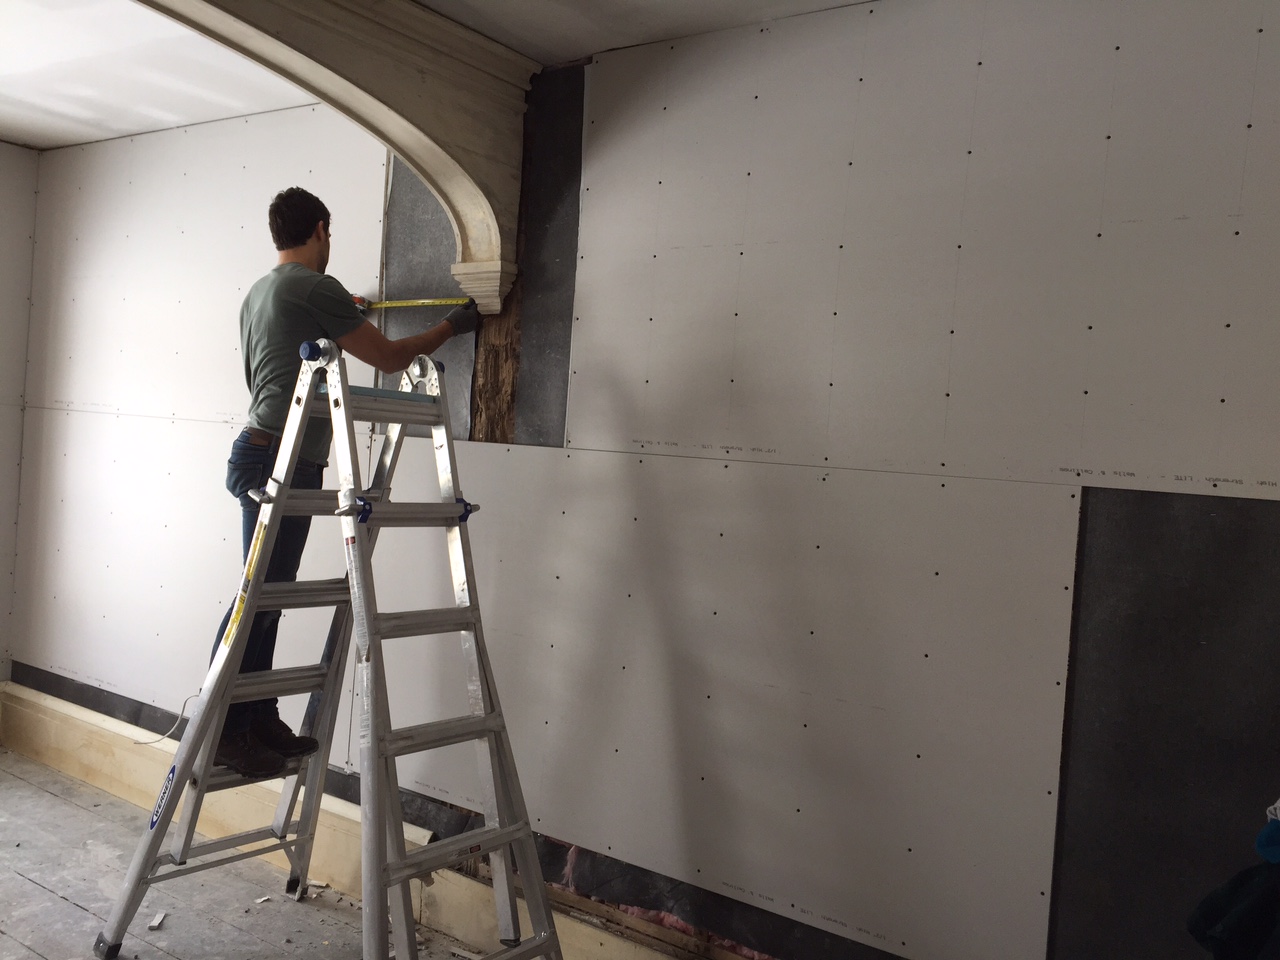
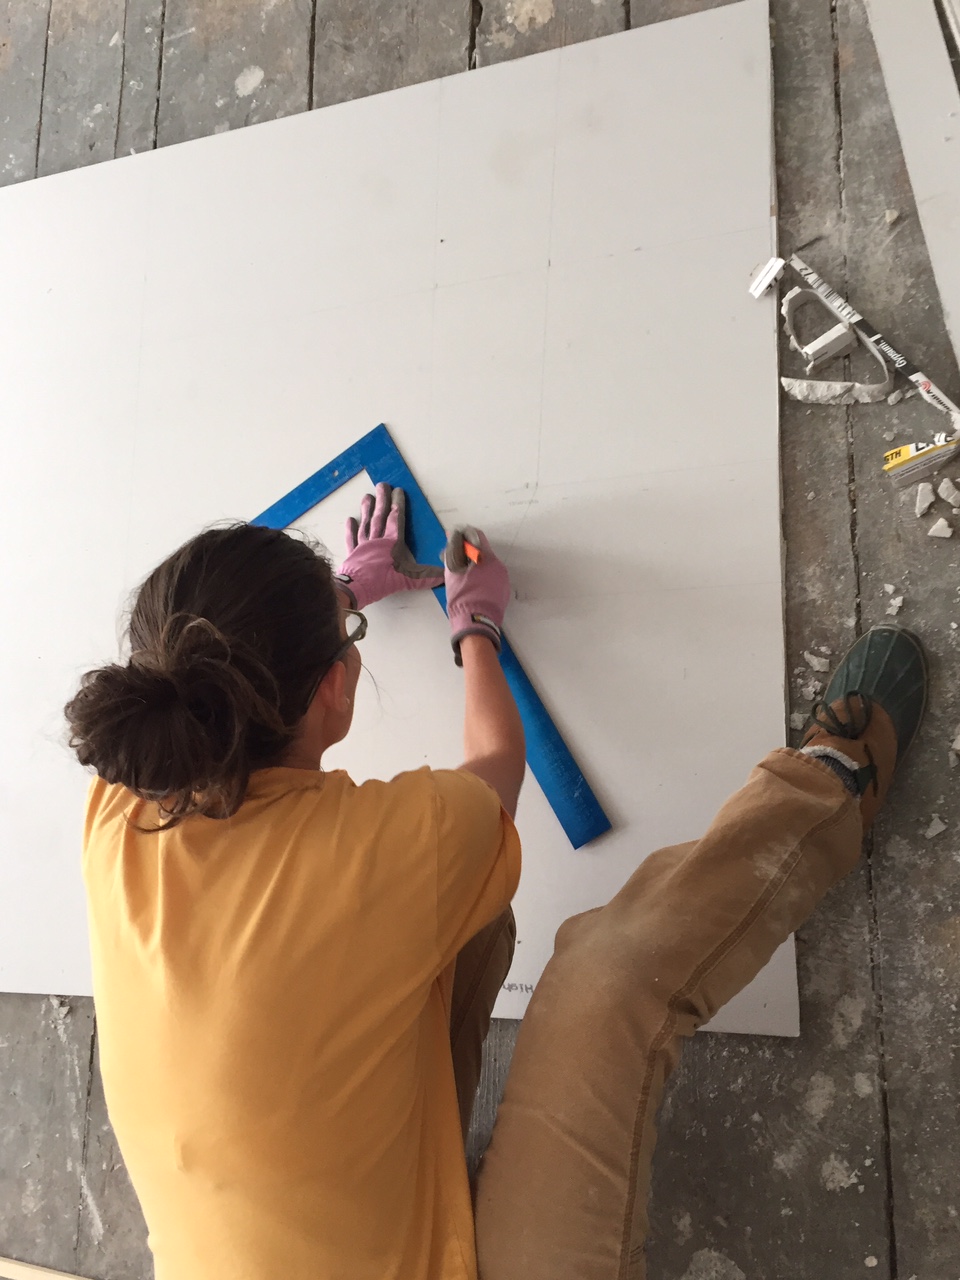
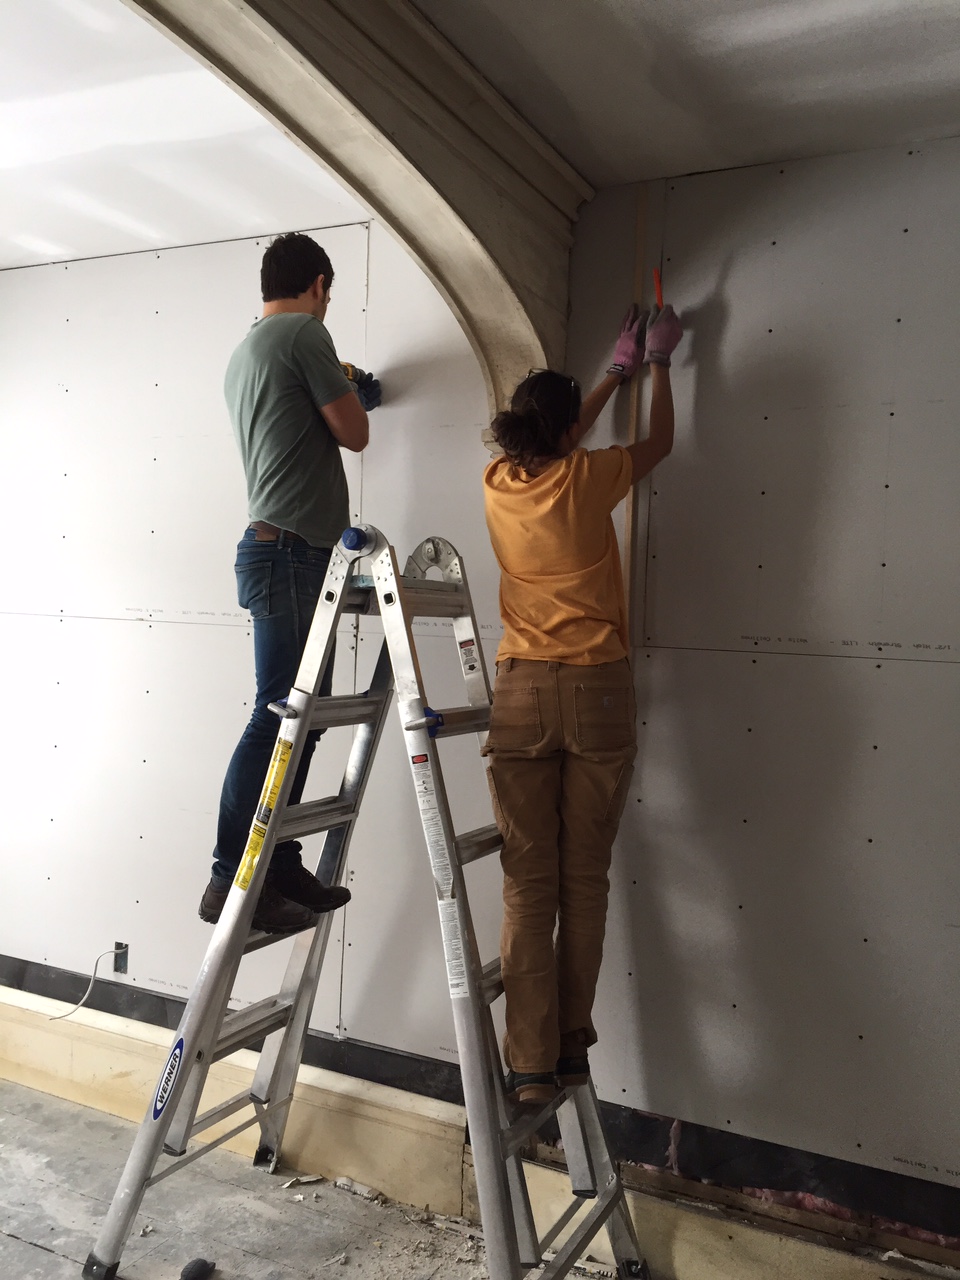
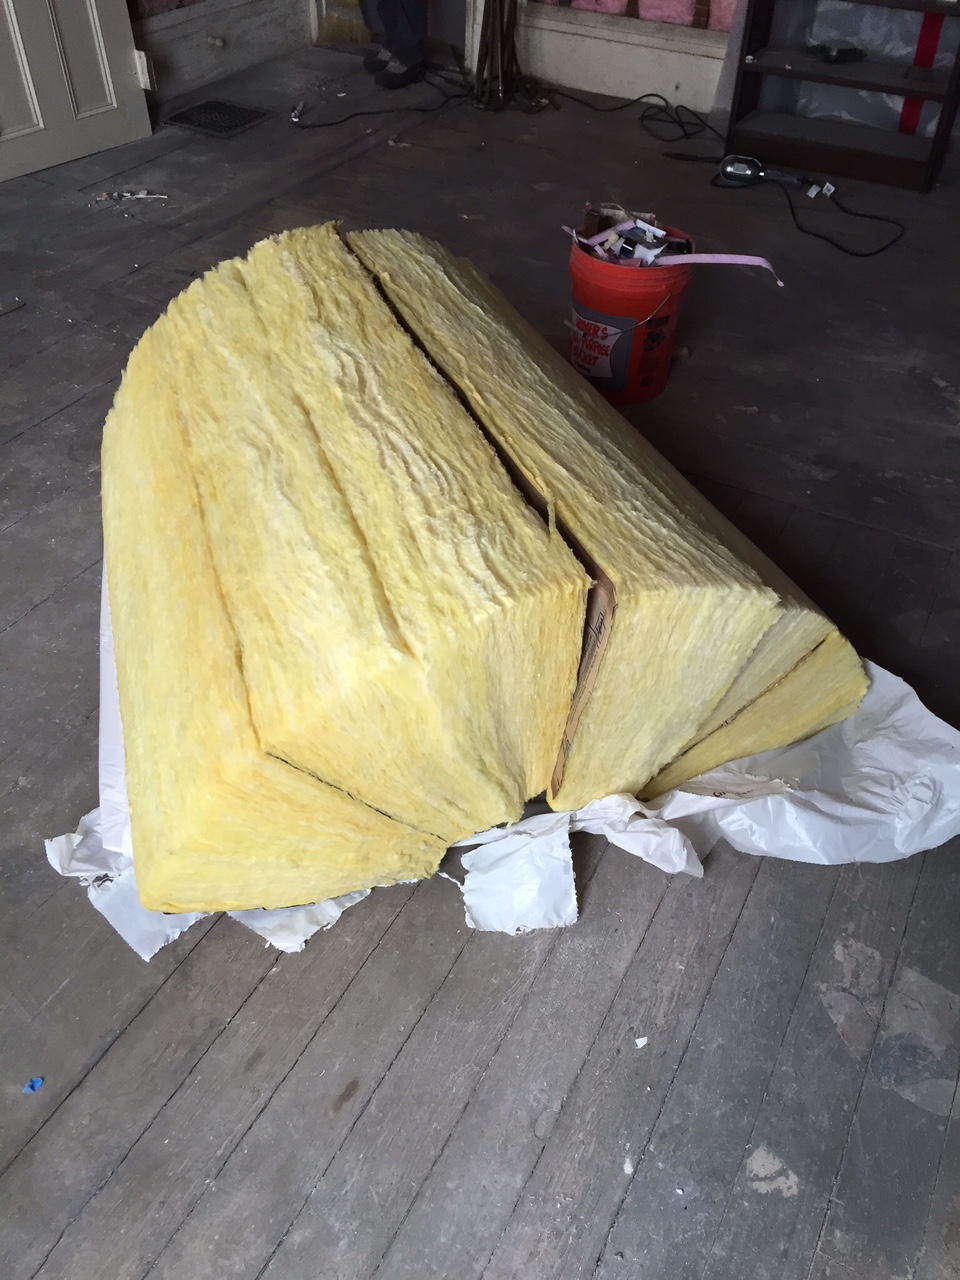
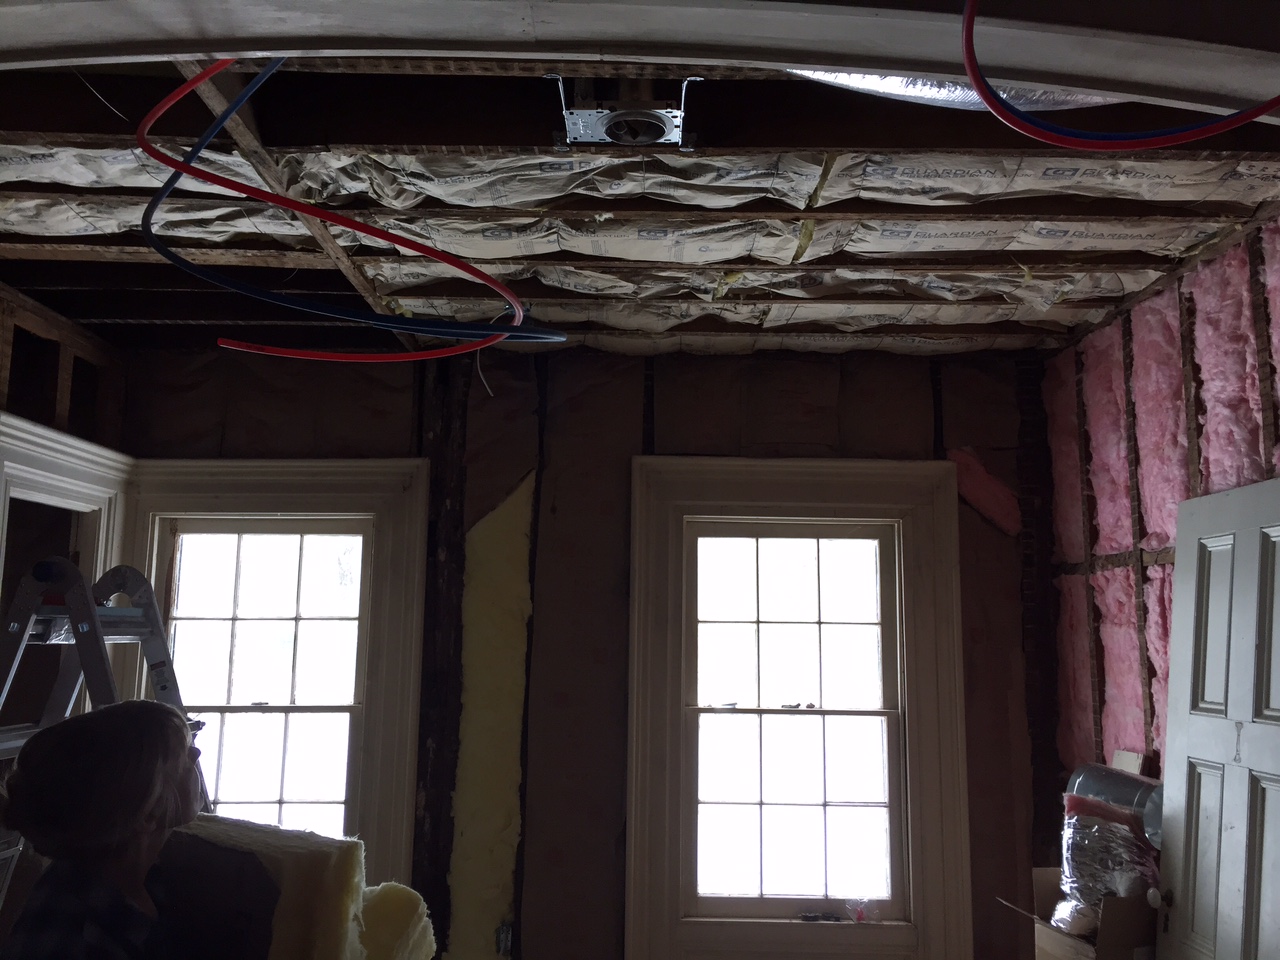
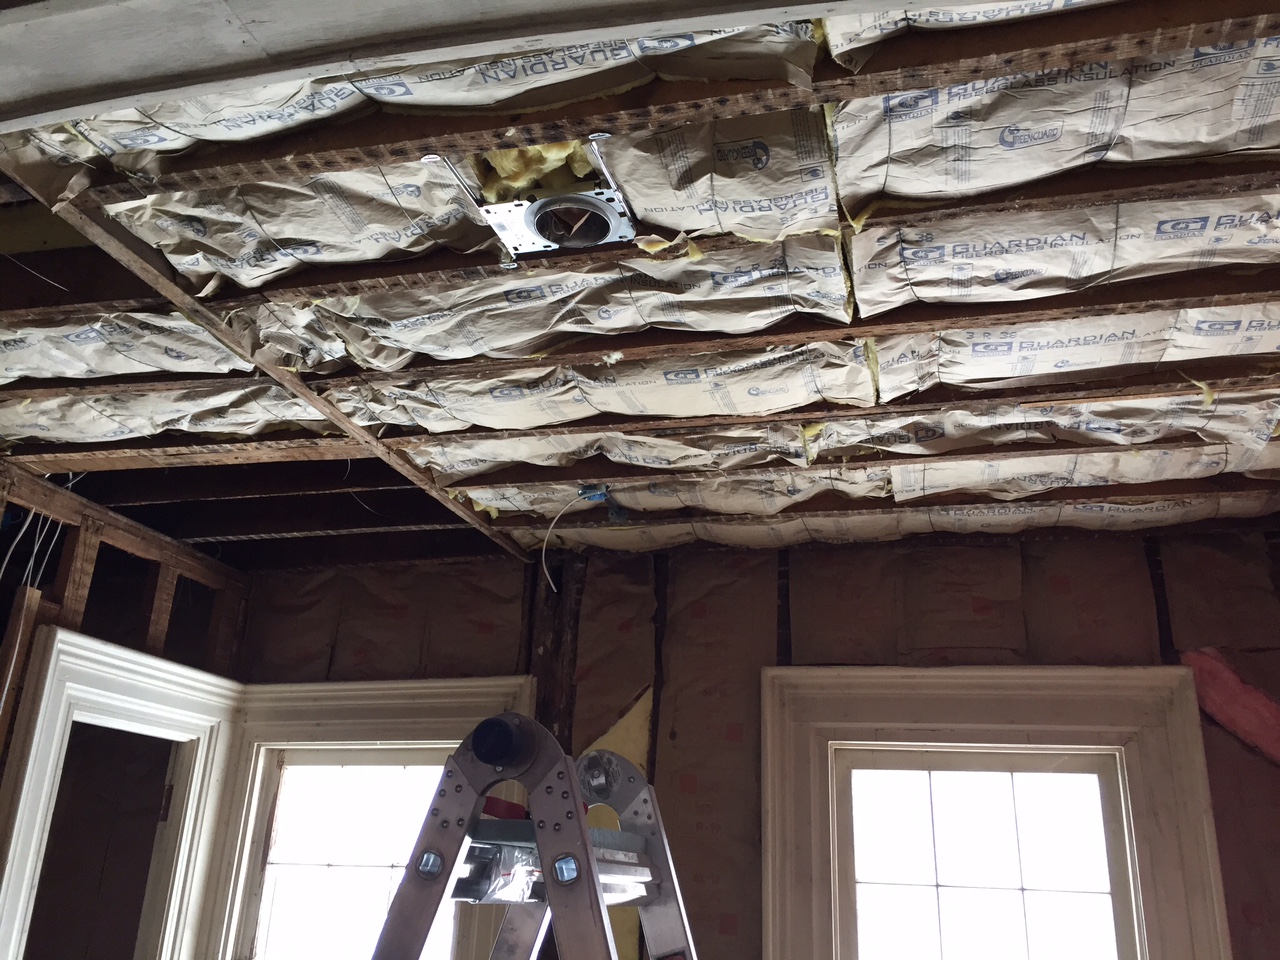
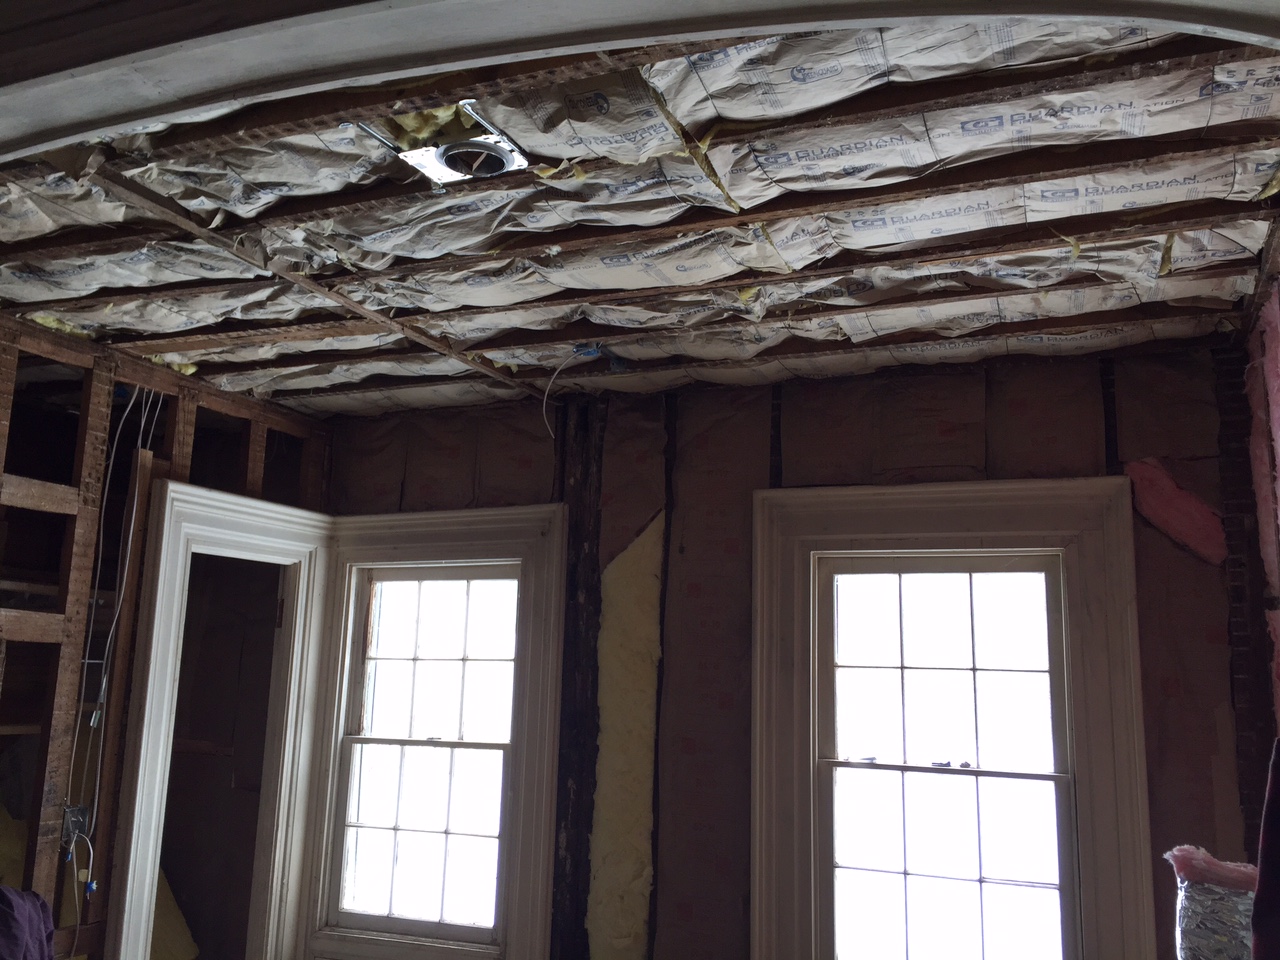
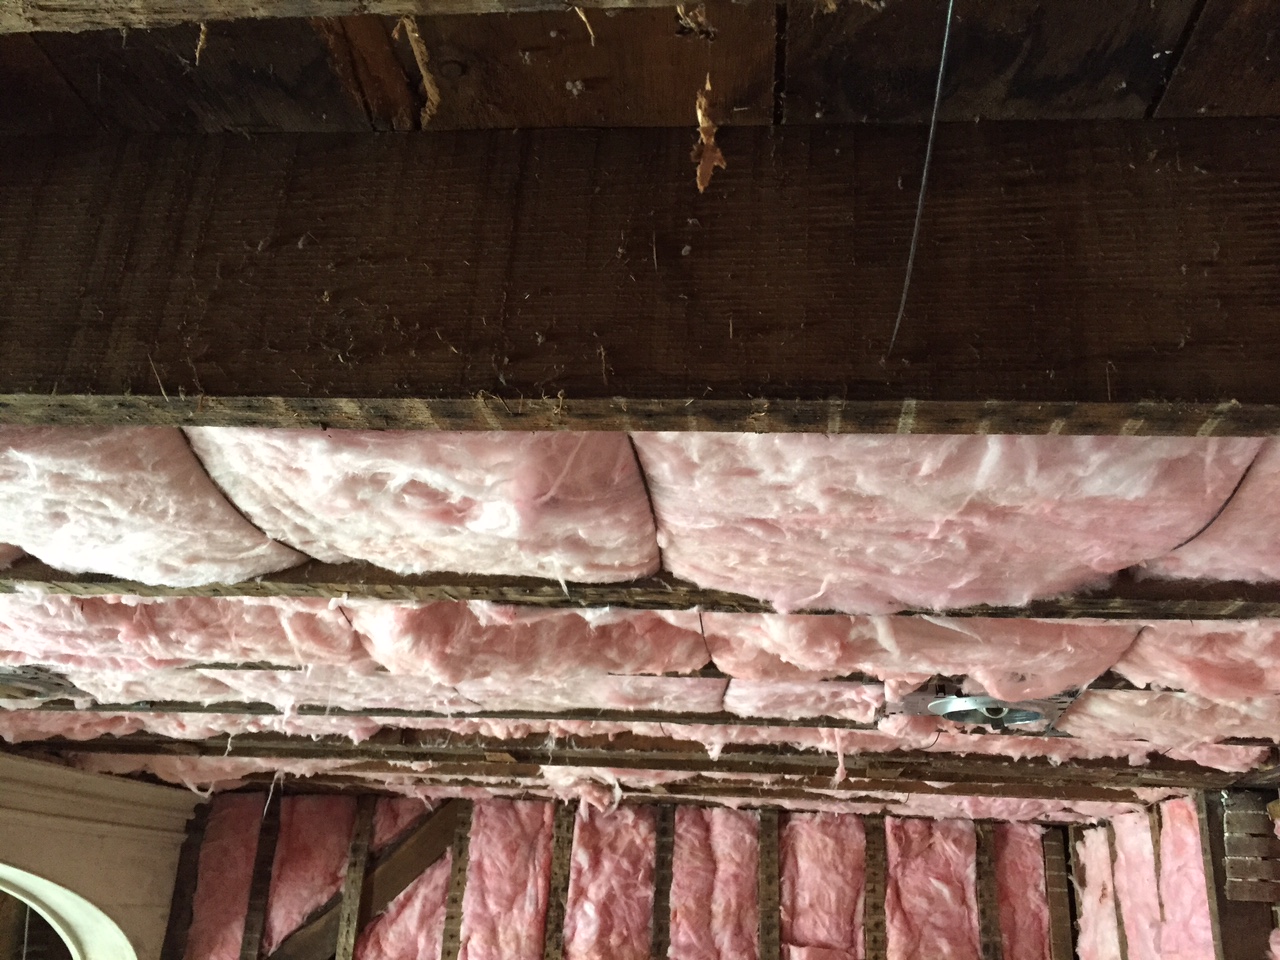
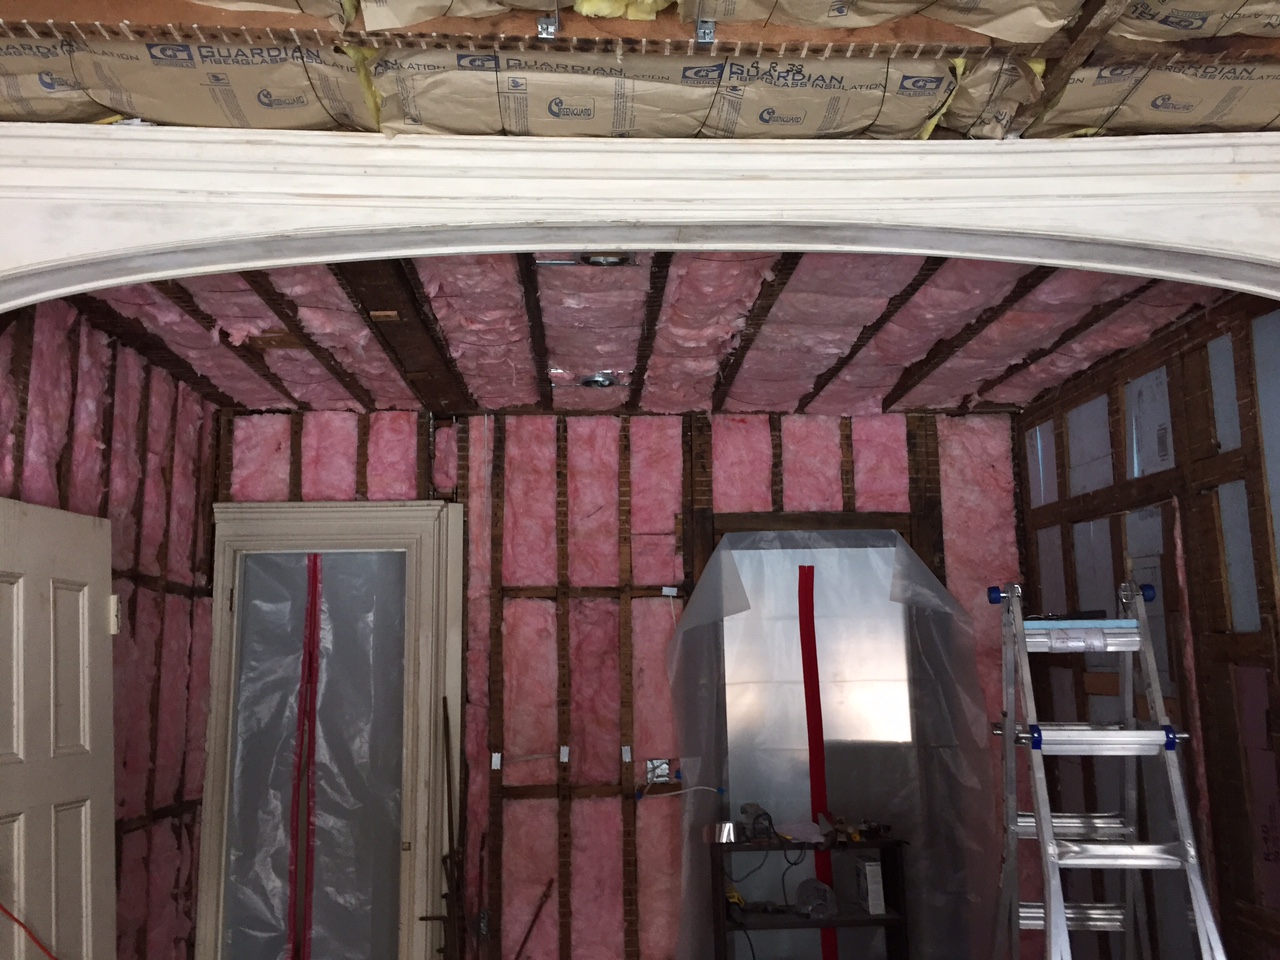
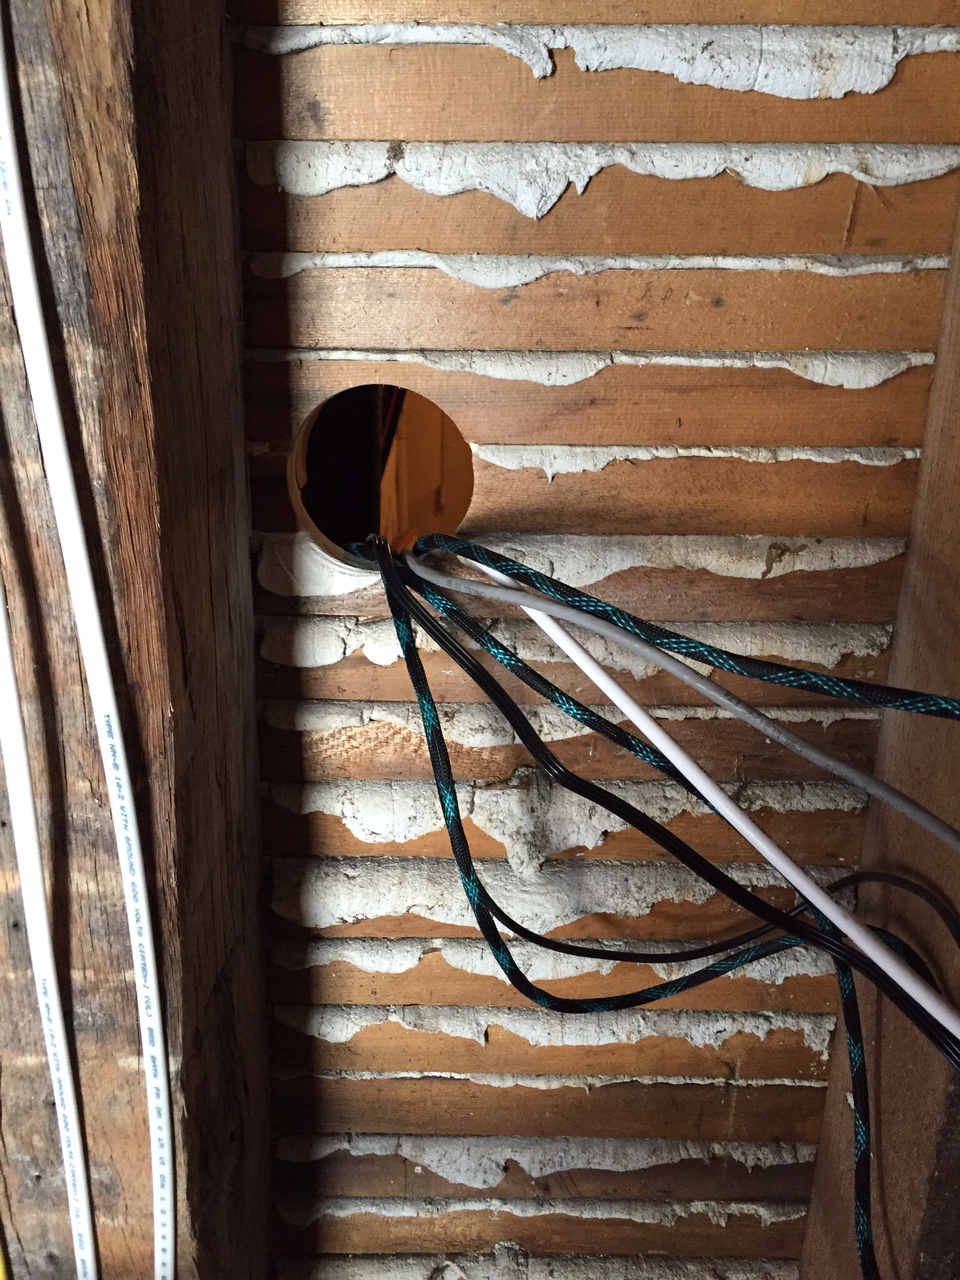
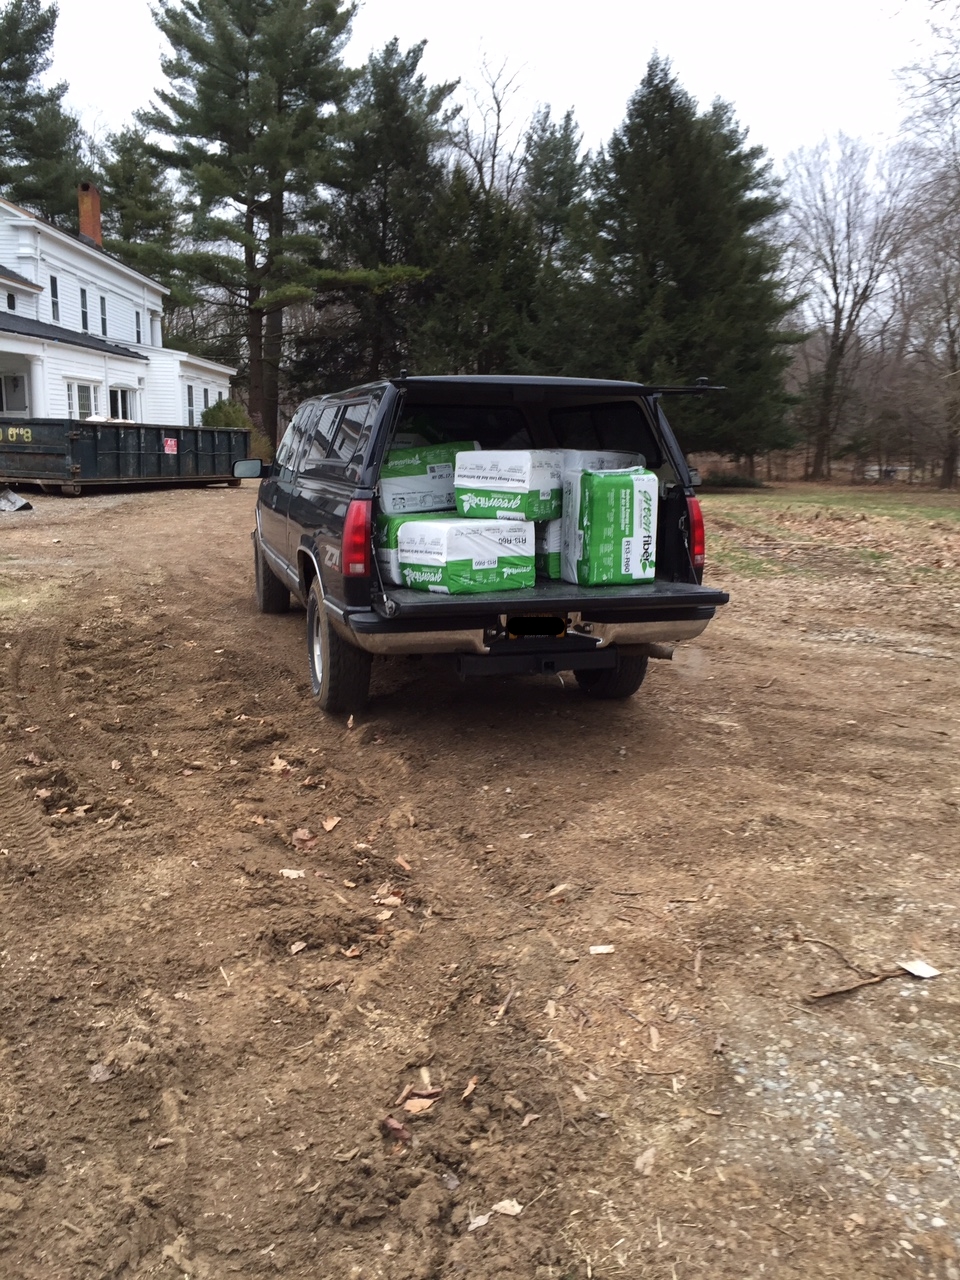
Overall drywall is really about learning rules and being able to keep a flexible mind. Most mistakes seem to be in reversing measurements from the floor to the wall, and in not planning ahead. With this house one of our biggest hurdles is that the blocking in the walls was set up for plaster, which is very different in application to drywall so we occasionally ad to add extra blocking in the walls to have something to attach the sheets to. The other headache is that the drywall is thinner than the plaster that used to be there so we will have to go around all the trim in the room and add a layer of wood to blend it all in.

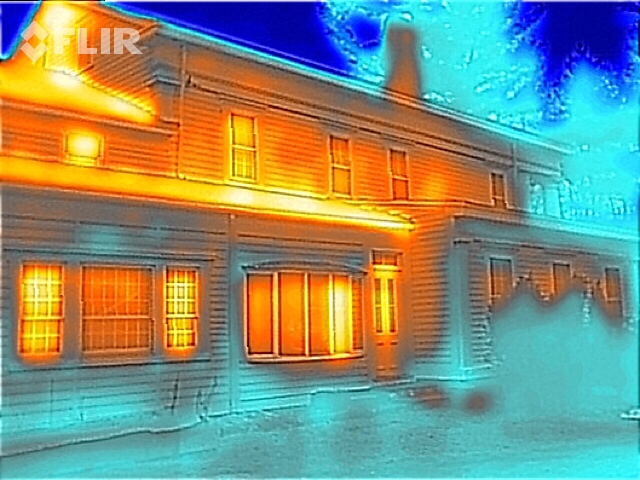
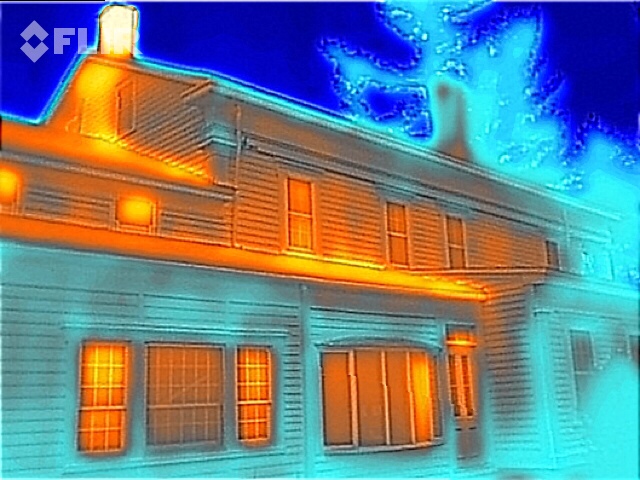
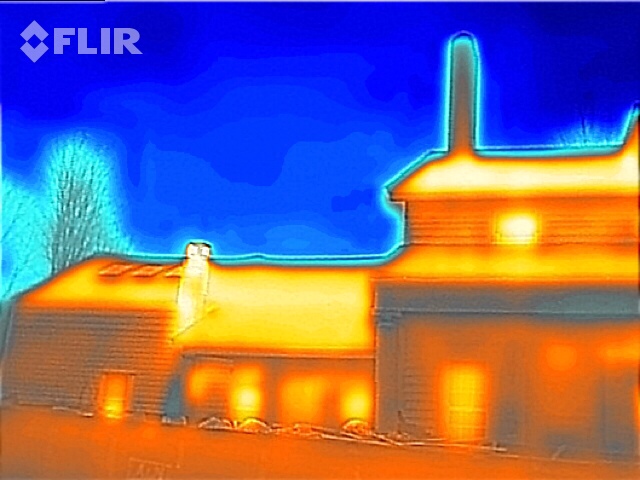
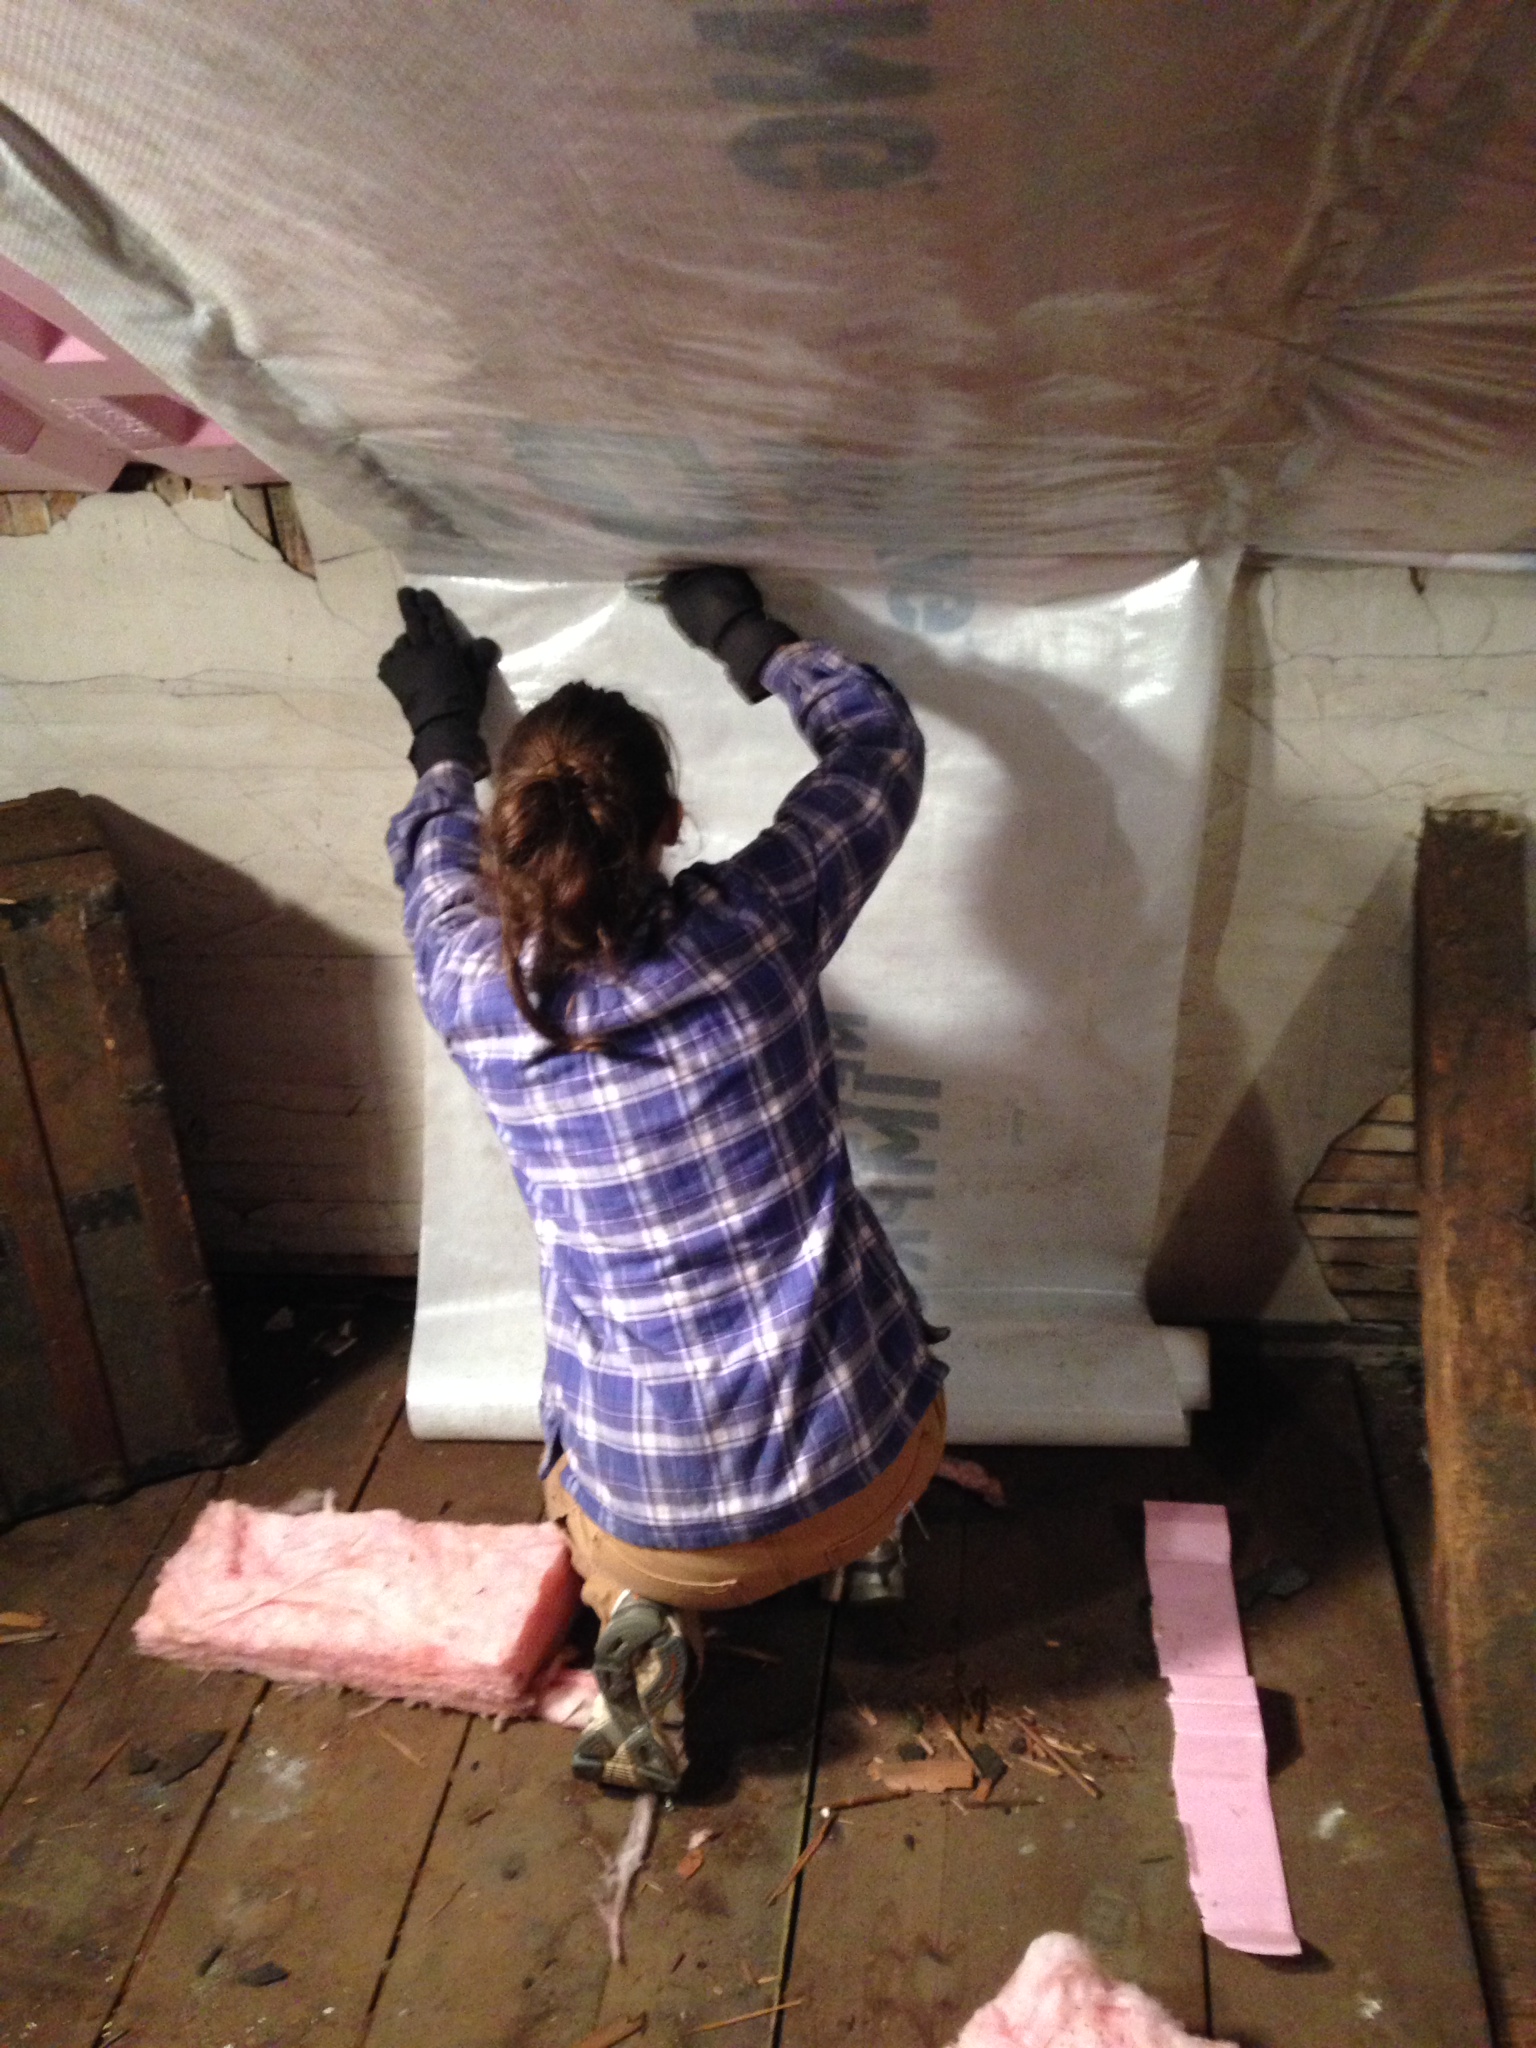
With the drywall in and the walls sealed up and insulated this is now the warmest room in the house, it's really amazing considering it is the north side of the house and only has one heat register. Proof that some demolition headaches are worth it, at least that is what we will tell ourselves while watching movies curled on the couch this coming winter.
 

The Making of a TV Room

A TV room....what makes a TV room? The obvious answer would be "a TV" but here at the farm we take our small modern pleasures seriously. So, what makes OUR tv room a tv room? The answer is... copious amounts of thermal insulation to make it warm and cozy, huge sheets of rubber acoustic insulation to make it quiet, enough data cables and lines to make it look like we have a nest of skinny snakes in the walls and of course, a free standing popcorn maker. We may have jumped the gun on the popcorn maker, but seeing it's box offers incentive to finish the room. The TV room has been one of the most complicated spaces for us because it has lots of architectural detail to work around, and with the walls and ceiling open it provided opportunity to upgrade and run wiring, heat ducts and plumbing lines to several areas.... Never fail to take advantage of an open wall or ceiling. This past weekend as the snow was falling outside and the car was getting harder and harder to see under the drifts, we decided it was time to start closing things back up.    
 

The view from the TV room while we were working. Our mini orchard will probably go in this area in the spring.
 

So while mother nature provided ample incentive to stay indoors, we got to work. The first thing to do was make sure all the wiring was clearly labeled so that once the drywall is in we will still know what goes to what. With that done we got down to insulation. Normally when insulating a ceiling the joist spacing is standard and you can just use pre-cut wires that spring in between the joists and hold the insulation up. Our framing is anything but standard so we had to custom cut every single wire, (think thick hard to cut wire) about 200 of them. So the room is split by a beautiful old arch, the outside side of the arch has roof above it, so requires insulation similar to an attic. The inside side of the arch has the second floor above it so requires an interior level of insulation. We used an R-38 fiberglass batt with vapor barrier for the exterior exposed side and an R-13 without vapor barrier for the interior side. We cut the batts to fit snugly (Carol does this with scissors and affords each batt the same level of attention as she would were she making a dress). Graham pretty much stood on the ladder cursing most of the day, not unusual behavior for him. The trick with insulation batts is to get a tight fit so that air cant pass around them, but not to compress them so that they lose insulating ability... not hard, just time consuming, and if you are using the yellow contractor grade stuff, make sure you wear a mask and glasses.  
 

If you look closely at the pics you can see some of the IC rated high hats, they will provide even lighting, but the intent is to put them on a dimmer so that we can get that little theatre experience of the lights going down before the show. With the room insulated and immediately warmer and more comfortable to work in, it was time to run the data lines. Things are moving more and more wireless, but we still wanted to have enough HDMI/composite/Cat6/optical cables to be able to put things in the tech closet and not have to have visible wires hanging down from the TV. It was not too hard, just a matter of ordering a bunch of 10' cables and running them through the wall so that eventually they can be hooked to boxes which will be behind the TV and behind the cabinet where the electronics will be stored. A little planning here should (fingers crossed) save us trouble down the road.

Now for the fun part, the acoustic matting. This stuff is dense, and heavy and it does not want to unroll. It really just takes some practice, and thankfully it cuts easily. Our system was to unroll it up the wall and staple the top edge and then work our way down. We used 1/2" staples, anything shorter just ripped out under the weight. Once the matts were up we went over the seems with high quality duct tape. The drywall will go right over it just like a normal installation.
 

So, what makes a tv room a tv room??? A whole lot of advance planning. Can't wait till we can kick back and watch a movie in here.

What We Did With Our Winter Vacation.....

Big surprise, we demolished stuff, in between demolishing things we occasionally built things, insulated things and played Wii tennis (for the record Graham always wins). In terms of progress, probably the biggest gains were made in the insulation category where we finally blew massive amounts of cellulose into the roof crawlspaces and created our own custom attic insulation system (a separate post).


The cellulose started similarly to the last time, we unloaded bales from the back of the truck and wrestled a ridiculously heavy contraption onto the porch. along with two contractor bins of hoses and fittings. From there it was a different experience, no drilling holes into joist cavities or tapping on walls. This was straight up cellulose full throttle into the crawlspaces. Which at first we thought would be not so bad, but those small small spider filled spaces turned out to be less than fun.

The process its self was pretty simple: climb into the ceiling, keep crawling until you can't go any further, while dragging a hose and balancing on the beam edges, don't impale yourself on a nail, yell as loud as you can to communicate (helps to remember to turn music off downstairs first) and then try to evenly distribute the cellulose to get a nice thick layer.

If you are lucky, you will make interesting discoveries, like this big hole (usable space) running next to a chimney, if you are luckier, you wont drop your only flashlight down it.
 

And there is a strong likelihood you will end up with some variation of this look at the end of the day:
 

Snow Falling on Shingles

With winter coming on strong and the oil tank gauge showing lower and lower levels we have gone into insulation mode. EVERYTHING is viewed through the lens of "will this reduce heat loss?" "will this "adversely effect the structure?" "will this make us more comfortable?" The answer to most of these questions is to mindfully insulate. That doesn't mean go wild stuffing rafters full and blowing expanding foam into every hole…insulation is something that must be approached as a science. The risk of doing it wrong is all to often the slow accumulation of moisture in places impossible to see with rot to follow. Attics in particular are tricky because they are where all the accumulated humidity from showers, kitchens and respiration end up. If you pack the rafters full and then seal them what often ends up happening is moisture collecting under the roof sheathing with a whole lot of rot and a very expensive mess down the road. Their are two solutions to this. One is to leave the attic as unused space and ventilate it (old houses did not have to deal with it because they were so drafty that humidity rarely built up) the other option is to put in ventilation channels right against the bottom of the roof sheathing to allow the air to move under the insulation. Our favorite option for this is a product from Owens Corning called Raft-R-Mates. They are easy to staple up, cut and combine for custom lengths. 

Here they are in the middle attic, a much smaller project than the big attic which required about 170 sheets and over 1,500 staples.

With the air channels in we then had the complicated task of adding insulation. With new construction you simply purchase the insulation that matches the width of the rafters and either staple it in or use metal spring bars to hold it up. With a 300 year old farm house you don't have anything approaching modern spacing, the wood they were working with was much much stronger than modern options…. so you get creative. We opted to take tyvek wrap staple it up and then stuff the insulation in. It worked, but is a very trying process. 

Now, normally with insulation you feel the results more than see them, but we had a pleasant surprise after a little snowstorm. 

This is the view from the big attic looking west over the older portion of the house. That patch of snow on the north side is proof that the insulation works….we only did that portion of the north side before the health of our marriage vs. tyvek alignment became a consideration. Essentially what you are seeing is the insulation protecting the snow on the roof from the heat radiating from the house..that oh so expensive heat. Pretty nifty huh??

Cellulose Insulation - Round #1

This looked like it was going to be a daunting task. The machine is big and heavy, comments online are all about the hose being difficult and unwieldy, and that at minimum you need three people (an issue because Ermela had to be away the day we rented the equipment from Home Depot so there were only two of us). In reality, it was easy, took a few minutes to get the hang of it, and you definitely need a couple strong guys to load and unload the truck, but the process it's self is painless if a little messy.

For about half a second we flirted with the idea of skipping this whole step. The area in question is a 10' wide area of a North wall, hardly worth the trouble, but one look at the split copper pipes from the old shower reminded us of how important proper insulation is.

After we removed all the old plywood and nails from the wall we drilled 1.5" holes towards the top of each stud bay. We were drilling blind so we aimed for the centers of the bays, but did not always get it right.

That little lower hole is from when we were checking to see if any insulation existed a couple weeks back. Once we had the holes drilled we drove the truck around to the north side of the house and Graham pulled the insulation blower out. The blower is provided with two 50' hoses, the idea being that people never have to bring the machine inside, in this case we got pretty close so we only had to hook up one hose length, and pull it through the bathroom window. 

 Once the hose was in we set about preparing the work area. Moving obstructions inside and pre-slicing bags of insulation open outside and putting them within easy reach. This was a step that is not really necessary when doing cavity filling, but probably very necessary when doing open attic filling, otherwise time would be wasted, but with our short 16" stud bays there was really no urgency, each bag lasted a couple bays.  

With the work area prepared we hit the on switch....and nothing happened. If you look at the picture above there is an orange sheet of metal above the house, turns out you have to pull that out in order for the cellulose to get to the hose. SO, we pulled that out, flipped the switch and we were off to the races. Graham loading and unclogging the blower and Carol handling the hose. We had one clog while trying to overstuff a bay, but other than that it went easy. There is a lot of yelling back and forth to turn on, then off, then back on for one second etc.. but all things considered that machine is a huge time saver. We only used a third of the bags of Green Fiber insulation but opted to keep the extra and re-rent the machine when we are ready to put a layer in the attic eaves and knee wall areas.  

You should be prepared to be covered in cellulose insulation at the end and it's best to close off the area you are working in (she says she is smiling behind the mask in this picture). Once we we packed the machine up we stuck the wooden plugs back in and taped over them to hold them in place. They will be covered with cement board and drywall so no need to get fancy in re-installing the plugs.  

The final touch for this wall is a little expanding foam insulation at the top and we are ready to go to the next project. 

Ugly Wallpaper Bath No More

So the ugly wallpaper bath was named for what originally appeared to be just that. Once we started demolishing it though we learned that it was actually decorated using shelf liner/contact paper (ingenious). Under the contact paper we found a rather nice old floral wallpaper and a green plaid wallpaper. 

Under the floral wallpaper we found odd thin strips of wood that were nailed to the wall vertically. Under that was a layer of generic building paper and under that was Kraft paper, the all purpose building wrap of the early 1900's. From there we expected plaster or raw studs…..

but that would make entirely too much sense. Instead we found horizontally laid wainscot over empty stud bays (hence the frozen pipes). We will continue tearing down to the wainscot level and see what surprises we come across. 

We also need to see about renting an insulation blower for the north exterior wall. Given that it took us two days to remove the loose fill fiberglass from the ceiling cavity above this bathroom we are a little hesitant to subject future generations to that form of insulation.

The goal for this bathroom is a claw foot tub, big shower, higher ceilings and plenty of storage… all pretty reasonable given it's 13'8" x 8'2" dimensions.